


- Contents
PureConnect Cloud Resources
Create Attendant call flows for PCC Emergency ANI phone numbers
This procedure explains how to create call flows for "PCC Emergency
ANI" phone numbers. In the event that a 911 call is disconnected,
a 911 operator or emergency responder will call back the calling party
number (ANI) associated with the 911 call. That number is the phone
number specified in the custom attribute PCC Emergency ANI
on the user or station that placed the call. Therefore routing must be
configured to appropriately route inbound calls to these phone numbers. How
to achieve that routing may be different for different customers. Three
common routing options are described below.
-
Option 1: Create one universal Attendant profile/workgroup
Create one new "Emergency Response" Attendant profile where each unique DNIS that is assigned as a PCC Emergency ANI attribute on a user or station is specified and it directly routes to an "Emergency Response" workgroup. The "Emergency Response" names are arbitrary and can be whatever you choose. Since all the numbers route to this one workgroup, the workgroup would likely be a global network operations center (NOC), security desk, or other group that could answer immediately should emergency responders call back in the event that a 911 call was disconnected.
-
First, Open Interaction Attendant and create a new Profile. In this example, the profile is named Emergency Response. Ensure there is no greeting. Then, within the "Incoming Call Selection" section, check the DNIS checkbox. Then enter the 11 digit phone numbers in a comma separated list. Telephone numbers must be entered without formatting, and may contain wildcards. See formatting help.
For example,
13175551234, 1317555????, 13175551000-13175552000. You must ensure that all phone numbers that have been assigned as a PCC Emergency ANI custom attribute value on a user or station are listed here.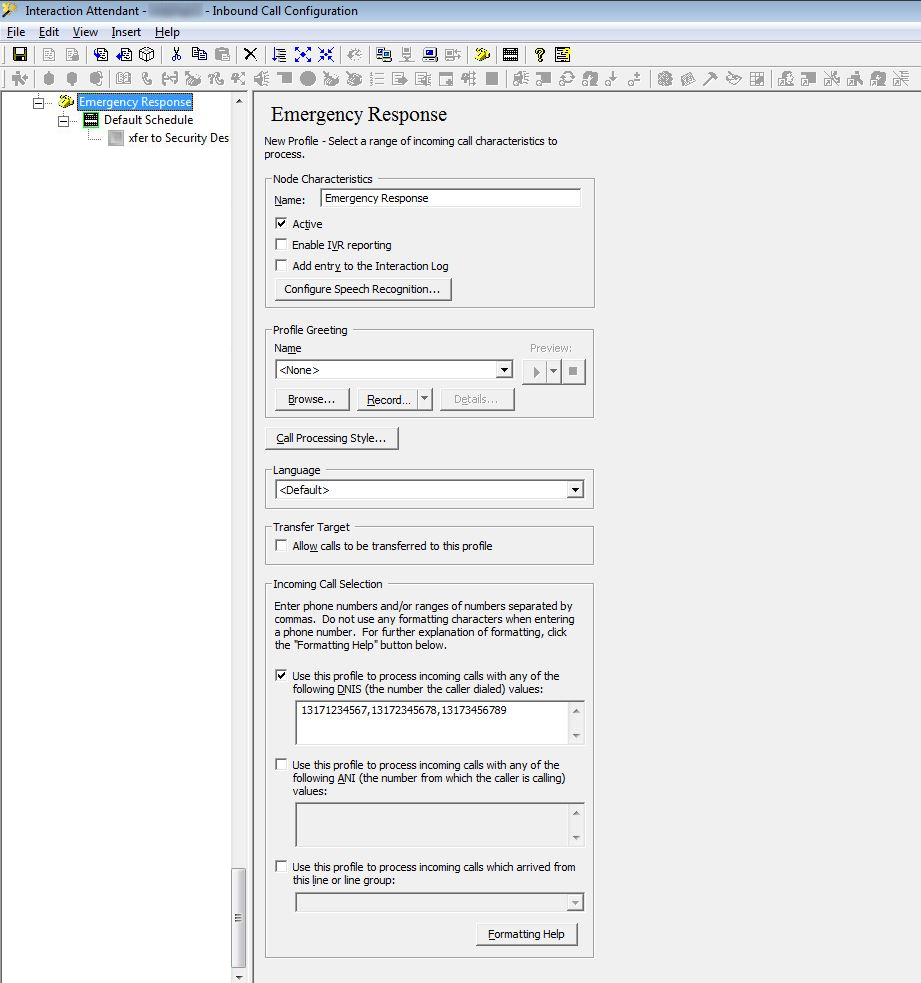
-
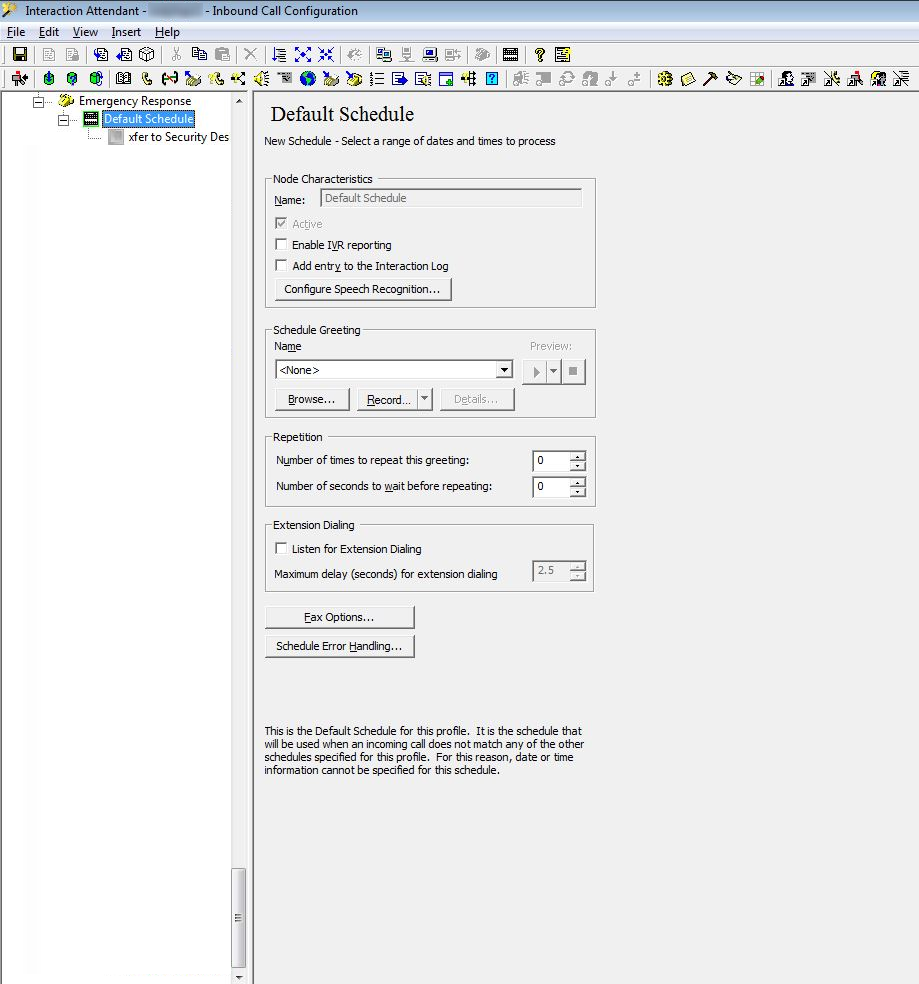
Next select the Default Schedule and ensure there is no greeting, repetition settings are set to zero, Listen for extension dialing is unchecked. Click on Fax options and remove the Fax Listener checkbox. This ensures the call immediate proceeds to the workgroup transfer without delay.
-
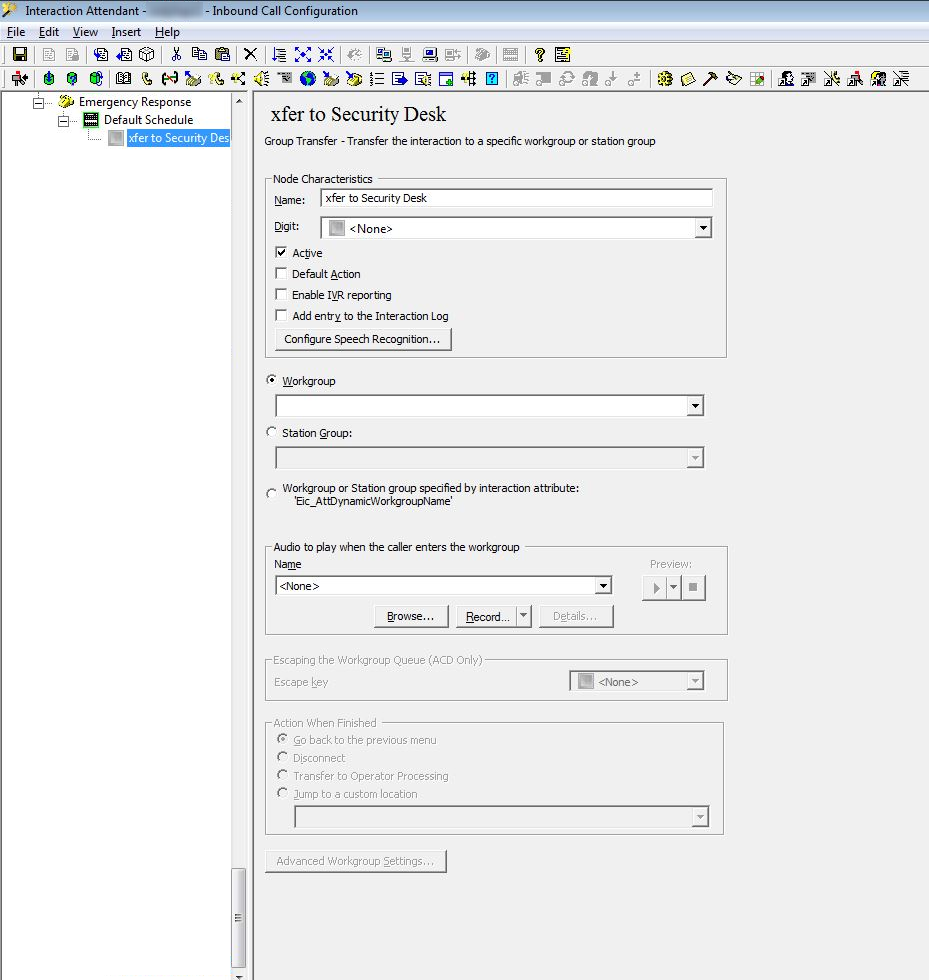
Lastly, while the default Schedule is selected, add a Workgroup Transfer node. In this example, the node is named "xfer to Security Desk". Select Workgroup and then in the drop down menu select the appropriate workgroup that should receive these calls.
-
-
Option 2: Create multiple Attendant profiles
This configuration is like #1, but instead of all the DNISs going to one workgroup, you break this out by physical sites, buildings, or sections of buildings and create an Attendant profile and workgroup for each. For example:
-
"Emergency Response - Building 1" Attendant profile where each DNIS that reflects an address for Building 1 is specified and it just directly routes to an "Emergency Response "- Building 1" workgroup.
-
"Emergency Response - Building 2" Attendant profile where each DNIS that reflects an address for Building 1 is specified and it just directly routes to an "Emergency Response - Building 2" workgroup.
-
-
Option 3: Create unique DIDs for each individual user or station
For a Customer with a DID per user or station and many users/stations, then DID/DNIS Mapping would likely be preferable to creating hundreds or thousands of Attendant profiles. This would require a Project or MAC requests as customers do not have access to this section in Interaction Administrator. See DID/DNIS mapping online help. With this option, each DID would be entered and a simple mapping selection would be made to associate the phone number to the corresponding user or station.