


- Contents
Interaction Connect Help
Add a Contact
Requirements: You need a Tracker Access license and the Add Individuals Security right to add a Contact. Other Journey Map functions are available only if you have the appropriate licenses and security rights. For more information, see Journey Map Licensing and Rights and your PureConnect administrator.
Note: You can also Quick Add a Contact.
To add a contact:
-
From the menu in the Journey Map view, select Add Contact.
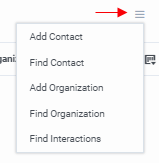
Result: The Add Contact dialog box appears.
-
In the General view, complete the necessary information and then select Organization.
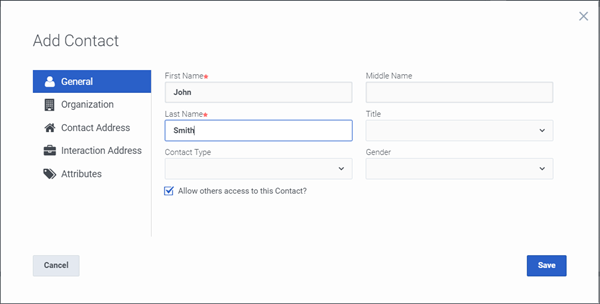
Note: Fields with a red asterisk (*) are required.
First Name
Middle Name
Last NameEnter the contact’s first, middle, and last names in the appropriate text boxes.
Title
Use the arrow to select a title from the drop-down list.
Contact Type
Use the arrow to select a type from the drop-down list.
Examples of contact types include System, IC User, External, Internal, Customer, Partner, Vendor, and Public Relations.
Gender
Use the arrow select a gender.
Select Yes or No to control whether others can view or use this Contact information.
Selecting No indicates that this contact is private.
Rights: To indicate that a contact is private, you must have created the contact and have the Have Private Contacts Security right or the Tracker Administrator Security right.
-
In the Organization view, complete the necessary information and then select Contact Address.
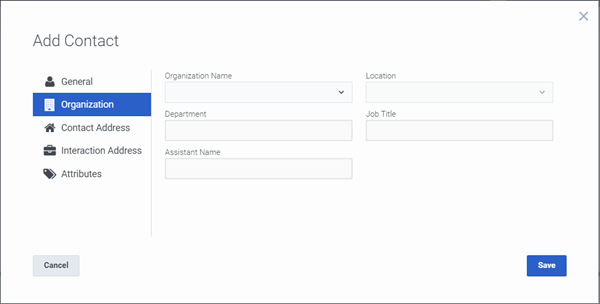
Organization Name
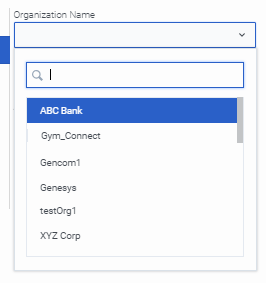
Type all or part of the organization's name in the search box or scroll to the organization's name , then select it.
Note: If the Organization does not appear in this list, Save the contact. Add the Organization, then return here and complete the Contact information.
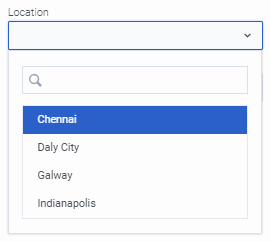
Location
In the Location text box, if an organization has more than one location, type all or part of the location name or scroll to the location name, then select it.
Note: If the appropriate Location for the selected Organization does not appear here, Save the contact. Modify the Organization information, adding the location, then return here and complete the Contact information.
Department
Type the name of the department to which this contact belongs.
Job Title
Type the contact’s job title.
Assistant
Type the name of this contact's assistant.
-
In the Contact Address view, complete the necessary information and then select Interaction Address.
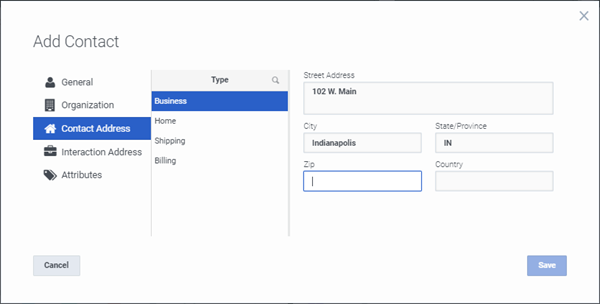
Select an address Type and then enter the address information. You can enter a contact address for each type.
Tip: You can type the name of any state or province in the State/Province text box or the name of any country in the Country text box.
Note: Business, Home, Shipping, and Billing are default Interaction Tracker address types. Your CIC administrator can define different or additional address types. If you have any questions about address types, see your administrator.
- In the Interaction Addresses
view, complete the necessary information for one or more addresses,
then select Attributes.
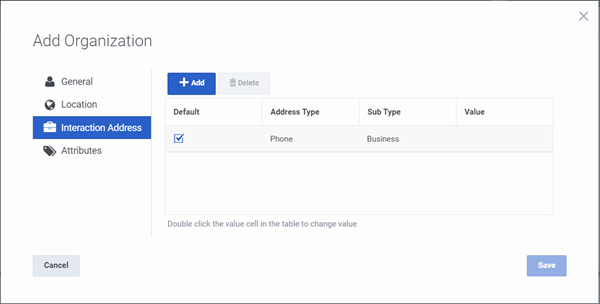
Repeat these instructions for as many interaction addresses as needed:
Note: An interaction address, or iAddress, is a media-specific, electronic address against which interactions take place. The type of address corresponds to the type of interaction: for example, calls or email messages among other supported interaction types.
-
Click the Add button.
-
Click in the Address Type field, then select the appropriate type.
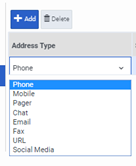
-
Click in the Sub Type field, then select the appropriate subtype.
-
Click in the Value field, then enter the appropriate address (phone number, email address or other) according to the Address Type you selected.
-
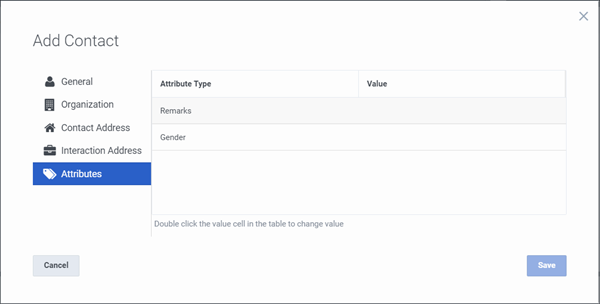
In the Attributes view, double-click the appropriate table cell and supply a Value for the selected Attribute Type.
Note: The Journey Map feature enables you to store attributes for contacts and organizations. These attributes can include such information as personal characteristics, historical notes about a particular situation, or other significant details. Your CIC administrator defines these attributes in Interaction Administrator. Contact your CIC administrator if you have any questions about these custom attributes.
-
When you finish adding this contact, click Save.
Result: This saves the contact's information and closes the dialog box. To add another contact, repeat this procedure.
Related Topics