


- Contents
Interaction Connect Help
Create Personal Responses
Requirements: See Working with Response Management.
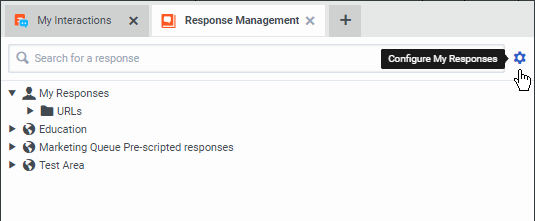
You can create personal response items that contain information you often need when handling interactions. These personal responses appear in the My Responses folder in the Response Management view. You can arrange personal responses in folders (categories). For more information, see Organize Personal Responses.
Note: You can create and edit only your personal responses. Personal responses are private and are not available to other CIC client users. You cannot add to or change the company-wide response items. Company-wide response libraries are indicated by a globe icon.
You can create three kinds of personal responses:
Personal Messages
Use messages to save standard text responses that you often use when interacting with customers. For example, you can save a message that contains your typical office hours, phone number, and email address. You can then use this response in a Chat or Email message and never have to type this information again.
Note: A stored message can contain a working URL hyperlink.
To create a message response item:
-
Do one of the following:
-
If the Response Management Editor is not already open, in the Response Management view, click the Configure My Responses tool.
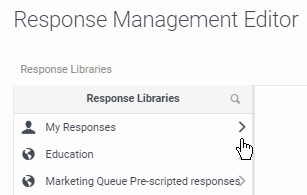
And then in the Response Management Editor, click the Expand Category arrow for My Responses. If needed, click Expand Category arrows to navigate to the appropriate subcategory.
-
If the Response Management Editor is already open, and if needed, click Expand Category arrows to navigate to the appropriate subcategory.
-
-
When you reach the appropriate category, click the Add button.
-
From the Type popup menu, select New Text Response.
-
In the Name text box, type a name for this stored message.
Note: Response Management provides a full-text search tool that uses the information in Name, Shortcut, and Labels along with the response item’s content to find a response. See also Search for a Response.
Tip: Name identifies the response item, but does not have to be unique. If you do not provide a name, it defaults to "New Text."
-
In the Shortcut text box, type a short name, abbreviation, or code.
Tip: The shortcut does not have to be unique. For example, you could use the shortcut "Hi" for all the variations of your standard greeting. For more information, see Use a Response Shortcut.
Note: Do not use any of these restricted characters in your shortcut: ~ ! ? * ^ \ . These special characters prevent the shortcut from working.
-
In the Labels text box, type a space-separated list of words that identify or classify this response item.
Note: As you type labels, a dropdown list appears that lists the labels you have already used. You can select a label from this list.
-
In the composition area, type the text of the message.
Tip: Different email clients at your customer sites can interpret line endings differently. To avoid this problem, press Shift+Enter to create a new line. Press Shift+Enter twice to create a blank line between two lines of text. This creates line endings that all email applications can reliably interpret.
-
Optionally, do any of the following in the My Responses Editor:
Note: There are some limits to the use of stored responses in chats. Chat interactions are conducted in plain text. Stored responses that contain formatted text are converted to plain text when used in a chat. Hyperlinks and images in a stored response are not sent as part of a chat reply. However, you can use responses containing macros in a chat.
-
-
Format the text: Use any of the text formatting tools.
-
Insert Link: Create a clickable link to a URL by clicking the Insert Link tool. Supply the necessary URL address and the text for the link. If you selected some text in the stored response before clicking Insert Link, it appears as the clickable text.
-
Insert Image URL: Supply a URL ending in the image file name. This URL must be accessible to your browser. Supply the text for the link and click Insert Link.
-
Tip: You can also copy and paste the image from your browser to the stored response.
-
-
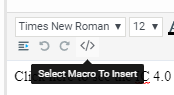
Add a Response Macro: Response macros automatically insert a system value like today’s date, an interaction attribute such as the customer’s name, or another response item into your email message or chat. Click the Select Macro to Insert toolbar button to insert a macro in a personal message. See Create Response Macros for more details.
-
-
Click Save.
Result: The new response item appears in the selected folder in the My Responses Window.
Tip: Interaction Connect saves new items and changes to existing items only after you press Save. You can create multiple new items or make multiple changes before you press Save.
Personal Files
Personal files are files that you upload from your workstation.
Note: You cannot use the following types of executable files (.exe, .sh, and .js) in a personal response.
To create a file response item:
-
Do one of the following:
-
If the Response Management Editor is not already open, in the Response Management view, click the Configure My Responses tool.
And then in the Response Management Editor, click the Expand Category arrow for My Responses. If needed, click Expand Category arrows to navigate to the appropriate subcategory.
-
If the Response Management Editor is already open, and if needed, click Expand Category arrows to navigate to the appropriate subcategory.
-
-
When you reach the appropriate category, click the Add button.
-
From the Type popup menu, select New File Response.
-
In the Name text box, type a name for this stored response.
Note: Response Management provides a full-text search tool that uses the information in Name, Shortcut, and Labels along with the response item’s content to find a response. See also Search for a Response.
Tip: Name identifies the response item, but does not have to be unique. If you do not provide a name, it defaults to "New Text."
-
In the Shortcut text box, type a short name, abbreviation, or code.
Tip: The shortcut does not have to be unique. For example, you could use the shortcut "Hi" for all the variations of your standard greeting. For more information, see Use a Response Shortcut.
Note: Do not use any of these restricted characters in your shortcut: ~ ! ? * ^ \ . These special characters prevent the shortcut from working.
-
In the Labels text box, select one of your previously-used labels from the drop-down list or type a space-separated list of words that identify or classify this response item.
-
In the composition area, do one of the following:
-
-
Drag and drop a file from Windows Explorer to the composition area.
-
Click Choose a file, navigate to the file and click Open.
-
Note: There is a limit of one file per stored response.
-
Click Save.
URLs
URLs are clickable hyperlinks to web pages.
To create a URL item:
-
Do one of the following:
-
If the Response Management Editor is not already open, in the Response Management view, click the Configure My Responses tool.
And then in the Response Management Editor, click the Expand Category arrow for My Responses. If needed, click Expand Category arrows to navigate to the appropriate subcategory.
-
If the Response Management Editor is already open, and if needed, click Expand Category arrows to navigate to the appropriate subcategory.
-
-
When you reach the appropriate category, click the Add button.
-
From the Type popup menu, select New URL Response.
-
In the Name text box, type a name for this stored response.
Note: Response Management provides a full-text search tool that uses the information in Name, Shortcut, and Labels along with the response item’s content to find a response. See also Search for a Response.
Tip: Name identifies the response item, but does not have to be unique. If you do not provide a name, it defaults to "New Text."
-
In the Shortcut text box, type a short name, abbreviation, or code.
Tip: The shortcut does not have to be unique. For example, you could use the shortcut "Hi" for all the variations of your standard greeting. For more information, see Use a Response Shortcut.
Note: Do not use any of these restricted characters in your shortcut: ~ ! ? * ^ \ . These special characters prevent the shortcut from working.
-
In the Labels text box, select one of your previously-used labels from the drop-down list or type a space-separated list of words that identify or classify this response item.
-
In the URL text box, type or copy and paste the URL.
-
To test that the URL is correct, click Open URL.
-
Optionally, in the Text box, type the name for a clickable link.
-
Click Save.
Related Topics