


- Contents
Interaction Attendant Help
Modify CustomSubroutineInitiatorRouter.ihd
This procedure explains how to modify CustomSubroutineInitiator.ihd handler in Interaction Designer to specify a subroutine to invoke. This must be done before you can use Run Subroutine nodes in your menus.
Before performing this procedure, the subroutine to be called must exist on the server, and you must know its name. It is assumed that the reader has some experience with Interaction Designer. You may find it helpful to consult the Designer help system as you perform this procedure. You may wish to obtain assistance from an experienced handler developer. To modify the handler, follow these steps:
-
Open Interaction Designer.
-
Open the File menu, select Open, navigate to \IC\I3\IC\handlers\40handlers\CustomSubroutineInitiatorRouter.ihd, and click Open. The CustomSubroutineInitiatorRouter.ihd opens.
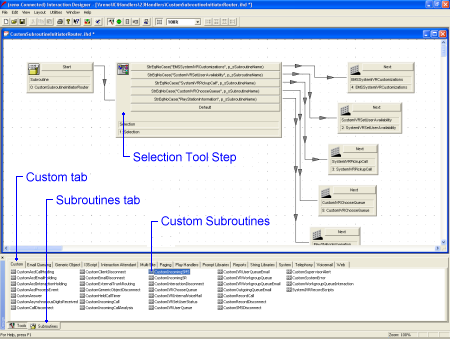
Note: If you have multiple custom subroutines, you will have to call your own selection tool steps. For example, if you have three custom subroutines, you must hook up a selection step and enter the appropriate name in Interaction Attendant.
-
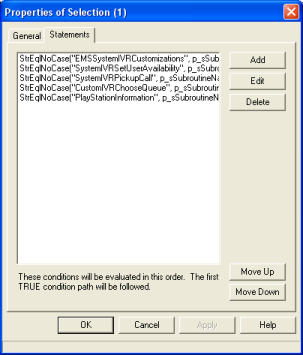
From the Tools tab, located at the bottom corner of the Design pallet, click the Basic tab and drag a Selection tool step to the Design area, and then double-click the Selection tool step. The Properties of Selection dialog opens.
-
Click the Statements tab, and then click the Add button. The Edit Expression dialog opens.
-
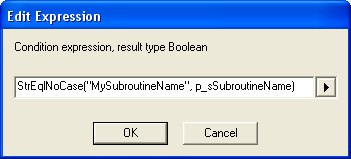
In the Condition expression, result type Boolean field, type:
StrEqlNoCase("MySubroutineName", p_sSubroutineName)
Note: Replace MySubroutineName with the name of a custom subroutine you want to call from Attendant using a Run Subroutine node. This conditional expression identifies a subroutine for CustomSubroutineInitiatorRouter to invoke.
-
Click OK to close the Edit Expression dialog.
-
Click OK to close the Properties of Selection tool step.
-
Click the Subroutines tab, located at the bottom corner of the Design palette, and select the Custom tab.
-
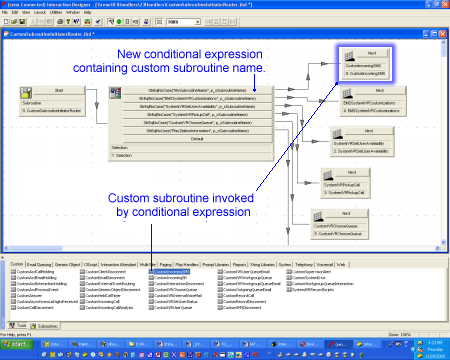
Locate the custom subroutine whose name you specified in step 5. Drag and drop its tool icon into the Design window so that it is positioned to the right of the Selection tool step.
-
Connect the Selection tool to the subroutine by clicking and dragging between the icons. Your screen should look similar to the following:
-
Look for a green "happy face" icon in the toolbar. Green indicates that the handler is ready to publish.
Note: If the icon is Yellow or Red, do not proceed until you have located the source of the error. Consult the Designer online help for more information.
- Open the File menu and select Save.
-
Press the Publish toolbar button, or open the File menu and select Publish, to republish CustomSubroutineInitiatorRouter.ihd.
Note: You can now use the Run Subroutine nodes in Interaction Attendant to call the subroutine. If your custom subroutine transfers the call to another thread (e.g. does not return the call to Attendant), the subroutine should set a Boolean return value named p_bTransferred. Set its value True if the call was transferred, or False if the call will be returned to Interaction Attendant for further processing (in other words, True indicates that the call was transferred). See Run Subroutine for details.
Related Topics