


- Contents
Interaction Desktop Help
Change View Layout
Using a flexible docking architecture, you can arrange views within the Interaction Desktop interface, placing them in more convenient locations to suit your needs. This capability is helpful if you manage multiple views, such as workgroup overviews, within a workspace.
Note: When you exit Interaction Desktop, it saves the arrangement of your docked views.
To move a view, click and hold the tab with your mouse and start dragging it. Docking icons appear on the Interaction Desktop window, showing you the available locations to which you can move the view.
When you drag the view on top of an arrow, Interaction Desktop indicates the area to which the view moves when you release your mouse and "drop" it. You can also drag a view within its current set of tabs to reorder it.
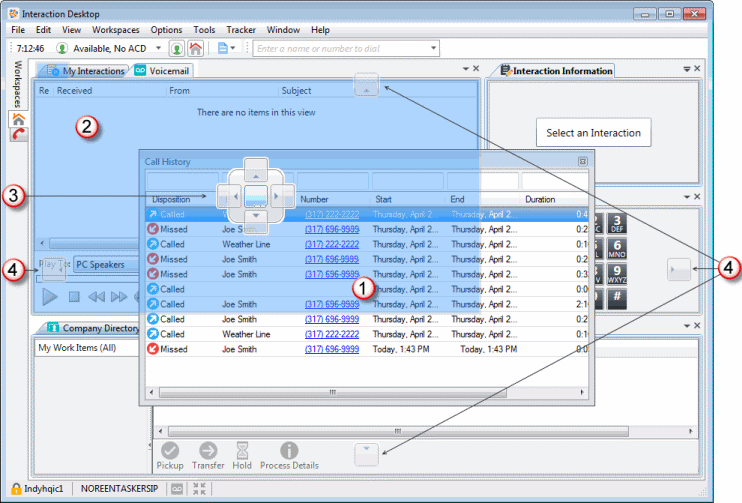
|
1 |
Selected view |
To move a view, click and hold on its tab and start dragging it. |
|
2 |
Selected docking zone |
When you drag the view on top of an arrow, Interaction Desktop indicates the area to which the view moves when you release your mouse and "drop" it. Tip: You can also drag a view within its current group of tabs to reorder it. |
|
3 |
Center docking icons |
To relocate a view based on the view over which it appears, use the center cocking icons For example, if you want to move a selected view above another view, click and drag the selected view until the center docking icons appear. Then position the cursor over the top center docking icon and release the mouse button. |
|
4 |
Outer docking icons |
To move a selected view to an entire workspace zone, use the outer docking icons. For example, if you want to move a view so that it takes up the left side of the workspace, click and drag the view. Position the cursor over the left outer docking icon and release the mouse button. |
Related Topics