


- Contents
Interaction Optimizer Help
View and Filter Agents in the Agent Groups
On the Agent Groups tab, view agents in the agent groups and the associated information on the Agents tab, and optionally filter the view. Also, change the agent's or agents' group membership, add agent groups, and set the criteria to consider when ranking.
Note: Before you configure settings, select the appropriate scheduling unit from the Interaction Optimizer Home page Scheduling unit drop-down list.
Filter the agents
-
From the Interaction Optimizer Home page, in the Configuration area click Agent Groups. The Agent Groups tab opens.
-
Select the agent group to which you want to add agents.
-
In the bottom of the workspace, click the Agents tab.
-
Click the column heading you want to filter. The columns available to view and filter are:
-
Agent
-
Agent Group
-
Workgroups
-
Interaction Types
-
Licensed
-
Scheduling Unit
-
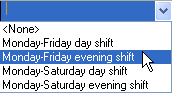
Shift
-
Shift Rotation
-
Skills
-
In the blank row below the column heading, type the filter information by which to sort, or click the down arrow and select the filter information from the drop-down list.
Change group membership
Note: Administrators must have the appropriate right to access another scheduling unit to which the agent is assigned before the administrator can move the agent from the existing scheduling unit and into the agent group he or she is editing.
-
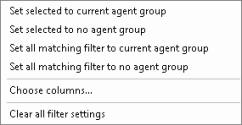
Select one agent, or select multiple agents by using your mouse click and the <CTRL> or <SHIFT> key, then right-click to display the context menu.
-
Do any of the following:
-
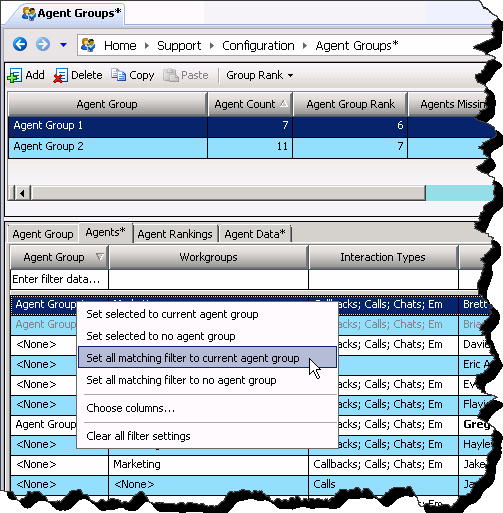
Use the Set selected to current agent group option (available when multiple cells are selected) to add all selected agents to the agent group highlighted above the grid, "Agent Group 1" in the example shown below:

-
Use the Set selected to no agent group option (available when multiple cells are selected) to remove group membership for the selected agents.
-
Use Set all matching filter to current agent group to change group membership to the currently highlighted agent group for every agent in the agent view. All the agents that have not been filtered by the current filter settings, are changed to the highlighted agent group. The highlighted agent group is "Agent Group 1" in the example shown below:
This is useful for example, when you want to move agents with specific skills and workgroup membership (find the skills and workgroups by filtering) to another agent group. -
Use Set all matching filter to no agent group to remove group membership for every agent that is not filtered by the current filter settings.
-
Select Choose columns... to open the Column Selector dialog and add or remove the columns displayed in the agent view.
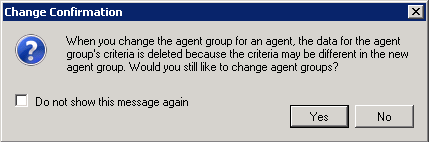
When you make an agent group membership change, you are asked to confirm your change. Click Yes to save the changes, or click No to cancel.
Note: When multiple users change agent groups simultaneously, Interaction Optimizer may not immediately display the updated mapping of an agent group ID to the correct agent group name. In this situation, the agent group's ID appears in the Agent Group column of the Agents tab. To refresh and view the updated information, close the view and then reopen it.
