


- Contents
Short Message Service Technical Reference
Configure Broker Accounts
You can configure multiple accounts registered to the same broker. These accounts use the same broker interface and communication ports. You can add new accounts, edit existing accounts, or delete an account.
-
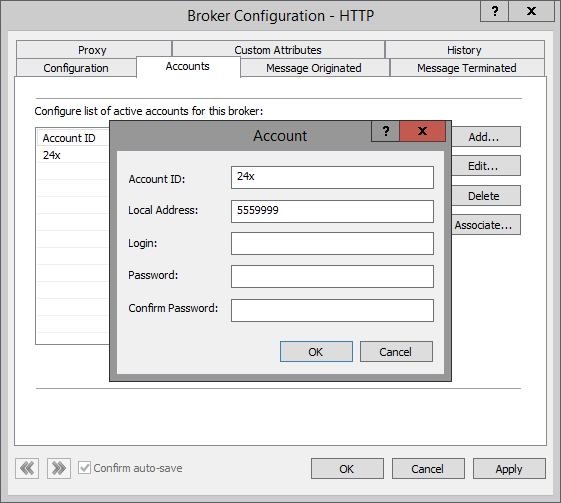
In the Accounts tab of the Broker Configuration dialog box, add or edit an active broker account.
-
In Account ID, enter the account ID that the broker uses for your SMS messages.
Note:
The value you specify must be unique among all other account IDs on this broker. If a broker provider does not provide or use an account ID, then choose an arbitrary account identification.
-
In Local Address, enter the phone number for the account.
Note:
This setting is optional, but if you do specify a number, it must be unique among the other local addresses on this account.
The local address serves two purposes:
-
CIC populates it on an outbound message if the broker profile requires its specification.
Note:
Genesys Broker Outbound messages: If you are configuring the Genesys SMS broker for outbound international SMS messages, you must include the country code as part of this phone number. The Genesys Broker uses the country code to route the message to the appropriate carrier.
-
CIC populates it on inbound messages to create a pairing between the external party and an internal account. If the broker does not provide a local address on incoming messages, CIC uses this value for the message's local address.
-
-
In Login, enter the User ID for logging on to this account.
Note:
You can leave Login and Password blank, if the broker does not require account validation.
-
In Password, enter the Password for the account. In Confirm Password, repeat the password entry.
-
Click OK.
-
Optionally, in the Accounts tab, select a broker and click Associate. In the Outbound SMS Workgroup and User Associations dialog box, select Workgroups and Users to associate with this Broker Account.
Note:
This enables agents to choose which number appears when they send an SMS message, either their personal number or the number associated with their workgroup.

-
To save your input and close the dialog box, click OK.