There are a few requirements that must be met in order to setup a custom IceLib-based application from within Visual Studio, regardless of the version of Visual Studio used.
- Use .NET Framework 3.5 or greater. Client Profile versions of .NET Frameworks cannot be used due to IceLib dependencies.
- Select the appropriate processor architecture (either x86 or x64).
- Include the necessary IceLib binary references. Note that the unmanaged assembly dependencies required by IceLib do not get copied to the project's output folder when adding the reference, so they will have to be copied manually.
Step-by-step instructions on setting up a custom IceLib-based application in Visual Studio.
| Visual Studio 2010 is used in this example, but any version of Visual Studio that supports the .NET Framework 3.5 or greater can be used. |
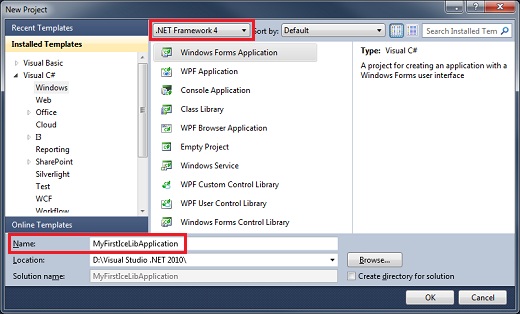
After starting Visual Studio, go to the "New Project" screen. Select ".NET Framework 3.5", or a later version of the .NET Framework. After selecting the appropriate project type (Windows Forms Application, Console Application, etc.), give the project an appropriate name. The "New Project" screen should resemble something similar to the following:
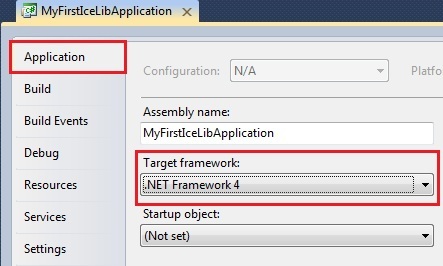
After clicking the "OK" button, the next step is to setup the required project-specific properties. To do this, right click the project node in the Solution Explorer, and select "Properties". If using Visual Studio 2010 or earlier (Visual Studio 2012 defaults to not use the Client Profile), it will be necessary to change the "Target framework" from the "Client Profile". On the "Application" tab, be sure that the "Target framework" has an appropriate framework version selected - any .NET Framework version 3.5 or greater will work, as long as it is not a "Client Profile". Changing this will require the solution to be reloaded, in which case the properties window will need to be re-opened:
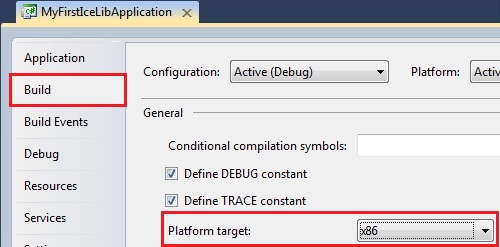
After changing (or verifying) the "Target framework", the project's "Platform target" will need to be changed on the "Build" tab. By default, Visual Studio will select "Any CPU" for this; however, because of the unmanaged assemblies that IceLib has dependencies on, a specific target must be selected. If the IceLib references that this project will be using are the x86 binaries (which is the typical case), select "x86" for the "Platform target"; otherwise, if the x64 binaries will be used, select "x64" for the "Platform target":
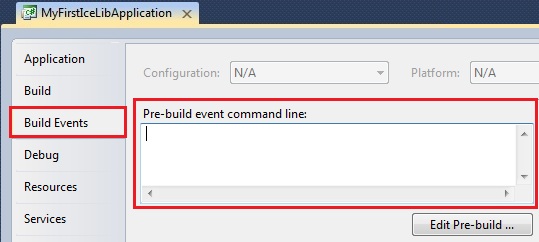
Due to the fact that all dependent IceLib binaries must reside in the output folder of the project, it will be necessary to copy those binaries over. An easy way to accomplish this is with pre-build commands. On the "Build Events" tab, there is a section where these commands can be added:
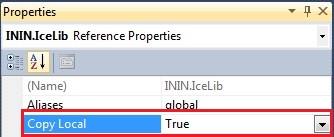
After making the necessary changes, the next step is to add in the IceLib references to the project. In the Solution Explorer, right click on the "References" node in the project and select "Add Reference". Browse to the "bin" folder under the installation folder of the IceLib SDK and select the ININ.IceLib* binaries that will be needed in the project. Be sure that the added references are set to "Copy Local" in the "Properties" window: