- Contents
- Index
Modify a Setup Configuration
Use the Setup Configuration pane to modify a setup configuration for credit bureau reporting.
To modify a setup configuration
-
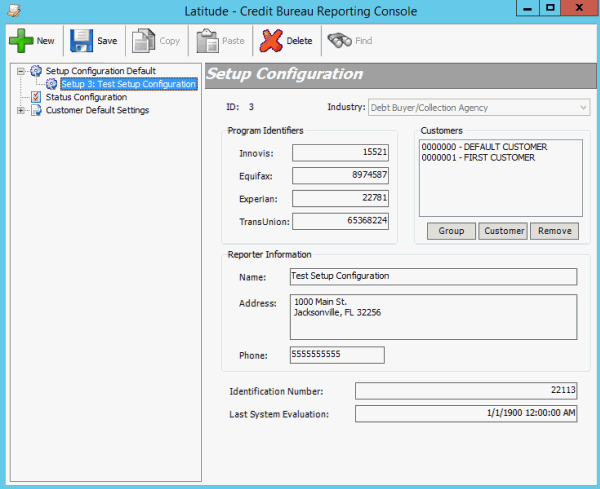
In the Navigation pane, expand Setup Configuration Default and then click a setup configuration. The Setup Configuration pane appears.

Program Identifiers (Innovis, Equifax, Experian, TransUnion): Code that the credit bureau provides to your agency to identify that credit bureau.
Customers: Customers to which to apply the configuration.
Reporter Information (Name, Address, Phone): Name, address, and telephone number of the person or organization reporting the information.
Identification Number: Optional internal identifier that your agency uses. Internal numbers can signify a branch, office, or credit center where users verify information.
Last System Evaluation: Date and time the system last evaluated accounts for credit reporting.
-
To select a customer group to apply the configuration to, do the following:
-
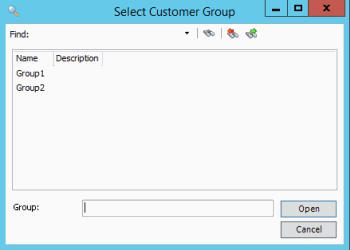
Click Group. The Select Customer Group dialog box appears.

-
Click one or more groups and then click Open. The selected groups appear in the Customers list box.
Tip: To select multiple sequential groups, click the first group to include, hold down the Shift key, and then click the last group. To select non-sequential groups, click the first group to include, hold down the Ctrl key, and then click each individual group to include.
-
To select a specific customer to apply the configuration to, do the following:
-
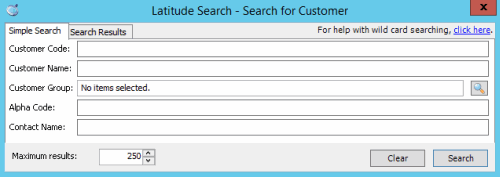
Click Customer. The Search for Customer dialog box appears.

-
On the Simple Search tab, specify your search criteria and then click Search. The results appear on the Search Results tab.
-
Click a customer and then click Select. The selected customer appears in the Customers list box.
-
Select more customers as necessary.
-
To delete a customer or group so that the configuration doesn't apply, in the Customers list box, click a customer or group and then click Remove.
-
Modify other information in the Setup Configuration pane as necessary and then, in the toolbar, click Save.


