- Contents
Statistics Console Help
Generate a Production Report
Use the Batch Reports tab to configure and generate a production report.
To generate a production report
-
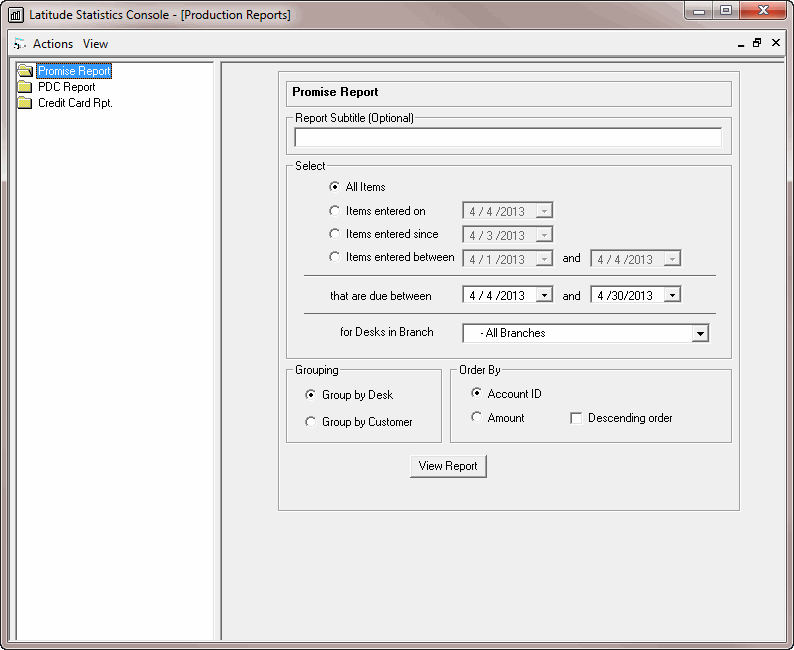
In the Latitude Statistics Console window, from the View menu, click Production Report. The production report options appear.

-
In the Selection pane, click a report.
-
Specify the report parameters.
Report Subtitle: Optional subtitle for the report.
Select section
All items: The report includes all promises, PDC payments, or credit card payments in Latitude.
Items entered on: The report only includes promises, PDC payments, or credit card payments added on the specified date.
Items entered since: The report only includes promises, PDC payments, or credit card payments added after the specified date.
Items entered between: The report only includes promises, PDC payments, or credit card payments added between the specified dates.
That are due between: The report only includes promises, PDC payments, or credit card payments due between the specified dates.
For Desks in Branch: The report only includes the specified branches.
Grouping section
Group by Desk: If selected, Statistics Console groups the promises, PDC payments, or credit card payments by desk.
Group by Customer: If selected, Statistics Console groups the promises, PDC payments, or credit card payments by customer.
Order By section
Account ID: If selected, Statistics Console sorts the report by account ID.
Amount: If selected, Statistics Console sorts the report by promise, PDC payment, or credit card payment amount.
Descending order: If selected, Statistics Console sorts the report in descending order. If cleared, Statistics Console sorts the report in ascending order.
-
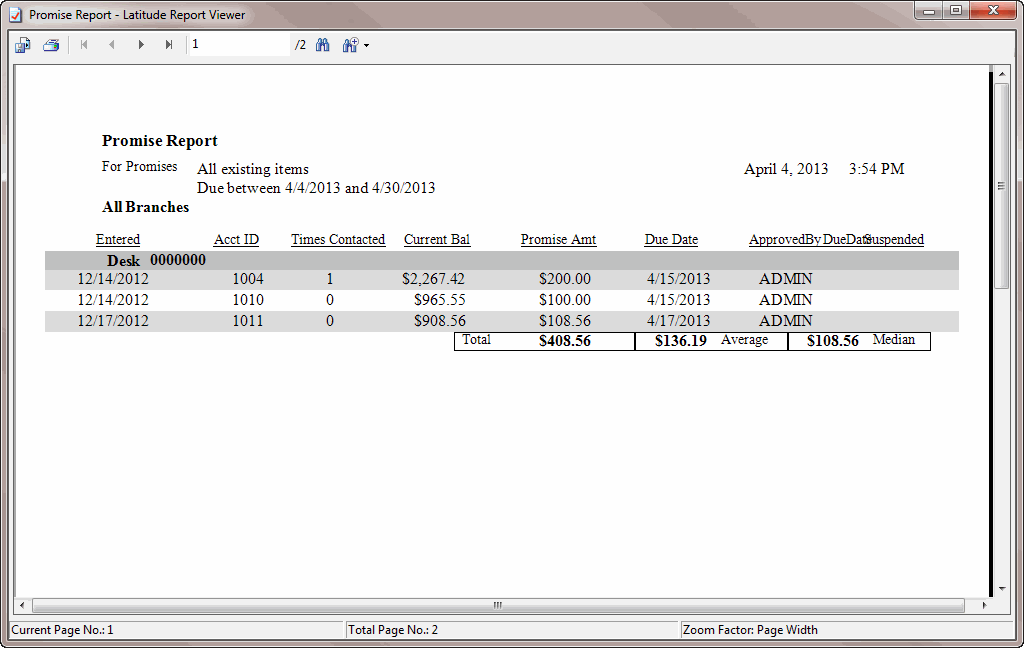
Click View Report. The Latitude Report Viewer window appears.

-
To print the report, in the toolbar, click the Print icon. The Print dialog box appears.
-
Modify the settings as necessary and then click Print.
Note: For more information about using the Latitude Report Viewer window, see Latitude Report Viewer.


