- Contents
Job Manager Help
Create a Vendor Package
Use the Package - [Package Name] tab to create a vendor package to automate a manual process for a vendor service (for example, a request for a credit bureau report). The package creates and sends vendor request files, and downloads and processes vendor return files. You can create several packages within the same folder based on different query criteria and extracted information. For example, you can set up a package to request vendor items for higher balance accounts or set up a package for accounts assigned to specific customer.
Before creating a vendor package, ensure that your organization defined the query configuration, transfer configuration, and, if necessary, file protection configuration.
Note: Maintain the import mapping for each package in Exchange. The Fusion folder in Exchange contains the Exchange vendor clients. Fusion imports files using these Exchange clients.
To create a vendor package
-
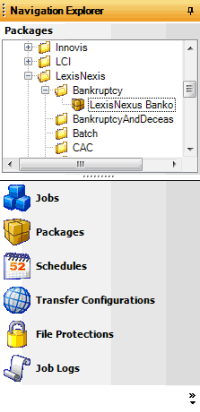
In the Navigation Explorer pane, click Packages. The Packages panel appears.

-
Right-click the folder that represents the vendor service, click Add, and then click Add Package.
-
Type a name for the package and then press Enter.
-
Do one of the following:
-
Right-click the package and then click Properties.
-
Double-click the package.
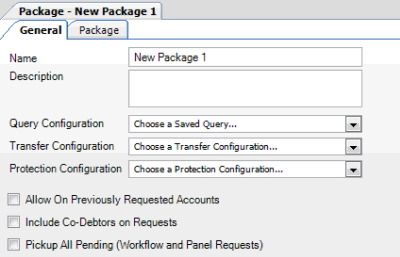
The Package - [Package Name] tab appears, with the General tab selected. Job Manager includes the name of the package in the tab name.

Name: Name of the package as specified in the Packages panel. To modify the name, rename it in the Packages panel.
Description: Description of the package.
Query Configuration: Query to use to select accounts for processing. The available queries include ones created in Job Manager and Latitude.
Transfer Configuration: Configuration to use to send files to and receive files from the vendor.
Protection Configuration: Configuration to use for encrypting and decrypting files sent to and received from the vendor, if necessary.
Allow on Previously Requested Accounts: If selected, Job Manager includes accounts that you requested for this service previously. If cleared, Job Manager excludes accounts that you requested previously.
Include Co-Debtors on Requests: If selected, Job Manager includes co-debtors in the request for this service. If cleared, Job Manager only includes the primary debtor.
Pickup All Pending (Workflow and Panel Requests): If selected, Job Manager includes pending requests that WorkFlow generated, and pending requests that users generated in Latitude. If cleared, Job Manager excludes pending requests.
-
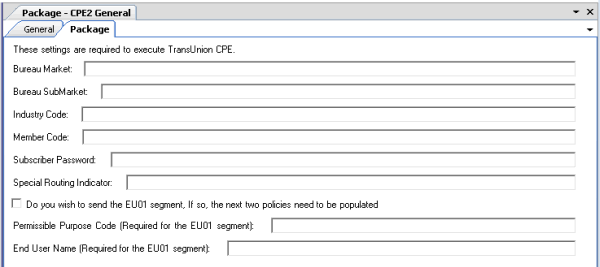
Complete the information and then click the Package tab. The vendor settings appear on the Package tab. The information available on this tab is based on the selected vendor product folder.

-
Specify the package settings and then, in the toolbar, click Save.
Note: To obtain specific instructions and values, contact your vendor representative.


