


- Contents
Maintain Client Account Information
Use the Account tab in the Client dialog box to maintain account information for a client.
To maintain client account information
-
In the Navigation pane, click System Codes and Settings > Accounts > Client.

Tip: To limit the clients that display in the data grid, click one or more check boxes next to a column heading. In the Filter box, type one or more characters and then press Enter. To clear a filter, clear the check boxes and then click the Refresh icon.
-
In the data grid, click the Edit icon and then click Account.
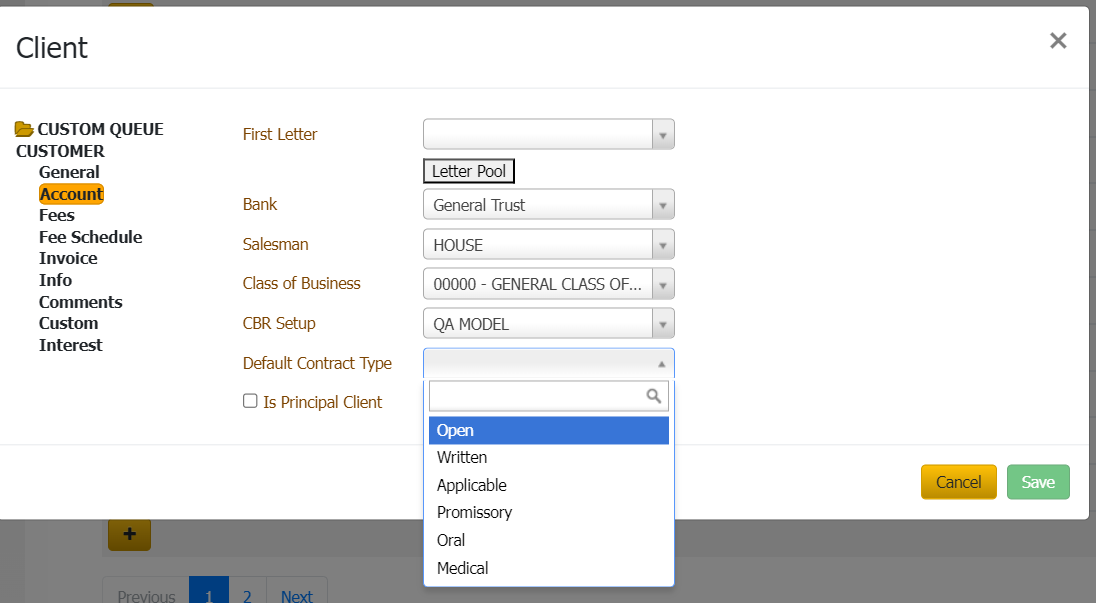
First Letter: First letter to generate for new accounts. For information about managing letters, see the Letter Console documentation.
Bank: If your organization prints checks for the client, this value is the trust account your organization uses for this client. For information about setting up trust accounts and printing checks, see the Invoices documentation.
Salesman: Salesman handling this client account. For more information, see Salesman.
Class of Business: Class of business to assign to this client account. For more information, see Classes of Business.
CBR Setup: Credit Bureau Reporting method.
Is Principle Client: If selected, your organization owns the accounts that this client holds. If cleared, your organization holds this client's accounts for collection purposes only.
Default Contract Type : If selected, you can choose multiple types of contract like open, written,Applicable,promissory,oral and Medical.
-
To specify one or more letters to populate the First Letter list box, do the following:
-
Click Letter Pool.
Note: Only the letters with a time restriction set in Letter Console to either "Allow Always" or "Only Allow in First 30 Days" appear in this dialog box.

-
Select the check box for each letter you want to display in the First Letter list box.
-
Clear the check box for each letter you don't want to display in the First Letter list box.
-
Click Close.
-
In the First Letter list box, click the first letter to send to customers.
-
Complete the remaining information and then click Save.