- Contents
WorkFlow Designer Help
Send Email
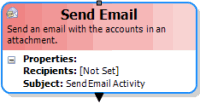
Use the Edit Send Email Activity dialog box to specify the criteria for sending an email message to the specified recipients. WorkFlow Designer creates a file that includes a list of accounts that reach this point in the workflow. The file is attached to the email message. This activity is an excellent tool for testing workflows as it "reports" on accounts flowing through the activity at selected intervals by number of accounts or time frame.
In order to send email messages, your organization must specify an email server at the system level in the SMTP permission in Latitude. For more information, see the Latitude documentation.
To modify a Send Email activity
-
Create or open a workflow with a Send Email activity. For more information, see Create a Workflow or Modify a Workflow.

-
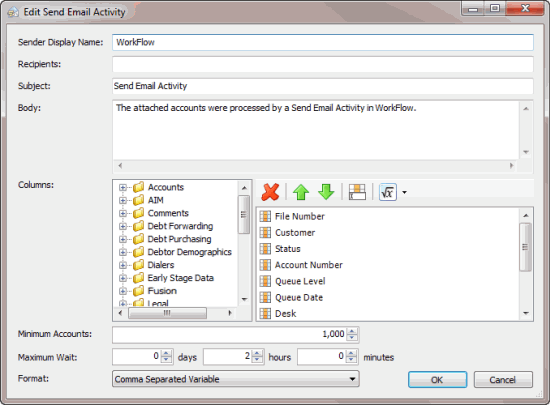
On the workflow tab, double-click the Send Email activity. The Edit Send Email Activity dialog box appears.

Sender Display Name: Name to display as the sender of the email message.
Recipients: Email addresses of the email message recipients, separated by semi-colons.
Note: Keep in mind that the attached file of accounts is not encrypted. Specify email message recipients that are internal to your organization or modify the columns of data to exclude sensitive information.
Subject: Subject of the email message.
Body: Body of the email message.
Columns: Allows you to specify the columns of data to include in the file that WorkFlow Designer creates and attaches to the email message.
Minimum Accounts: Minimum number of accounts that enter this activity before sending the email message.
Maximum Wait: Amount of time to wait before sending the email message.
Days: Number of days to wait before sending the email message.
Hours: Number of hours to wait before sending the email message.
Minutes: Number of minutes to wait before sending the email message.
Format: Format for the file that WorkFlow Designer creates and attaches to the email message.
-
Specify the email message sender, recipients, subject, and body.
-
To specify the columns of data to include in the file that WorkFlow Designer creates as an attachment to the email message, do the following:
-
In the Columns section, expand a folder.
-
Drag and drop a column from the left side into the box on the right side.
-
To delete a column, click the column in the box on the right side and then click the Delete icon. In the confirmation dialog box, click Yes.
-
To move a column up or down in the list, click the column in the box on the right side and then click the Up or Down arrow.
-
To rename a column, click the column in the box on the right side and then click the Rename icon. In the blank box, type the new name and then click outside the box.
-
To perform an aggregate function on a column, click the column in the box on the right side, click the arrow on the Aggregate icon, and then click the type of function.
-
To delete an aggregate function, right-click the aggregate function in the box on the right side and then click Delete. In the confirmation dialog box, click Yes.
-
To specify the minimum number of accounts that enter this activity before sending the email, in the Minimum Accounts box, type or use the arrows to specify the number.
-
To indicate the amount of time to wait before sending the email message, do the following:
-
To wait a specific number of days, in the days box, type or use the arrows to specify the number of days to wait.
-
To wait a specific number of hours, in the hours box, type or use the arrows to specify the number of hours to wait.
-
To wait a specific number of minutes, in the minutes box, type or use the arrows to specify the number of minutes to wait.
Note: You can use a combination of days, hours, and minutes. The activity waits until it reaches the minimum accounts, or it reaches the maximum wait time, whichever occurs first.
-
In the Format list box, click the format for the email message attachment.
-
Click OK. WorkFlow Designer updates the Send Email activity in the workflow.


