- Contents
Add a Customer Desk Distribution
Use the Distribution Detail Properties dialog box to add a desk to a customer account. You can add multiple desks to a customer account, based on the State (address) and account balance.
To add a customer desk distribution
-
In the Main Menu window, from the Maintenance menu, click System Codes and Settings. The Latitude Maintenance window appears.
-
In the Navigation pane, click the Customers folder.
-
Do one of the following:
-
To add a customer, in the Navigation pane, double-click the Customers folder, or right-click the Customers folder and then click New Customer.
-
To modify a customer, in the Information pane, double-click the customer, or right-click the customer and then click Properties.
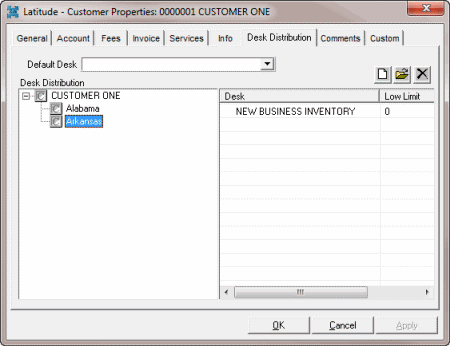
The Customer Properties dialog box appears.
-
Click the Desk Distribution tab.

-
In the Default Desk list box, click the default inventory desk to receive the customer’s accounts.
-
Click the New icon
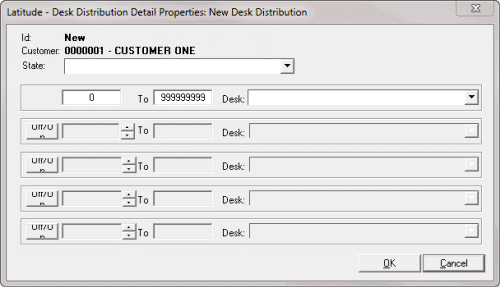
 . The Latitude - Desk
Distribution Detail Properties dialog box appears.

-
In the State list box, click a state.
-
Type a range for account balances and then, in the Desk list box, click the desk to receive the accounts.
-
To activate the next line for further account distribution, click Off/On and repeat the previous step. You can modify the balance ranges on any active line.
-
When finished, click OK.
-
On the Desk Distribution tab, click OK.


