- Contents
Create an RDN Case
Use the Create Case dialog box to create an RDN repossession case for a piece of collateral for which there is no case currently. You can only create one case for each piece of collateral. If all pieces of collateral have a case, the option to create a case is not available. You must have the Allow RDN Case Creation and Updates Permission.
To create an RDN case
-
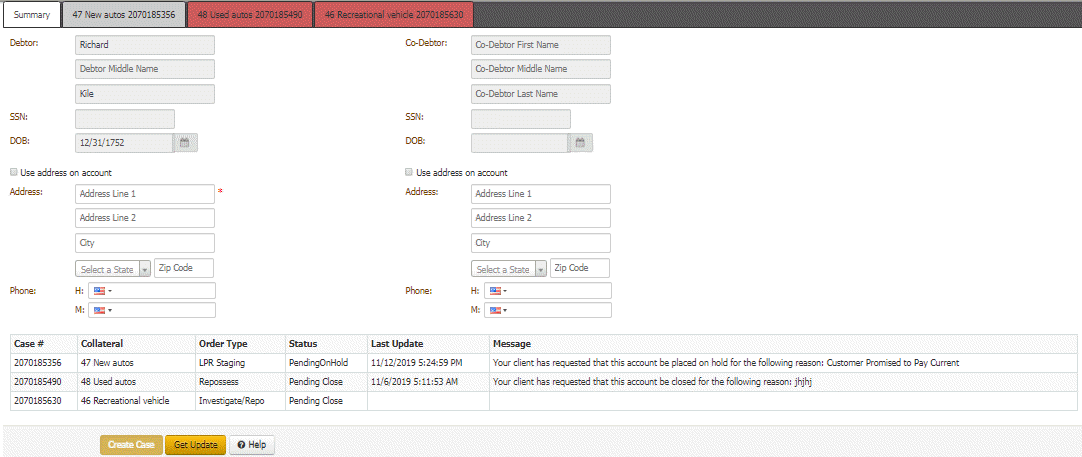
In the Task Panel navigation tree, click RDN Integration.

Latitude populates the debtor and, if applicable, co-debtor boxes.
-
Modify the debtor and co-debtor information as necessary. Latitude does not change the debtor and co-debtor information on the account. The changes on this tab are for the RDN system only.
-
Do one of the following:
-
To use the address on the account, select the Use address on account check box. Latitude populates the address boxes with the default address on the account and makes the address boxes unavailable for edit.
-
To specify an address other than the one on the account, clear the Use address on account check box and then complete the address boxes. Latitude does not change the address on the account. The changes on this tab are for the RDN system only.
-
To specify phone numbers, complete the phone number boxes.
-
Click Create Case.

-
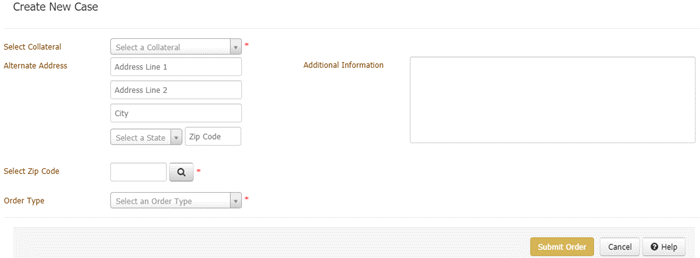
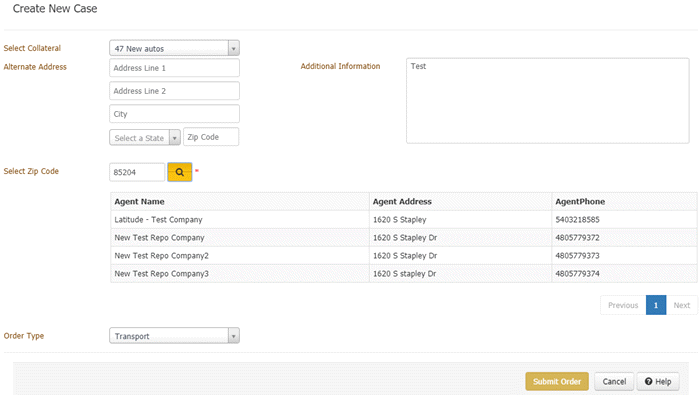
In the Select Collateral list box, click the piece of collateral to assign to the case. The list only contains collateral that isn't associated to a case currently.
-
(Optional) In the Alternate Address boxes, specify an alternate address where the recovery agent might find the piece of collateral. Or, you can specify the agent's business address.
-
(Optional) In the Additional Information, type other information regarding the case.
-
Do the following:
-
In the Select Zip Code box, type the ZIP code in which to search for a recovery agency and then click the Search icon. The agencies located in that ZIP code appear in the data grid.

-
In the data grid, click the agency to assign to the case.
-
In the Order Type list box, click the type of order requested, such as vehicle transport or repossession.
-
Click Submit Order. Latitude sends the recovery order to the RDN system. If sent successfully, RDN sends the case information to the agent and Latitude adds a tab to the RDN Integration panel for the case.
Related Topics


