- Contents
Latitude Help
Add a Custom Anchor Card or Reference Panel
Use the Custom Panel Mapping panel to add a custom anchor card or reference panel.
To add a custom anchor card or reference panel
-
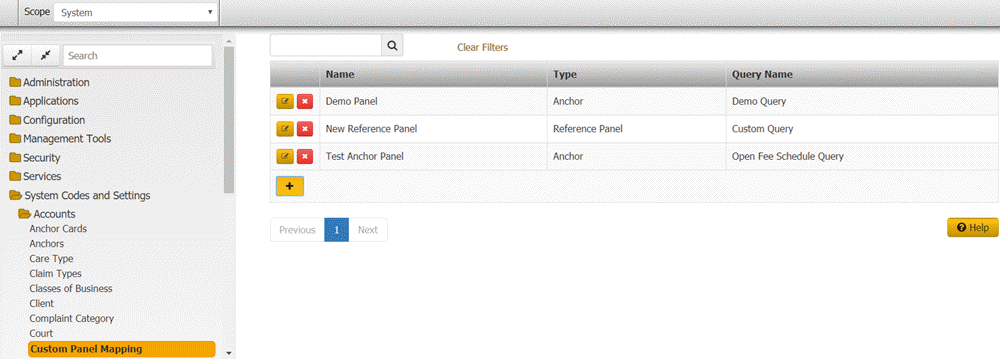
In the Navigation pane, click System Codes and Settings > Accounts > Custom Panel Mapping.

-
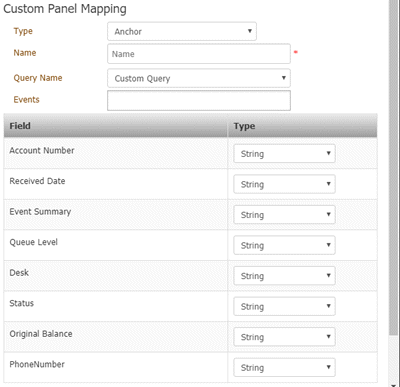
Click the plus sign (+). The Custom Panel Mapping dialog box appears.

Type: Indicates whether the mapping is for a custom anchor card or reference panel.
Name: Name to assign to the custom anchor card or reference panel.
Query Name: Name of the query to map to the custom anchor card or reference panel.
Note: You can map a single query to one anchor card and one reference panel only.
Events: Events that, when triggered, refresh the custom anchor card or reference panel in the Work Form.
Field: Field specified in the query to display in the custom anchor card or reference panel.
Type: Data type to assign to the field.
-
Complete the information and then click Save. One of the following occurs:
-
If you mapped a custom anchor card, the system adds the custom anchor card to the list of available anchor cards that you can associate to an anchor. For more information about anchor cards, see Anchor Cards.
-
If you mapped a custom reference panel, the system adds the custom reference panel to the list of available reference panels in the Reference Panels permission. For more information about the permission, see Reference Panels Permission.
-
Do one of the following:
-
If you mapped a custom anchor card, add the anchor card to an anchor to allow users to view the card in the Work Form. For more information, see Add an Anchor Card to an Anchor.
-
If you mapped a custom reference panel, select the reference panel in the Reference Panels permission to allow users to view the panel in the Work Form. For more information, see Reference Panels Permission.


