- Contents
WorkFlow Designer Help
Select and Configure Conditions
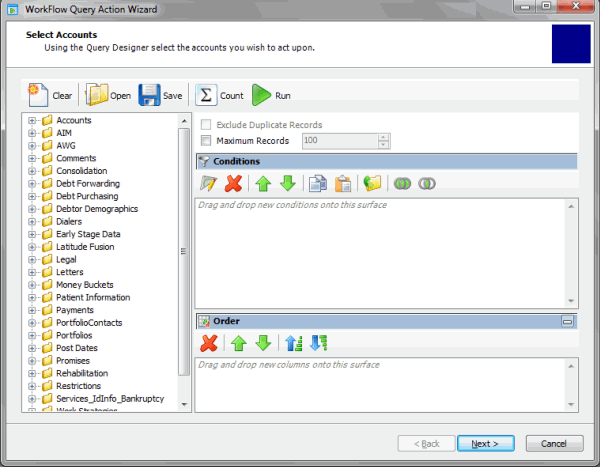
Use the Select Accounts page of the WorkFlow Query Action Wizard to select conditions and specify the criteria for accounts to process.
To select and configure conditions
-
Do one of the following:
-
From the File menu, click Create New Work Flow.
-
From the Window toolbar, click the Open WorkFlow Query Action Wizard icon
 .
.
The WorkFlow Query Action Wizard appears.

-
To open an existing query, do the following:
-
In the toolbar, click Open. The Open Query Dialog box appears.
-
Click the query and then click Open. The query appears in the Select Accounts page.
-
To specify conditions for processing specific accounts, do the following:
Note: To process all accounts, don't specify any conditions.
-
In the Data Selection pane, click the plus sign (+) next to a folder to expand it.
-
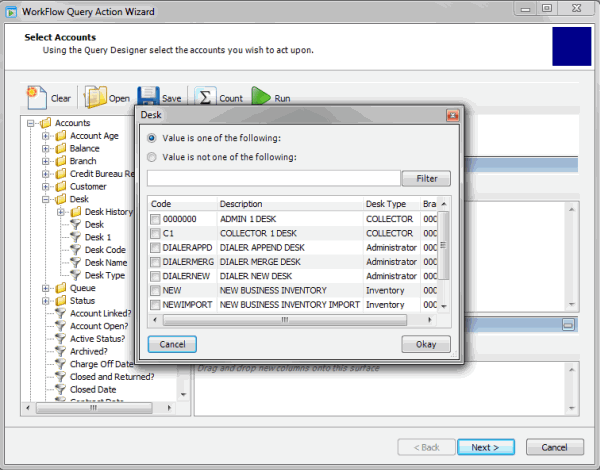
Drag and drop a data item into the Conditions pane. A dialog box appears, which allows you to specify the criteria. The title of the dialog box and the information displayed depend on the condition selected.
In the following example, the user dragged and dropped the Desk data item into the Conditions pane, causing the Desk dialog box to appear.

-
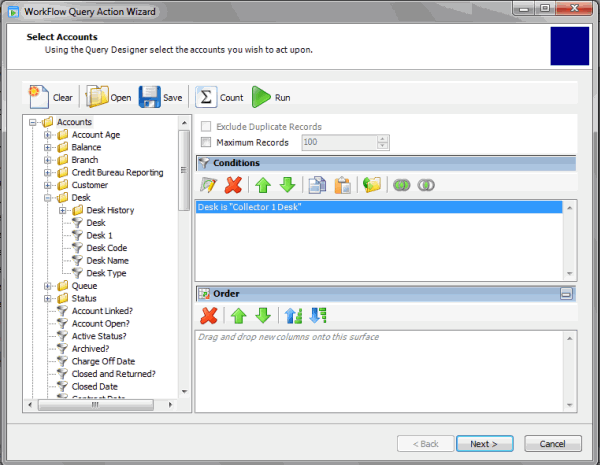
In the dialog box, specify the criteria and then click Okay. The condition appears in the Conditions pane. In the following example, the condition indicates that you want to include accounts assigned to the "Collector 1 Desk."

-
Drag and drop more data items into the Conditions pane as necessary. For more information about modifying, copying, grouping, arranging, and deleting conditions, see Query Conditions.
-
To specify data to include as a column in the query, do the following:
-
In the Data Selection pane, click the data to include and drag and drop it in the Order pane.
-
Drag and drop more data items into the Order pane as necessary.
For more information about arranging, sorting, and deleting columns, see Query Column Order.
-
To limit the query to a specific number of records, select Maximum Records and then, in the box, type the maximum number of records to include in the query.
-
To count the number of records that match the selection criteria, in the toolbar, click Count. The results appear in the Query Designer dialog box. Click OK.
-
To save the query, do the following:
-
In the toolbar, click Save. The Save Query Dialog box appears.
-
To save a new query, in the Query Name box, type a name for the query and then click Save.
-
To save to an existing query, click the query name and then click Save.
-
Click Next. The Choose Action page appears.
-
Do the steps to Select an Action to Process.


