- Contents
Exchange Manager Help
Create a Query for an Export
Use the Query Tool Built Export window to create a query for an export definition.
To create a query for an export
-
Do one of the following:
-
If the export file layout doesn't exist, do the steps to Create an Export File Layout Using the Query Tool.
-
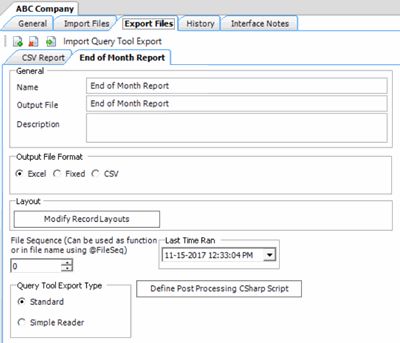
If the export file layout exists, click the [Export Layout Name] tab on the Export Files tab (for example, End of Month Report).

-
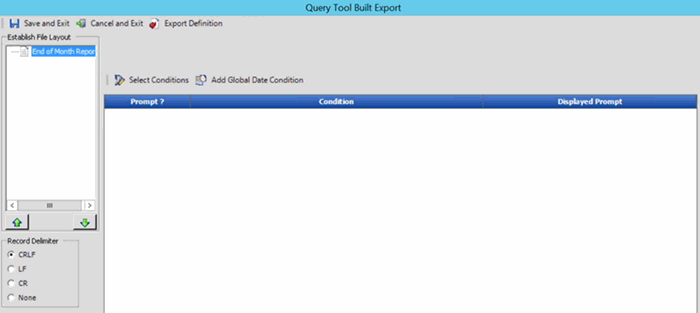
Click Modify Record Layouts. The Query Tool Built Export window appears.

Record Delimiter
CRLF: If selected, separates records using a carriage return/line feed (Windows).
LF: If selected, separates records using a line feed (Unix).
CR: If selected, separates records using a carriage return (Macintosh).
None: If selected, doesn't use a record delimiter.
-
Click the delimiter to use to separate records.
-
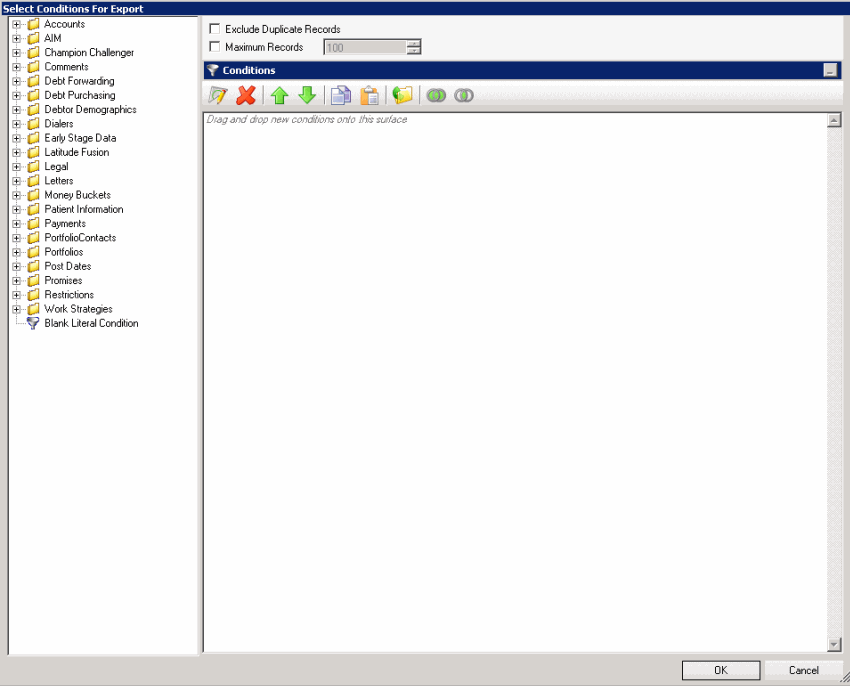
Click [Export Layout Name] (for example, Financial Export) and then click Select Conditions. The Select Conditions for Export window appears.

-
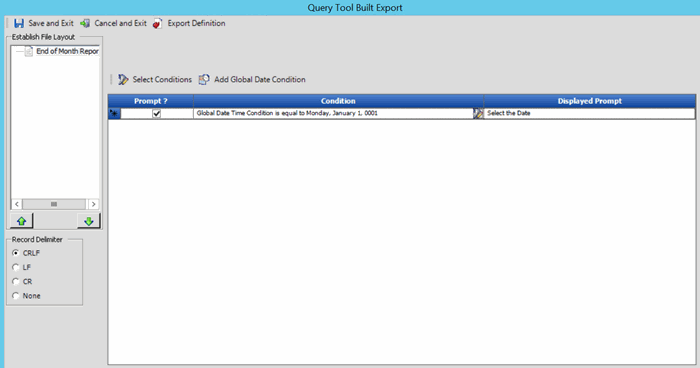
Specify the global conditions and then click OK. The condition appears in the data grid in the Query Tool Built Export dialog box. For more information about using queries, see Queries.

Prompt: If selected, Exchange Manager prompts the user for input.
Condition: Condition that limits the records to export. To modify the condition, click the Edit icon next to the condition.
Displayed Prompt: Prompt to display to the user to request input when exporting the data. If you selected the Prompt check box, type a message in this box.
-
To add a global date condition that you can apply to date conditions you define in the detail records, click Add Global Date Condition. The system adds the condition to the data grid. To modify the condition, click the Edit icon next to the condition.
-
To prompt the user for input for a condition, click the Prompt check box and in the Displayed Prompt box, type the message to display to the user.
-
To delete a condition, click the row in the data grid and the press Delete. In the confirmation dialog box, click Yes.
-
To export the query definition to an XML file, in the toolbar, click Export Definition.
-
Do the steps to Add a Detail Record to a Query Export.
-
When you finish building the query, in the toolbar, click Save and Exit.
-
In the toolbar in the Clients pane, click Save. The Update Comment dialog box appears.
-
In the Update Comment box, type a comment regarding your changes and then click OK.


