


- Contents
Interaction Connect Help
Quick Add a Contact
Requirements: You need the Add Individuals Security right to quick add a contact. Other Journey Map functions are available only if you have the appropriate licenses and security rights. For more information, see Journey Map Licensing and Rights.
If the Contact Resolution process does not find the contact that you want, and you are unable to find the appropriate contact using your own search criteria, you can create a new contact. For more information about this feature or your right to use it, see your CIC administrator.
When you "quick add" a new contact for the current interaction, you need to specify only the most important contact information.
Note: To add a contact at any time, you can use the menu on the Journey Map view.
To quick add a contact:
-
Do one of the following:
-
Right-click the interaction and select Journey Map > Quick Add Contact.
-
Select the current interaction and click the down arrow on the Journey Map button and select Quick Add Contact.
Result: The Quick Add Contact dialog box appears.
-
-
Complete the required information and as much of the optional information as you deem necessary.
Tip: Required information is indicated by an asterisk (*).
-
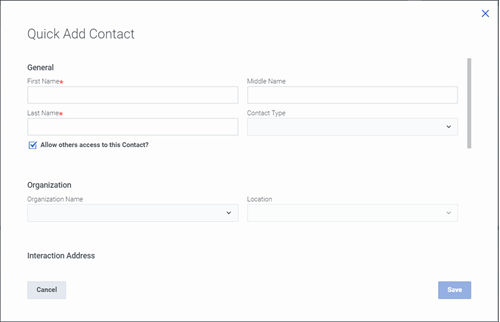
In the General section, supply basic identity information. See Add a Contact for details.
-
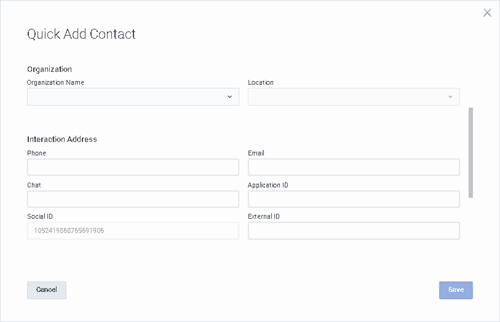
In the Organization section, you can associate this contact with an existing organization and location.
-
In the Interaction Address section, an address field corresponding to interaction type is pre-filled by information on the selected interaction.
Note: An interaction address, or iAddress, is a media-specific, electronic address against which interactions take place. The type of address corresponds to the type of interaction: for example, a phone number for a call, an email address for an email message, or the Social ID associated with a Twitter or Facebook profile for a social media message.
-
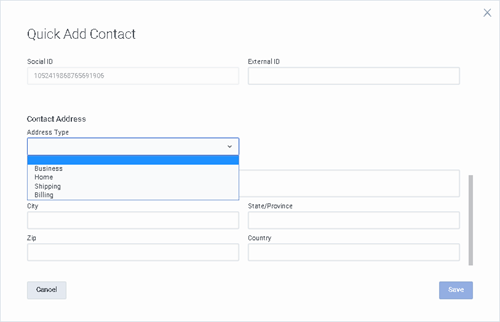
In the Contact Address section, you can supply a Business, Home, Shipping, or Billing address for this contact.
-
Click Save.
Result: PureConnect saves the contact information and associates the interaction with this new contact.
Related Topics