- Contents
Interaction Supervisor Help
Manage Workgroup Membership
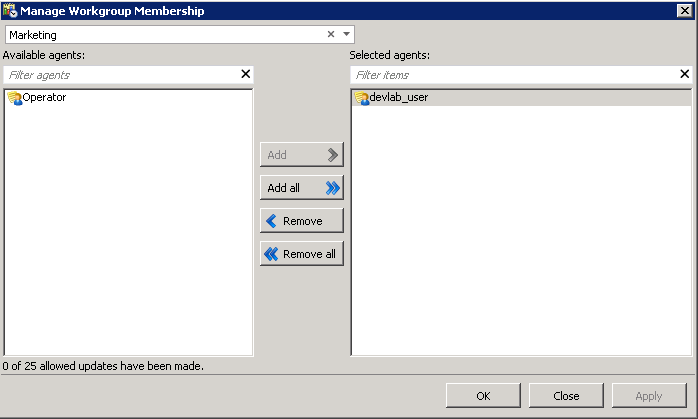
The Manage Workgroup Activations dialog adds or removes agents in a workgroup.
Note: The preferred
method of adding members to a workgroup is to add them in Interaction
Administrator and to then use Interaction Supervisor to activate them.
This is because when a member is added to a workgroup, there are
numerous related changes that automatically occur. For example, the new
member immediately inherits all of the security permissions and roles
that are assigned to the workgroup.
When large numbers of members are added to a workgroup, the potential exists
for a decline in server performance. To mitigate this potential, ICBM
only allows you to make a total of 25 membership transactions simultaneously.
For example, you can add 20 members to a workgroup and remove 5 because
that equals a total of 25 transactions. You cannot, however, add 20 members
and remove 10 because that would equal a total of 30 transactions. Also,
because there were improvements made in CIC 2016 R2 that allow for these
transactions to be made more safely, the feature will not be available
when connecting ICBM to a previous version of IC server.
This feature was successfully tested on a CIC Server with five Session
Managers (four off-server) and 5000 agents handling calls. In
the test, 250 simulated supervisors each performed a workgroup membership
change every 30 minutes. Higher loads than this could potentially
cause server scalability problems.
To add or remove agents in a workgroup:
-
Open either a Workgroup Directory or Workgroup Details view.
-
Do either of the following to open the Manage Workgroup Membership dialog:
-
Within the Workgroup directory control, right-click any agent name and select Manage Workgroup membership from the shortcut menu that appears.
-
From the Workgroup Directory menu or the Workgroup Details menu, select Manage Workgroup membership.

Manage Workgroup Membership dialog.
-
To select a workgroup other than the one initially displayed, use the list at the top of the dialog. This populates lists of agents for the workgroup. If the workgroup you want is not visible, filter the list by typing the first few letters of the workgroup name in the list.
-
To add agents, select names in the Available agents list. You can Ctrl-click to select multiple entries. To find an agent who is not listed, type the first few letters of the agent's name in the Filter list. Then click Add.
-
To remove an agent, select a name in the Selected Agents list. You can Ctrl-click to select multiple entries. To find an agent who is not listed, type the first few letters of the agent's name in the Filter list. Then click Remove.
-
Click Apply to apply changes, leaving the dialog open. Or click OK to apply changes and dismiss the dialog. If you click Close, the dialog is closed without applying changes.


