


- Contents
Director Installation and Configuration Guide
Define Monitored Servers
Use the Monitored Server Configuration dialog box in Interaction Administrator to define the Monitored Servers. The first step is to define the CIC sites to which Interaction Director can connect to receive routing requests and monitor destination queues.
Note:
An ACD queue without Director enabled has priority over an ACD queue with Director enabled. For example, suppose that an agent is a member of two ACD queues, one with Director enabled and the other without it. When the agent is in ACD Available status, then IC assigns ACD Wait calls in the non-Director queue before it assigns Director Wait calls in the Director queue.
To define Monitored Servers
-
On the Director server, click Start > Programs > Interactive Intelligence > Director Admin.
-
In the tree view, click the Monitored Servers container.
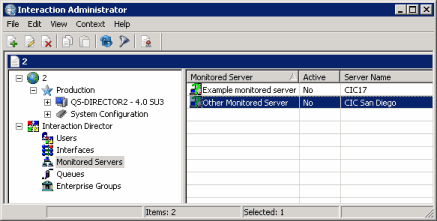
Status icon: Status of Director's network link to the site. Director polls the sites every two minutes and updates this status accordingly.
|
Icon |
Description |
|
|
Site is available. |
|
|
Site is not available. |
|
|
Undetermined link status. |


Monitored Server: CIC server to which Director can route calls.
Active: Indicates whether the server is eligible to receive calls that Director routes to it. Only active servers can receive calls.
Server Name: IP address or host name of the monitored CIC server.
-
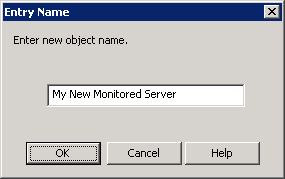
Right-click in the list view and then click New. The Entry Name dialog box appears.
-
In the box, type the name of the CIC server for Director to monitor and then click OK. The New Monitored Server Configuration dialog box appears.
Hostname: Name or IP address of the Monitored Server.
Server's Software Version: Version of CIC running on the Monitored Server. The "Site version" server parameter contains the list of known supported versions.
User Name: CIC user ID that you used to run Setup Assistant during installation of the Monitored Server.
Password: Password associated to the CIC user ID.
Active: If selected, this server is active and available for monitoring.
Note:
Director uses these credentials to access data from this CIC server.
-
Complete the information and then click Next. The next page of the wizard appears.
-
Do the following:
-
Click Add. The Routing Map Destination Configuration dialog box appears.
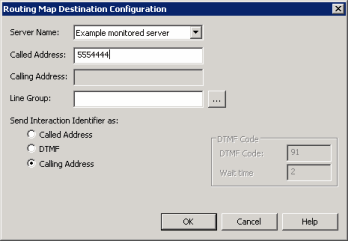
Server Name: Name of the Monitored Server to route this Monitored Server to when routing interactions between servers.
Called Address: Called number of the T1/E1 or ISDN tie line for the Monitored Server specified in the Server Name box. This phone number connects the servers.
Calling Address: Calling number of the ISDN tie line that connects this Monitored Server and the server specified in the Server Name box. The system places the interaction ID information in the origination information of the extended place call tool. If the tie line is not ISDN, specify the ANI/DNIS configuration for the interface on both CIC servers. For a T1/E1 line, leave this box blank.
Line Group: Line group for Director to use when routing calls from this Monitored Server to the server specified in the Server Name box. For a T1/E1 line, leave this box blank.
Send Interaction Identifier as: These options configure signaling attributes that identify the interaction when it routes to the server.
Called Address: If selected, places the called number of the tie line in the dial string of the extended place call tool. If the tie line is not ISDN, specify the ANI/DNIS configuration for the interface on both CIC servers.
DTMF: (Dual-Tone Multi-Frequency) If selected, plays digits to navigate an IVR. The interaction ID information plays as tones after the call connects, the wait time passes, and the DTMF code plays. Select this option when you have a dedicated T1/E1 tie line between servers.
Calling Address: If selected, places the calling number of the tie line in the dial string of the extended place call tool. If the tie line is not ISDN, specify the ANI/DNIS configuration for the interface on both CIC servers.
DTMF Code: Code to play when sending an interaction ID between servers connected by a T1/IE tie line.
Wait time: Number of seconds to wait to play in interaction ID as tones.
Important!
If you selected the DTMF option for servers connected by a T1/IE tie line, change the handler on each Monitored Server. For more information, see Handler Change for T1 Tie Lines.
-
Complete the information and then click OK.
-
Add more routing maps as necessary.
-
To rearrange the routing order, click a server and then click Up or Down.
-
Click Next. The next page of the wizard appears.
-
Do the following:
-
Click Add. The Add Routing Cost dialog box appears.
Note:
If all defined Monitored Servers have assigned routing costs, a notification dialog box appears, indicating that all available servers have routing costs assigned. Click OK.
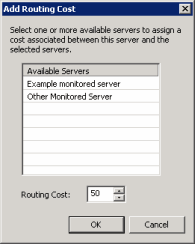
Available Servers: Available servers to which to assign a routing cost.
Routing Cost: Numeric value (from 1 to 100) used to weight the relative cost of routing to other Monitored Servers. The default value is 50 for any server not assigned a specific value. Higher numbers signify more costly routing.
-
Click a server and then type or select the routing cost.
-
Click OK.
-
Assign costs to other servers as necessary.
-
To delete a routing cost, click the server and then click Delete. The system doesn't ask you to confirm this operation so use caution when deleting a cost.
-
Click Finish.
-
Return to the Director Server Installation Checklist, and proceed to the next step.