


- Contents
PureConnect Installation and Configuration Guide
Install IC User Applications (32-bit and 64-bit)
Make sure to install the version (32-bit or 64-bit) appropriate for the workstation. This section describes how to install IC User Applications (64-bit) 2015 R3 or later using Setup.exe.
Note:
If one or more Language Packs are installed on the CIC server, please refer to the CIC Language Pack Technical Reference for additional information.
To install IC User Applications
-
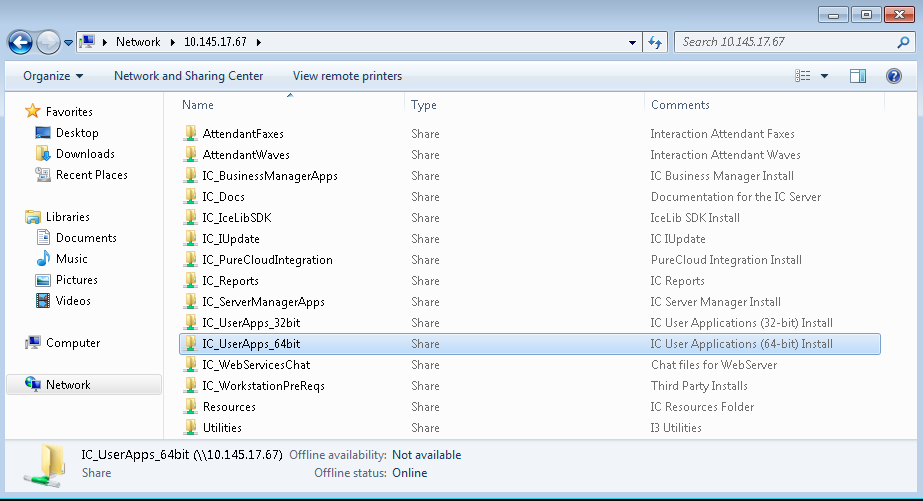
On the workstation, select Start. In Search programs and files, type \\servername\ where servername is the CIC server name, to view the shares on the CIC server.
-
Select the IC User Apps install share appropriate for the workstation from the list, for example IC_UserApps_64-bit, and double-click.
-
Review the contents of the IC User Apps install share and the Language Plugins subdirectory.
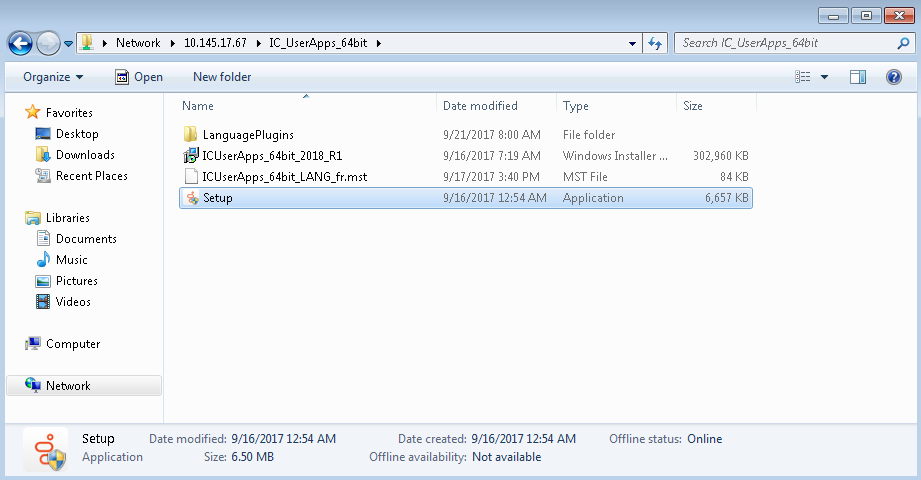

In this example, the IC_UserApps_64bit share contains:
-
Language Plugins directory: InteractionDesktopOutlookEdition_2018_R1.msi install and the ICUserApps_LanguagePlugin_fr_2018_R1.msi install.
-
The ICUserApps_64bit_2018_R1.msi install
-
The ICUserApps_64bit_LANG-fr.mst file
-
The Setup.exe utility
-
-
Double-click Setup.exe in the IC User Apps install share.
-
In the Setup.exe screen, select English from the drop down list and click OK.
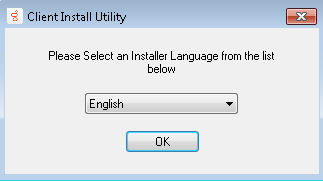
If one or more Language Packs are installed on the CIC server, the applicable languages are available in the drop down list for display on the IC User Applications install screens.
Note:
This screen appears only in the initial run of Setup.exe in the IC_UserApps_64bit share. The next time you run Setup.exe, the IC User Applications install automatically appears in the language you selected the first time you ran Setup.exe.
-
In the next Setup.exe screen, make the appropriate selections depending on the content displayed and click Start to launch the IC User Applications (64-bit) install.
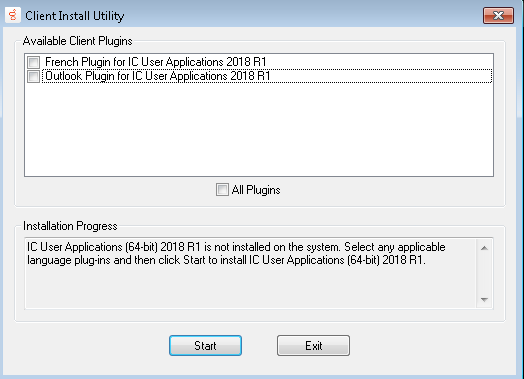
Available Plugins
Select the plugins to install or select All Plugins to install all listed plugins.
Installation Progress
Review the message displayed.
"IC User Applications (64-bit) 2018 R1 is not installed on the system. Select any applicable language plug-ins and then click Start to install IC User Applications (64-bit) 2018 R1."
-
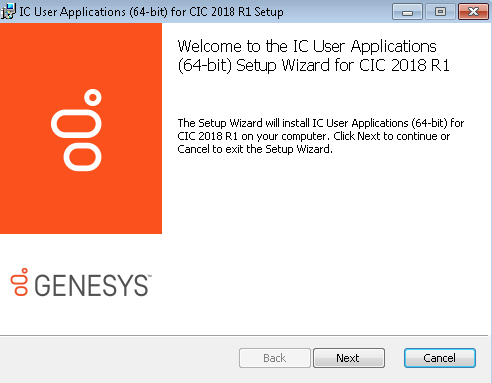
The IC User Applications (64-bit) install launches. Click Next to proceed past the Welcome screen.
-
In Custom Setup screen, select or de-select applications/features as needed and click Next.
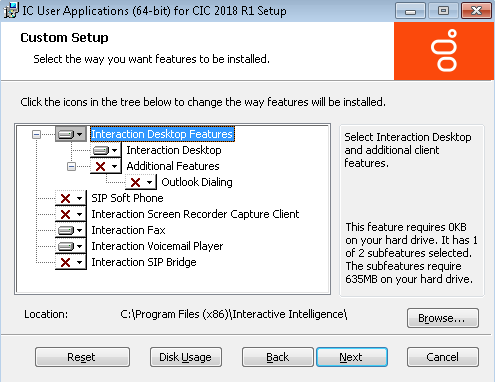
We recommend that you keep the default location of C:\Program Files\Interactive Intelligence where the IC User Applications will be installed. If you wish to change the default location, use the Browse button.
The following table provides a description for each of the applications/features.
Feature Component
Default Selection
Description
Interaction Desktop
Yes
Standard version of the CIC. Feature-rich, provides low bandwidth usage for larger deployments.
Additional Features
--
Select additional Interaction Desktop features.
Outlook Dialing
--
Dial from Microsoft Outlook and TAPI/TSP-compatible applications.
SIP Soft Phone
--
Delivers audio through a USB headset on a workstation or laptop. Works with Interaction Desktop or a basic call control interface.
Interaction Screen Recorder Capture
--
An Interaction Recorder feature installed on agent workstations to record agents' screens. Screen recordings can be associated with phone call and Web chat interactions.
Interaction Fax
Yes
Enables users to send, receive, print, annotate, and rotate faxes; as well as monitor the fax queue.
Interaction Voicemail Player
Yes
Enables users to play voicemail messages directly from email and control message playback.
Interaction SIP Bridge
--
Enables at-home workers to use a SIP-enabled telephone to make and receive calls from CIC through a remote connection.
-
If you selected SIP Soft Phone, Interaction Screen Recorder Capture , orInteraction SIP Bridge in the Custom Setup screen, the QoS Requirement screen appears.
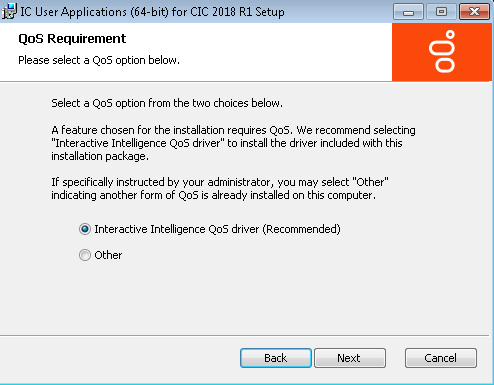
We recommend that you select PureConnect QoS driver.
PureConnect QoS driver
This is the default and recommended option. When this option is selected, the install adds the PureConnect certificate to the Trusted Publishers list, then installs the driver. In most cases, adding the certificate to the Trusted Publishers list saves the user from being prompted by Windows Security to manually trust the certificate.
Other
If Other is selected, the PureConnect certificate is not added to the Trusted Publishers list and driver is not installed. We recommend that users do not select this option unless specified by the administrator. Selecting this option implies that another form of QoS is used at the site.
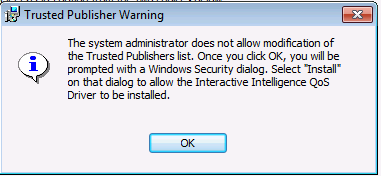
If the system administrator does not allow the Trusted Publishers list to be modified, the user will be prompted with the Windows Security screen. To make it easier for the user, the following message appears first, explaining what to do when the Windows Security appears.
For more information about the PureConnect QoS driver, see the PureConnect Customer Care KB article https://genesyspartner.force.com/customercare/pkb_Home?id=kA50B0000008R5H.
-
In the IC Server Name screen, type the name of the host CIC server and click Next. We recommend using a fully qualified domain name (FQDN), not a short name.
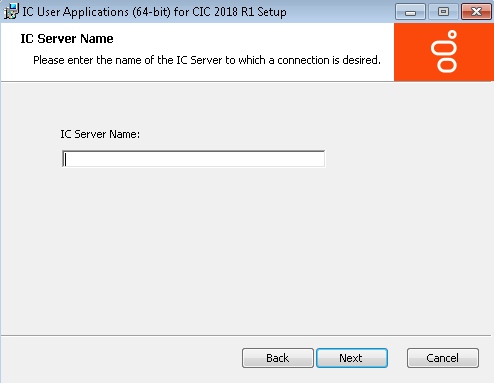
Note:
If you have a CIC Switchover architecture and you created a pair of commonly named DNS A records pointing to each server as part of the IP phone network configuration for managed phones, do not use that common name value here. Instead, use one of the actual CIC server names. We recommend using a fully qualified domain name (FQDN), not a short name.
Once you have completed this installation, refer to the following section to verify fully qualified domain name (FQDN) resolution to ensure connectivity with the host CIC server.
-
When you are ready to begin the installation, click Install.
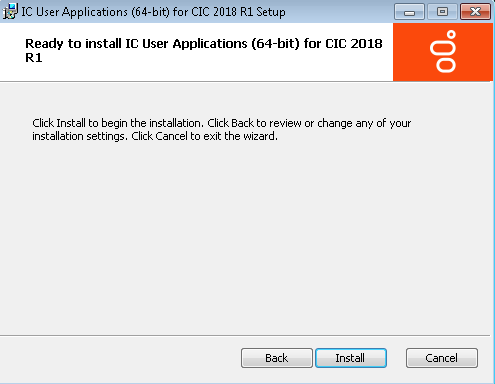
As the installation continues, a status bar indicates the progress.
-
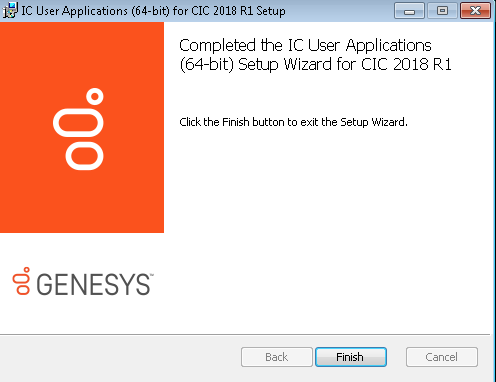
When the installation is complete, click Finish in the Completed screen.
-
The installation returns to Setup.exe. Setup.exe proceeds to silently install the client plugins selected in step 6. After the selected client plugins are installed, click Exit to close Setup.exe.
Installation Progress
-
The following message appears for each selected Client Plugin:"Installing {Client Plugin} Plugin for IC User Applications."
-
When Setup.exe has finished installing the Client Plugins, the following message appears: "Finished processing installs for client workstation applications and selected language plug-ins, if applicable."
-
-
If you are prompted to restart, click Yes to restart now.
-
The IC User Applications can be launched from the shortcuts on the desktop or from Start->Programs->PureConnect on Windows 7 or Start screen->Apps->PureConnect-> on later versions of Windows.