


- Contents
Interaction Migrator Technical Reference
Import Interaction Media Server Configuration Data
Complete this procedure to import Interaction Media Server configuration data to Interaction Media Server 2015 R1 or later using Interaction Migrator.
To import Interaction Media Server configuration data
-
Stop the Interaction Media Server 2015 R1 or later service.
-
Log on to the Interaction Media Server 2015 R1 or later using the same CIC administrator account as when you imported the CIC configuration data.
-
Copy the Interaction Media Server configuration data file from your storage media (as described in the last step in Export Interaction Media Server Configuration Data) to the Interaction Media Server 2015 R1 or later. For example, copy the file to D:\Temp\ImportData.
Important!
Do NOT copy the file to the root directory of the drive where you installed CIC (for example, do not copy to the root of \I3\CIC) as it overwrites critical files).
-
Start Interaction Migrator, either from the Interaction Migrator link on the desktop, or from Start -> Programs -> Interactive Intelligence -> Interaction Migrator.
-
On the Welcome page, click Next.

If you contact PureConnect Customer Care for migration assistance, provide them with the version number in the lower right corner of the page.
-
On the Task Selection page, select Import configuration data and then click Next.

-
On the Configuration page, specify the location of the Interaction Media Server configuration data .zip file and the folder to extract the Interaction Media Server configuration data file. Click Migration Mode, and then click Next.

Select the configuration data to import: Location of the exported Interaction Media Server configuration data file (for example, qf_backgammon_07092012143839.ininmigr) on the USB key or other writeable storage location.
Select folder for imported files to be extracted to: Directory to extract the Interaction Media Server configuration data file to. For example, extract the data to D:\Temp\ImportData.
Important!
Do NOT copy the file to the root directory of the drive where Interaction Media Server 2015 R1 or later is installed (for example, do not copy to the root of \I3\CIC) as critical files are overwritten and ensure the file you import contains the name of your Interaction Media Server and not the name of your CIC server.
Set password for export file: If selected, you set a password on the Interaction Media Server configuration data file.
[Password]: Password for the Interaction Media Server configuration data file. This box is available if you selected the Set password for export file check box.
Create registry and file restore
point: Interaction Migrator creates a registry restore point
for restoring the registry back to the point before running Interaction
Migrator to import the Interaction Media Server configuration data. When
this option is selected, Interaction Migrator runs a registry export of
the Interactive Intelligence key in hive format. This file
is located in the C:\Program Files (x86)\Interactive Intelligence\Migrator
folder and has a file name extension of .hive. Genesys recommends
that you keep the default setting.
Migration Mode: If selected, Interaction Migrator runs in migration mode. It is selected by default and you cannot clear it.
Notes:
-
When moving data from one server to another, take into account server name and site name changes. Interaction Migrator changes the data at run time before importing it into the new server.
-
You cannot import a configuration data file created using an older version of Interaction Migrator. However, you can import a configuration data file created using the same version of Interaction Migrator but an older build number.
-
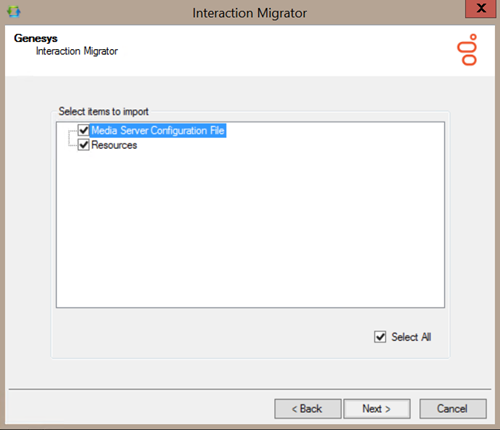
On the Select Items to Import page, ensure Select All (default) is selected and then click Next.
-
On the Import Confirmation page, confirm the selections and then click Next to start the import process.

Note: To change your selections, click Back.
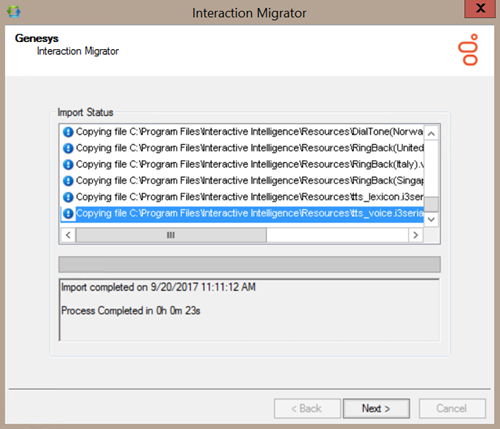
The Import Status page displays real-time updates during the import process.

The import process can take several minutes depending on the amount of data being exported.
Note: To stop the process at any time, click Stop. After stopping the process, you can go back and change any selections without exiting Interaction Migrator.
When the import process is complete, the Import Status page displays when the import completed and how long the process took.
-
Click Next to continue.
-
Click Finish to close Interaction Migrator.

Note: If you encountered problems during the import process, click Zip and Email logs to open Outlook and send a copy of the logs to PureConnect Customer Care.