


- Contents
PureConnect Reporting Technical Reference
Configuring a Custom Crystal Report in Report Management
Use this procedure to configure a custom Crystal Report torun in Interaction Reporter in IC Business Manager.
-
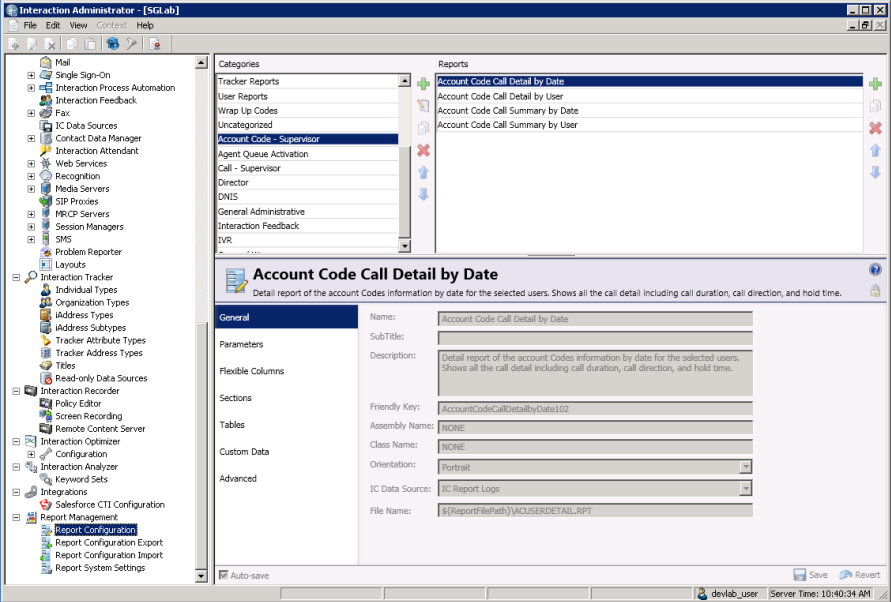
In Interaction Administrator under Report Management, select Report Configuration. The Report Configuration page appears on the right.
-
In the master view under Categories, identify the category you want to use for the custom report. You can select an existing category or add a category (for example, you can add the Custom Reports category).
-
Copy an existing report into an existing category or copy an existing report from an existing category to the category you created. For example, you identify the existing Account Code Call Detail by Date Crystal Report in the Account Code - Supervisor category as a report similar to the custom report. Copy the existing report to the Custom Reports category that you created. The new report appears in the Custom Reports category as Account Code Call Detail by Date (Copy).
Tip: The report that you copy must have a report type of Crystal Report. You can identify the report type in the Advanced tab in the detail view.
-
In the detail view for the new report, select General. Update the following information:
-
Name - Enter the name of the custom report as you would like it appear in the Navigation Pane in IC Business Manager.
-
Description - Enter a brief, one-sentence description of the new report. This description appears next to the name of the report in the Navigation Pane in IC Business Manager.
-
Friendly Key - Enter a unique value that easily identifies the new report in the database.
-
File Name Enter the Crystal Report template for the new report.
-
- In the detail view for the new report, select Parameters.
Use the existing parameters from the report that you copied if they
apply to the new report. You can add a parameter to the report, change
an existing parameter, or delete a parameter from the report.
Determine whether to update the following information if you add a parameter or change an existing parameter:-
The Class Name on the General tab indicates the parameter type.
-
The Source on the Data tab indicates whether the report prompts a user to enter a value for the parameter.
-
The Data Type on the Data tab indicates the type (for example, string, numeric, Boolean, and date) of data that the parameter expects.
-
The Default Value on the Data tab indicates the default value for the parameter.
-
The Parameter Type field on the Miscellaneous tab indicates whether to use the parameter as a filter.
-
The User Control Class Name field on the Miscellaneous tab indicates the user control type that corresponds to the parameter type on the General tab. Refer to Appendix G: Parameter Types for more information.
-
The Column Name on the SQL Table Columns tab indicates the name of the parameter in the Crystal template that maps to the data in the database column.
-
Note You can configure report parameters that limit which data users see based on the ACLs to which they have access. Secure report parameters are available for all Crystal Reports that use queue parameters. For additional information on configuring secure report parameters, see the Help topic Configure secure report parameters in the Interaction Administrator Help.
Note Localization behavior of parameter fields displayed in a report can be changed by adding _Display to the end of the parameter name in the Crystal RPT file. This will force the value displayed in the report to be the same as that entered by the user running the report instead of the localized value based on CIC's region.
-
In the detail view for the new report, select Tables to add the tables and views that the report uses.
-
In the detail view for the new report, select Custom Data to identify any custom data that the report uses.
-
In the detail view for the new report, select Advanced. Update the following information:
-
Report Visible Select the check box so that the report appears in IC Business Manager.
-
Report Type Select Crystal Report.
-
Require ACL Select the check box to use an Access Control List for the report.
-
-
When you finish entering the configuration information, click Save.
After you configure a custom report, provide a CIC user access to run the report. In Interaction Administrator, configure the Default User, Workgroup, or User container to have access to the report.