


- Contents
SSO Identity Providers Technical Reference
Configure Microsoft AD FS as an identity provider
-
Open the Microsoft AD FS Management snap-in.
-
In the left pane of the AD FS Management snap-in window, right-click and select Add Relying Party Trust.
The Add Relying Party Trust Wizard is displayed.

-
Select the Start button.
The wizard displays the Select Data Source page.
-
If you used Single Sign-On Configuration Utility and generated a SAML metadata file, do the following steps.Otherwise, to configure Microsoft AD FS manually, proceed to step 5.
-
Select Import data about the relying party from a file.

-
Select the Browse button for the Federation metadata file location box.
-
In the resulting dialog box, select the SAML metadata file that you created with Single Sign-On Configuration Utility.
-
Select the Next button.
Microsoft AD FS imports the SAML metadata.You have completed the configuration of Microsoft AD FS for CIC Single Sign-On.Proceed to Test Single Sign-On for the identity provider.
-
-
Select Enter data about the relying party manually and select the Next button.
The wizard displays the Specify Display Name page. -
In the Display Name box, enter the name of the trust configuration and then select the Next button.
The wizard displays the Choose Profile page.
-
Select AD FS 2.0 profile and then select the Next button.
The wizard displays the Configure Certificate page.
-
Browse to the CIC server trusted certificate and select it.
By default, this certificate is in the following location on the CIC server:
D:\I3\IC\Certificates\Client\Local_Subsystems
This certificate validates signed SAML <AuthnRequest> messages.
-
On the Configure Certificate page, select the Next button.
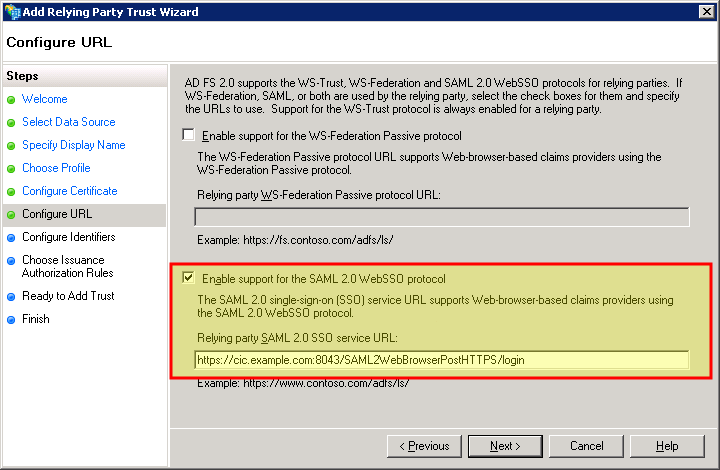
The wizard displays the Configure URL page.
-
Enable the Enable Support for the SAML 2.0 WebSSO Protocol check box and specify the Assertion Consumer Service URL.
-
On the Configure URL page, select the Next button.
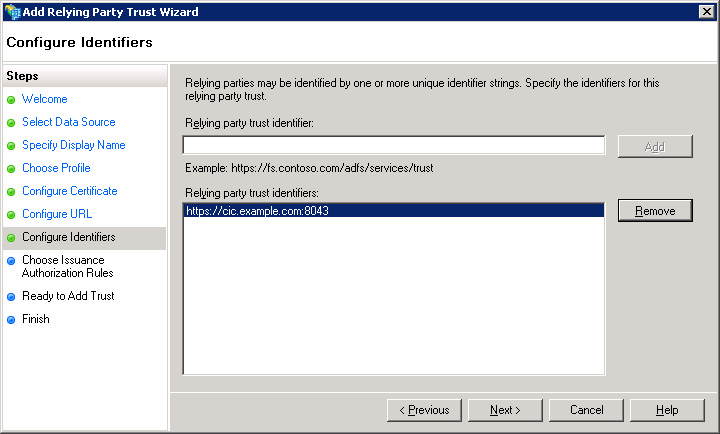
The wizard displays the Configure Identifiers page.
-
In the Relying party trust identifier box, enter the address and port number that you determined in Determine issuer/provider name/relying party identifier/partner identifier/entity ID and select the Add button.
Example:
https://cic.example.com:8043
-
On the Configure Identifiers page, select the Next button.
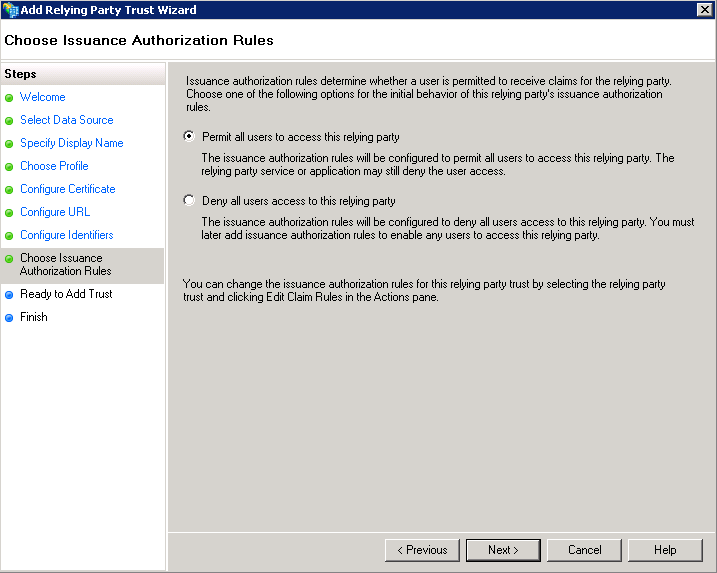
The wizard displays the Choose Issuance Authorization Rules page.
-
Select one of the appropriate option for either allowing or denying access for all users to the specified relying party.
-
Select the Next button.
The wizard displays the Ready to Add Trust page.
-
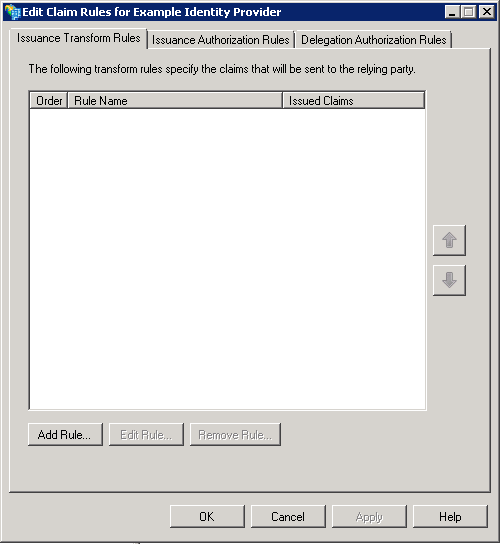
Select the Finish button.
The Edit Claim Rules dialog box is displayed.
-
Select the Add Rule button.
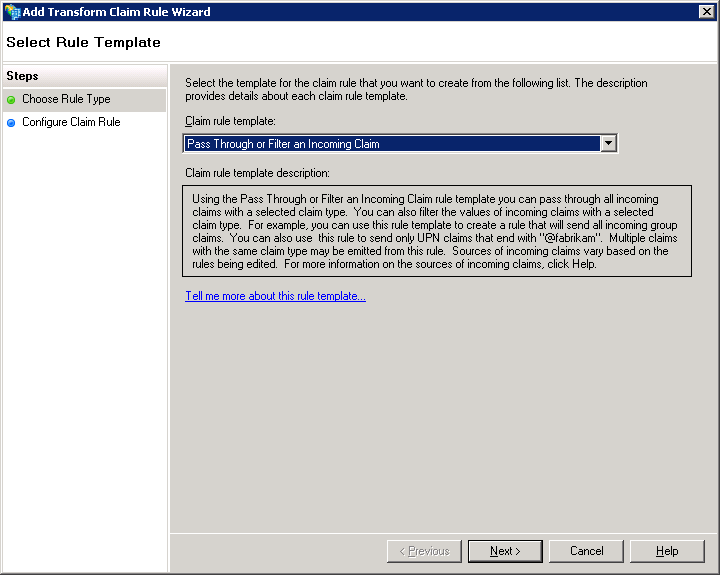
The Add Transform Claim Rule Wizard is displayed with the Select Rule Template page.
-
In the Claim rule template list box, select Pass Through or Filter an Incoming Claim.
-
Select the Next button.
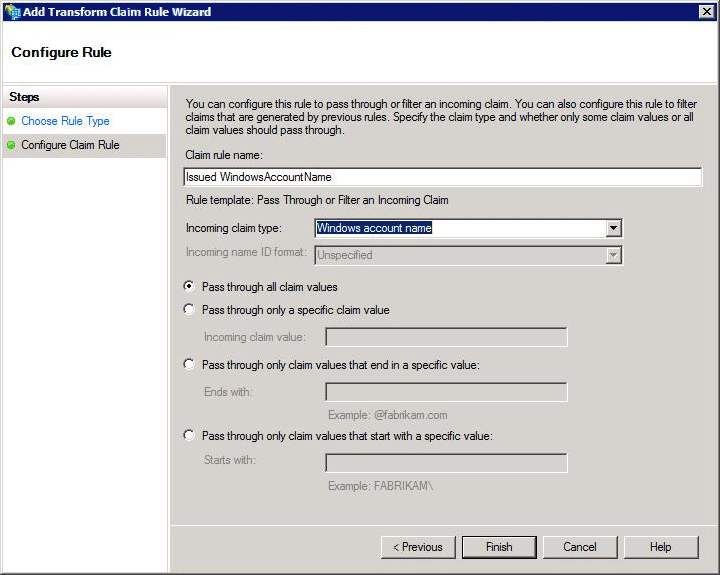
The wizard displays the Configure Rule page.
-
In the Claim rule name box, enter a rule name.
-
In the Incoming claim type list box, select Windows account name.
-
Select the Finish button.
-
In the Edit Claim Rules dialog box, select the OK button.
-
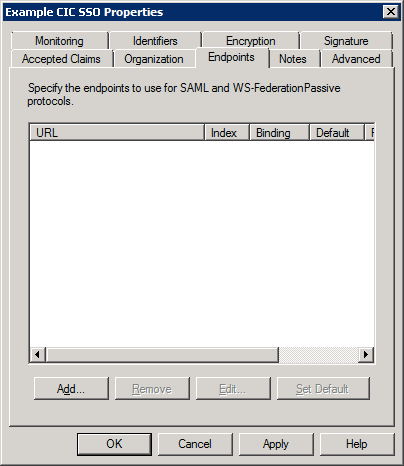
In the AD FS Management snap-in window, open the properties for the Relying Party Trust that you just created.
-
In the Properties dialog box, select the Endpoints tab.
-
Add any additional SAML Assertion Consumer Endpoints for the other Assertion Consumer Service URLs that you will use in your CIC Single Sign-On environment.
Important!
For each ACS URL, increase its index value.The index values
must be unique.For more information about ACS URLs, see Assertion Consumer Service
URL.For more information on ACS URL index values, see
the Microsoft AD FS documentation.