


- Contents
SSO Identity Providers Technical Reference
Generate a self-signed HTTPS certificate for non-FQDN configurations
If the workstations hosting CIC client applications that will use Single Sign-On do not use the Fully Qualified Domain Name (FQDN) of the CIC server to access resources, such as using an IP address or short host name, you must use the GenSSLCertsU.exe command line utility to generate the HTTPS certificate for the CIC server.
Important!
You do not need to do this procedure if the workstations hosting your CIC
client applications access the CIC server through its Fully Qualified
Domain Name (FQDN).The CIC server automatically generates
an HTTPS certificate with its FQDN address.Examples of configurations
that require you to generate a new HTTPS certificate would be using DNS-A/AAAA
records for a switchover pair, IP address, or short host name.
The GenSSLCertsU.exe command line utility has additional switches to customize creation of HTTPS certificates.For more information about the GenSSLCertsU.exe command line utility, see Security Features Technical Reference.
-
On the CIC server, open a Command Prompt window with Administrator privileges.
-
In the Command Prompt window, navigate to the drive where the CIC server software was installed by entering and executing the following command:
D:
D: is the default drive on which the CIC server software is installed.If you installed the CIC server software to a different drive, replace D with the appropriate letter.
-
Navigate to the HTTPS subdirectory by entering and executing the following command:
cd \I3\IC\Certificates\HTTPS
-
In the Command Prompt window, copy the existing files to new, renamed instances by executing the following command:
copy CICServerName*.* ?*.*.backup
CICServerName is a variable representing the non-FQDN address of this CIC server that CIC client applications in the network can reach.The following table displays examples of different address schemes:
Address scheme
Example
DNS A/AAAA-record
cic-serv.example.com
(DNS A/AAAA record points to either cic‑serv1.example.com or cic‑serv2.example.com)
IP address
192.168.1.100
Short host name
cic-serv
-
In the Command Prompt window, enter and execute the following command:
GenSSLCertsU w CICServerName -h
CICServerName is the non-FQDN address of the CIC server.
The GenSSLCertsU.exe utility generates the HTTPS certificate for the CIC server in the following directory on the partition or hard drive where the CIC server software was installed:
\I3\IC\Certificates\HTTPS
Important!
GenSSLCertsU.exe creates the file name of HTTPS certificate with the host
identified with the command.For example, if you have a CIC
server named cic-serv1.example.com and you generate a new HTTPS certificate
for cic-serv1 (not FQDN), the file names of the certificate and associated
files are as follows:
•
cic-serv1_Certificate.cer
•
cic-serv1_PrivateKey.bin
•
cic-serv1_PublicKey.bin
•
cic-serv1_TrustedCertificate.cer
The CIC server loads the HTTPS certificate with a file name containing
the FQDN of the server, such as cic-serv1.example.com.As such,
you must manually rename the newly-generated HTTPS certificate to reflect
the FQDN of the CIC server:
•
cic-serv1.example.com_Certificate.cer
•
cic-serv1.example.com_PrivateKey.bin
•
cic-serv1.example.com_PublicKey.bin
•
cic-serv1.example.com_TrustedCertificate.cer
The following steps guide you through renaming these files.
-
In the Command Prompt window, rename the files for the certificates, PublicKey, and PrivateKey using the following commands:
ren CICServerNameCertificate.cer CIC_server_FQDN_Certificate.cer
ren CICServerNameTrustedCertificate.cer CIC_server_FQDN_TrustedCertificate.cer
ren CICServerNamePublicKey.bin CIC_server_FQDN_PublicKey.bin
ren CICServerNamePrivateKey.bin CIC_server_FQDN_PrivateKey.bin
CICServerName is a variable that represents the name that the GenSSLCertsU.exe command was given to embed within the HTTPS certificate.
CIC_server_FQDN is a variable representing the FQDN of this CIC server.
Important!
If you use DNS A/AAAA records for a switchover pair, do not replace CIC_server_FQDN
with the DNS A/AAAA record name for as the target file name.The
target file name must be the specific FQDN of this CIC server so that
the CIC server loads the certificate and keys automatically.
Also, ensure that you do not miss including the underscore character (_)
in the target file name between CIC_server_FQDN and the remainder
of the file name.
Examples:
ren cic-serv1Certificate.cer cic-serv1.example.com_Certificate.cer
ren cic-serv1TrustedCertificate.cer cic-serv1.example.com_TrustedCertificate.cer
ren cic-serv1PublicKey.bin cic-serv1.example.com_PublicKey.bin
ren cic-serv1PrivateKey.bin cic-serv1.example.com_PrivateKey.bin
-
In the Windows Control Panel, start the Services application.
-
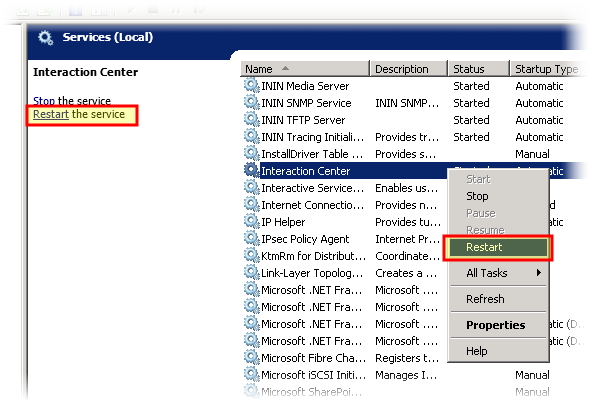
Restart the Interaction Center service by right-clicking it and selecting Restart from the resulting context menu or selecting the Restart hyperlink on the left side of the pane.
The CIC server restarts and uses the new HTTPS certificate that you generated.