


- Contents
SSO Identity Providers Technical Reference
Replace the CIC HTTPS certificate with an externally-generated certificate
If you have generated your own HTTPS certificate outside of CIC or if you use one generated by a third-party entity, you can use it on the CIC server (service provider).
Third-party certificates and Certificate Authorities
You can use a Certificate Signing Request (CRS) to obtain a signed certificate from a Certificate Authority (CA).The CSR generates a Private Key, which you must keep secure, and a certificate containing a Public Key.To generate a CSR, you must provide the following information:
|
Organization |
Usually, the exact legal name of your company or organizational entity. |
|
Organizational Unit |
The department or division of the organization that will use the certificate, such as IT or PureConnect Customer Care. |
|
Common Name |
Usually, the Fully Qualified Domain Name of the service that will use the certificate.For devices that do not use a name, use the IP address of the device as the Common Name. |
Some other information, such as country, city, state, may be required by the CA to which you submit the CSR.Additional information that could be included in the certificate, such as an e-mail address is optional.
The method through which you generate a CSR and the information required can vary between different CAs.Some CAs provide utilities that you can download to generate the CSR.You can also use other third-party tools, such as OpenSSL or the certreq command on Windows Server.
Note: Genesys does not provide technical support for third-party tools through which you generate a CSR.Consult the CA or vendor of these tools for assistance.
Once you have generate a CSR with a .req file extension, you can submit it to your selected CA.The method through which you submit your CSR is dependent on your selected CA.When the CA returns the signed certificate, you can install it on your CIC server.
An advantage of using third-party or self-generated certificates is that you do not have to install the certificate that is automatically generated by the CIC server into all client workstations.Client workstations can validate the CA signed certificate through existing entries in their own root certificate stores.
Procedure
After you have received your signed certificate from your selected Certificate Authority, or if you have generated your own certificate for use, do the following steps to install the certificate on the CIC server for Single Sign-On operations:
Important!
If the certificate was generated on another Windows server, you must create
a .PFX (PKCS#12 format) file, which contains the Private Key, the Public
Key, and the certificate (signed container for the public key) so that
you can import it into another Windows server, such as the CIC server.You
can use various tools to generate the .PFX file, including the Microsoft
Management Console Certificates snap-in, OpenSSL, and the ssl_app-w32r-5-0.exe
file in the \I3\IC\Server directory.
-
Copy the .PFX file to the CIC Server.
-
On the CIC server, open a Command Prompt window with Administrator privileges.
-
If necessary, change to the drive where the CIC server software was installed by entering and executing the following command:
DriveLetter:
DriveLetter is the letter representing the partition or hard drive where the CIC server software was installed.By default, the CIC server software is installed on the D: drive.
-
Navigate to the \I3\IC\Server directory using the cd command as follows:
cd \I3\IC\Server -
Export the certificate from the .PFX file using the following command:
ssl_app-w32r-5-0.exe pkcs12 -in PFXFile.pfx -nokeys -out PFXCertificateFile_Certificate.cer -nodes
PFXFile is a variable representing the drive, directory path, and file name of the .PFX file that you copied to the CIC server.Example: D:\MyPFXFile.pfx
PFXCertificateFile is a variable representing the FQDN of the CIC server.Example:cic‑serv1.example.com_Certificate.cer -
If you use non-self-signed certificates (there are additional certificates in the chain), do the following additional steps:
-
Execute the following command to export the CA certificate file in DER format:
ssl_app-w32r-5-0.exe pkcs12 -in PFXFile.pfx -nokeys -out PFXCACertificateFile_Certificate.cer ‑nodes ‑cacerts
PFXFile is a variable representing the drive, directory path, and file name of the .PFX file that you copied to the CIC server.Example: D:\MyPFXFile.pfx
PFXCACertificateFile is a variable that you can name freely. -
Execute the following command to convert the exported CA certificate to x509 (PEM) format:
ssl_app-w32r-5-0.exe x509 -in PFXCACertificate.cer -out CACertificate.cer
PFXCACertificate is a variable representing the drive, directory path, and file name that you chose in step a.
CACertificate is a variable that you can name freely. -
Using a text editor, open the CA certificate (CACertficiate.cer) that you exported in step a.
-
Copy all of the text to the Windows clipboard by pressing the Ctrl+C key combination on your keyboard.
-
In the text editor, open the certificate (PFXCertificateFile_Certificate.cer) that you exported in step 5.
-
Place the cursor at the end of the contents of the certificate and press the Ctrl+V key combination to append the contents of the CA certificate from the Windows clipboard.
-
Save the certificate file (PFXCertificateFile_Certificate.cer) and close the text editor.
-
Export the Private Key from the .PFX file by executing the following command:
ssl_app-w32r-5-0.exe pkcs12 -in PFXFile.pfx -nocerts -out PFXPrivateKey_PrivateKey.bin ‑nodes
PFXFile is a variable representing the drive, directory path, and file name of the .PFX file that you copied to the CIC server.Example: D:\MyPFXFile.pfx
PFXPrivateKey is a variable that you can name freely. -
Convert the Private Key that you exported from the .PFX file to the RSA format by executing the following command:
ssl_app-w32r-5-0.exe rsa -in PFXPrivateKey.bin -out PrivateKey_PrivateKey.bin
PFXPrivateKey is a variable representing the name you specified in step 7.
PrivateKey is a variable representing the FQDN of the CIC server.
Example:cic‑serv1.example.com_PrivateKey.bin
Important!
The file name of the Private Key (.bin) must match the file name of the
certificate (.cer) that you exported in step 5.
-
Export the Public Key from the Private Key by executing the following command:
ssl_app-w32r-5-0.exe rsa -in PrivateKey_PrivateKey.bin -out PublicKey_PublicKey.bin -RSAPublicKey_out
PrivateKey is a variable representing the FQDN of the CIC server.Example:cic‑serv1.example.com_PrivateKey.bin
PublicKey is a variable representing the FQDN of the CIC server.Example:cic‑serv1.example.com_PublicKey.com
-
In the \I3\IC\Certificates\HTTPS directory, make backup copies (in a different directory) of any existing certificates.
-
Copy the following files to the \I3\IC\Certificates\HTTPS directory:
- CIC_server_FQDN_Certificate.cer
Example: cic-serv1.example.com_Certificate.cer -
CIC_server_FQDN_PrivateKey.bin
Example: cic-serv1.example.com_PrivateKey.bin -
CIC_server_FQDN_PublicKey.bin
Example: cic-serv1.example.com_PublicKey.bin
CIC_server_FQDN is a variable representing the FQDN of the CIC server.
-
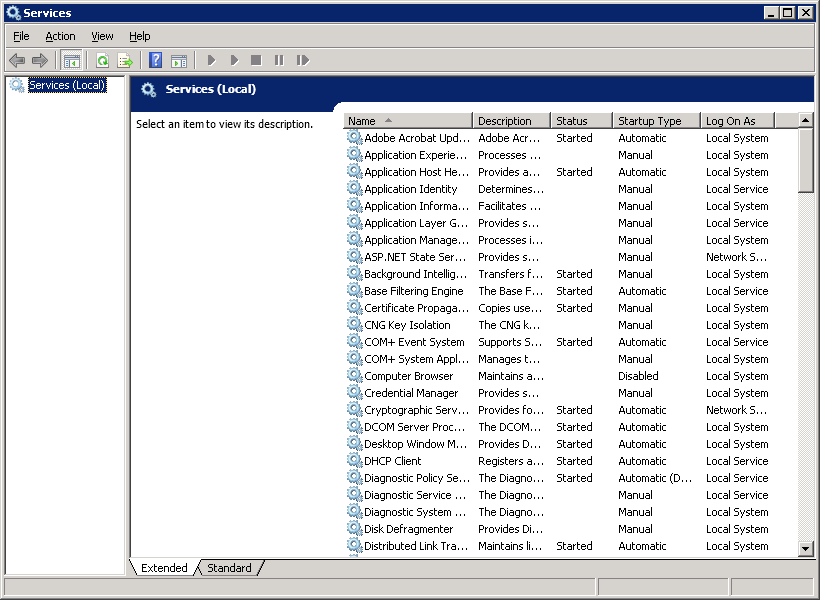
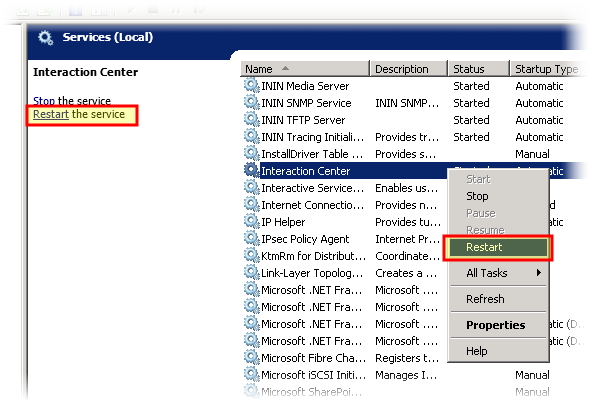
In the Windows Control Panel, start the Services application.
-
Restart the Interaction Center service by right-clicking it and selecting Restart from the resulting context menu or selecting the Restart hyperlink on the left side of the pane.
The CIC server restarts and uses the new HTTPS certificate that you exported.