


- Contents
Interaction Connect Help
Configure a WhatsApp channel
A channel represents a corporate WhatsApp account. CIC routes direct messages on the selected WhatsApp account to the selected workgroup. You can create only one WhatsApp channel. If you try to create more than one channel, the previous channel is overwritten.
Note: You must enable Social Media and log on to your Social Media account before you can configure your WhatsApp channel.
-
Expand the WhatsApp section and click Add WhatsApp Account.
- Log on to an existing corporate WhatsApp account.
Note: This is the account for your corporate WhatsApp direct messages. Authorizing the GenesysSocialEngagement app enables the Genesys hub to route WhatsApp direct messages to appropriate workgroup as interactions.
Result: This adds the WhatsApp account to the Account drop down list.
-
Enter the Phone Number for the new WhatsApp channel.
Note: Enter the phone number in E.164 International Standard Format: +(country code) <number>. Do not enter any spaces between the digits in the phone number; for example, +13175555555).
-
Supply the WABA Certificate for this account.
WABA is the WhatsApp Business Account. This is the Certification Authority (CA) certificate used for the SSL configuration of both the WhatsApp Business API Client and Webhooks. (see https://developers.facebook.com/docs/whatsapp/api/certificates/).
-
For Authentication Method, select Voice or SMS.
Note: If you select Voice, you receive a call unless the Phone number you use is configured for Voicemail only.
-
-
Click Create.
-
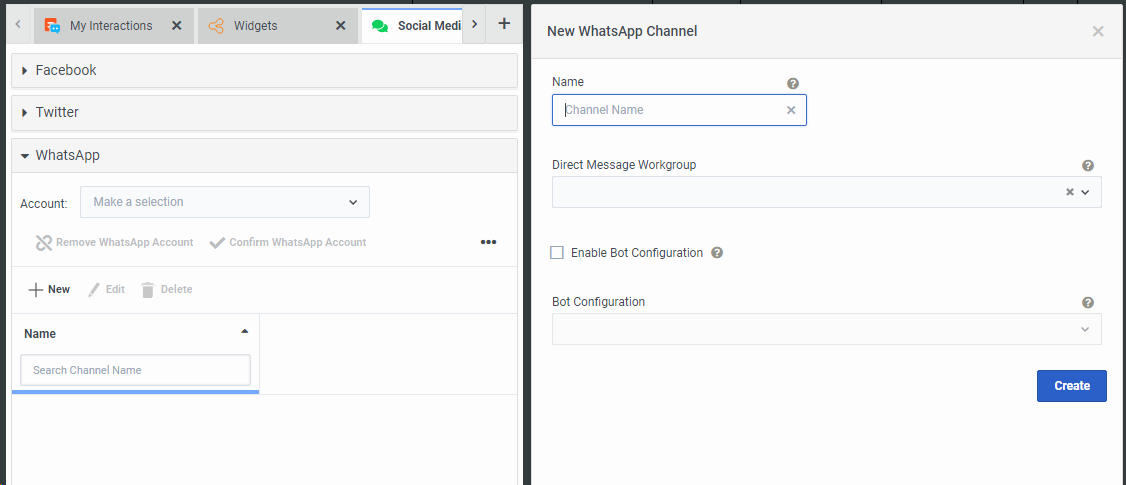
In the Social Media view, in the Account dropdown list, select the WhatsApp account.
-
In Name, type a name for this WhatsApp channel.
Note: Use this label to organize your WhatsApp channels.
-
To enable bot configurations to incoming Social interactions on a channel:
-
Check the Enable Bot Configuration box.
-
Select appropriate bot from Bot Configuration drop-down list for which bot configurations should be enabled.
-
Note: You must configure a bot from Bot View before you can enable the Bot configuration. (For more information, see Configure a Bot). Once you complete the enabling of bot configuration in social media, update the handlers ‘CustomSocialMediaDirectMessageChatBotRouting.ihd’ and ‘CustomSocialMediaDirectMessagePostChatBotRouting.ihd’ on the IC server for customization and publish handlers.
-
Click Create.
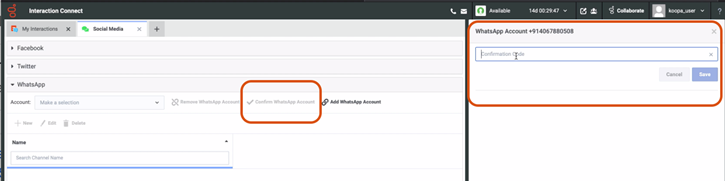
Result: A Confirmation Code panel appears.
-
Enter the confirmation code you received via the Authentication Method you selected and click Save.
Result: The new WhatsApp channel name appears in the Social Media view.
Note: If you encounter an error message while creating the WhatsApp channel, the error may have occurred due to timeout. It may have taken too long to get the confirmation code. The integration may have been created anyway. Try reloading the page, selecting the phone number and clicking the Confirm WhatsApp account button. If there is any other issue, contact the Genesys Customer Care team for assistance.
Tip: You can edit or delete the WhatsApp channel by selecting its label and clicking Edit or Delete in the Social Media view. If you delete a WhatsApp channel, wait for 15-20 minutes before creating another channel with the same phone number. If you encounter any errors while creating, editing, or deleting the WhatsApp channel, always try reloading the page and trying again before calling Customer Care.
Related Topics