- Contents
Interaction Attendant Help
Add Speech Recognition keywords or phrases for Inbound Call Operations
For every inbound call operation, you can enter keywords and phrases a caller might use to verbally indicate the location to which they want to transfer. You can choose from a list of languages, and you can enter multiple words and phrases, particularly useful if callers might use different terminology for the same destination. For example, callers who want to reach the customer service department might say “customer service”, “customer support”, “support”, “product assistance”, and so on. You can also direct the system to immediately send the caller to the current node if the speech recognition engine matches the verbal request anywhere within the current schedule. See To configure speech recognition for inbound call operations below.
If the inbound call operation is a menu, you have the additional option to modify confidence levels, timeouts, and which messages and in what order to play them when the speech recognition engine does not recognize the caller’s verbal request. See To configure speech recognition for menu operations below.
To configure speech recognition for inbound call operations
-
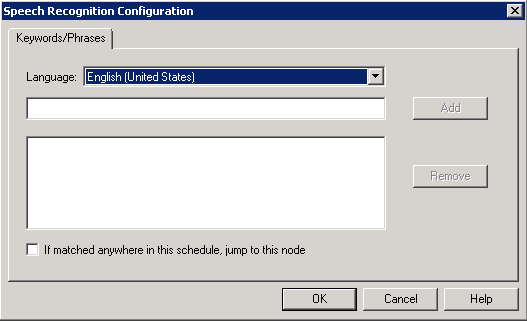
Select the desired inbound call operation and click Configure Speech Recognition . The Speech Recognition Configuration dialog box for inbound call operations opens:

-
To change the default language for speech recognition, click the arrow at the end of the Language drop-down list and select the desired language.
-
To add a keyword or phrase, type the word or phrase in the blank field below the Language drop-down list and click Add or press Enter on the keyboard.
-
Repeat step 3 for each keyword or phrase you want to add.
-
To remove a keyword or phrase, select the word or phrase from the list and click Remove.
-
To immediately send the caller to the current menu operation if the speech recognition engine matches the verbal request anywhere in the current schedule, select the If matched anywhere in this schedule, jump to this node check box.
-
To save your changes and close the Speech Recognition Configuration dialog box, click OK.
To configure speech recognition for menu operations
-
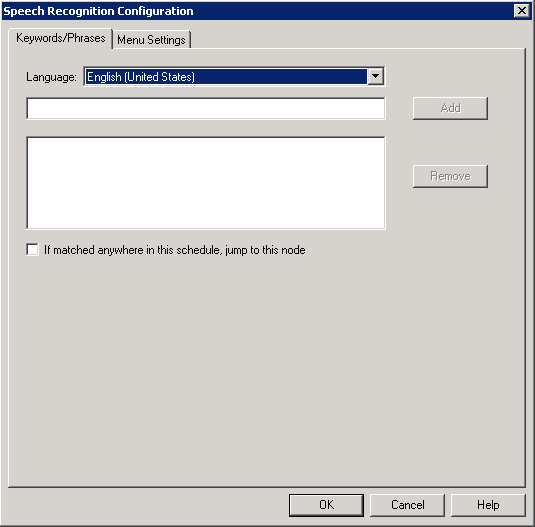
Select the desired menu and click Configure Speech Recognition. The Speech Recognition Configuration dialog box for menu operations opens:

-
On the Keywords/Phrases tab, to change the default language for speech recognition click the arrow at the end of the Language drop-down list and select the desired language.
-
To add a keyword or phrase, type the word or phrase in the blank field below the Language drop-down list and click Add or press Enter on the keyboard.
-
Repeat step 3 for each keyword or phrase you want to add.
-
To remove a keyword or phrase, select the word or phrase from the list and click Remove.
-
To immediately send the caller to the current menu operation if the speech recognition engine matches the verbal request anywhere in the current schedule, select the If matched anywhere in this schedule, jump to this node check box.
-
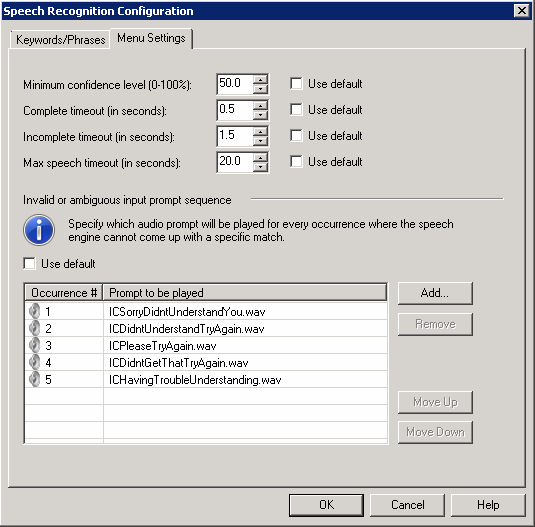
To configure confidence levels, timeouts, and which messages and in what order to play them when the speech recognition engine does not recognize the caller’s verbal request click the Menu Settings tab:

-
Select the preferred confidence and timeout levels:
-
In the Minimum confidence level area, clear the Use default check box and use the up and down arrows to select the scoring percentage the phrase must receive to achieve a successful match.
-
In the Complete timeout area, clear the Use default check box and use the up and down arrows to select the maximum time in seconds to wait after caller provides a valid speech input and stops talking before the system presents a positive match.
-
In the Incompletetimeout: area, clear the Use default check box and use the up and down arrows to select the length of time to wait after caller stops talking and when the verbal selection is invalid before the system indicates no match is found.
-
In the Speech timeout area, clear the Use default check box and use the up and down arrows to select the length of time allotted to the caller to make his or her verbal selection before the system times out and either prompts the caller to make a selection or disconnects the call.
-
Configure which messages and in what order to play them when the speech recognition engine does not recognize the caller’s verbal request:
-
In the Invalid or ambiguous input prompt sequence area, clear the Use default check box.
-
To add a prompt, click Add and in the Add Audio Prompt dialog, click the arrow at the end of the drop down list, select a prompt, and click OK. Or click Browse to search for the desired prompt and then click OK.
-
To remove a prompt, select the prompt from the list and click Remove.
-
To change the order in which the prompts are played to the caller, select the prompt and click Move Up or Move Down until the prompt is placed in the desired position.
-
To save your changes and close the Speech Recognition Configuration dialog box, click OK.


