


- Contents
Interaction Process Automation Designer Help
Database Action – Delete Row(s)
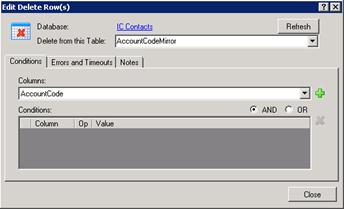
Use the Edit Delete Rows dialog to delete selected rows in a database table.
When you pass values to a standard database action such as this one, do not use the ToSql() function to convert the values. IPA Designer does any required conversion automatically. If you use ToSql() with standard database actions, it causes an error.
Note: To access CIC Data Sources in your process designs, you must have the user rights to access them. If you get an error message when you try to access a data source from a process design, contact your system administrator to obtain the required user rights. Users of the process must also have rights to access the data sources.
To create an SQL DELETE statement:
-
In the Select from this Table list box, select the desired database table.
-
On the Conditions tab, select a column in the Columns list box (see figure):
-
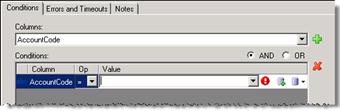
Click the Plus icon to add a condition (see figure).
|
|
New Variable: Lets you create a new variable to use for the criterion value. |
|
|
Value List Box: Displays the Value list box, in which you can choose to use a literal value, a variable, or a calculation. |


-
In the Op list box, select a Boolean operator to use.
-
In the Value column, enter a value to use as a selection criterion. Either:
-
Click the Value List Box icon to enter a literal text value, a variable, or a calculation.
-
Click the New Variable icon to create a new variable for the value.
Tip: When the New Variable icon is available, you can also type in the box to find a variable or use the drop-down list to browse for a variable.
-
Repeat steps 3-5 to add more selection criteria if needed.
-
If you have multiple criteria, select the AND or OR radio button.
If you select AND, the SELECT statement will search for table rows that match all of your criteria. If you select OR, the SELECT statement will search for table rows that match any of your criteria. For more information, see Understanding Boolean Expressions. -
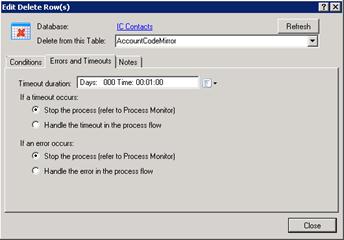
Configure Errors and Timeouts (see figure):
-
Click the Errors and Timeouts tab.
-
In the Timeout Duration text box, enter the amount of time that the process should try to do the database action before giving up.
-
Select the radio buttons for the desired timeout and error handling methods.
-
-
If desired, click the Notes tab and add notes about the database action.
-
Click Close.