


- Contents
Language Pack Technical Reference
Use Setup.exe to Install Localized Workstation Applications
This procedure describes how to install IC User Applications (64-bit) with the Spanish (Latin America) language installed. The procedure for the other localized client workstation installs is identical.
To install localized IC User Applications
-
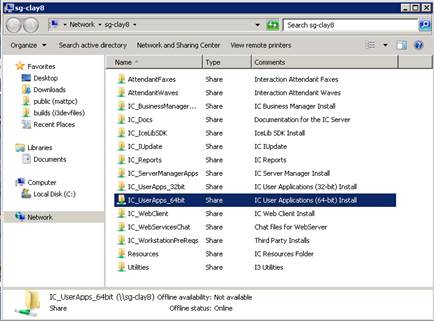
On the client workstation, click Start. In Search programs and files, type \servername where
servernameis the IC Server name. The shares on the IC server appear. -
Double-click the IC User Apps install share appropriate for the workstation. For example IC_UserApps_64-bit.
-
Review the contents of the IC User Apps install share and the Language Plugins subdirectory.
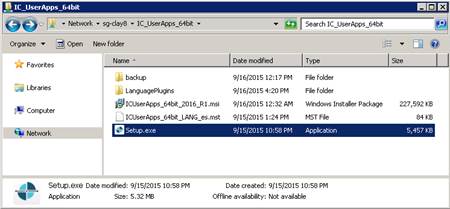
In this example, the IC_UserApps_64bit share contains:
-
Backup directory
-
LanguagePlugins directory
-
ICUserApps_64bit_2016_R1.msi install
-
Spanish (Latin America) localized string ICUserApps_64-bit_LANG_es.mst for the IC User Apps 64-bit install GUI
-
Setup.exe utility
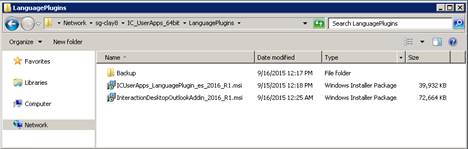
In this example, the LanguagePlugins directory contains:
-
Backup directory
-
ICUserApps_LanguagePlugin_es_2016_R1.msi
-
InteractionDesktopOutlookAddin_2016_R1.msi install
-
-
Double-click Setup.exe in the IC User Apps install share.
-
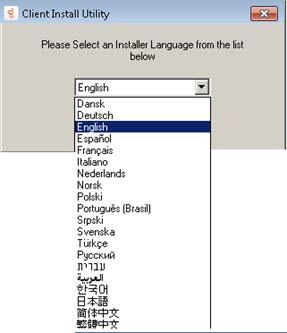
On the following Setup.exe page, click the language in which you want the IC User Applications install to display and then click OK.
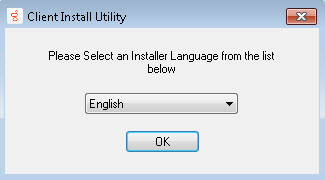
The languages available in the list box are based on the Language Packs installed on the IC Server. (English is always included.) In this example, since the Spanish Language Pack is installed on the IC server, Spanish is available to select.
Note:
This page appears only in the initial run of Setup.exe in the IC_UserApps_64bit share. The next time you run Setup.exe, the IC User Applications install appears in the language that you selected the first time you ran Setup.exe.
-
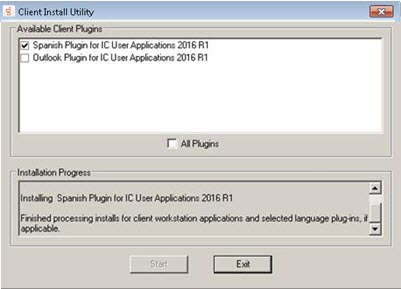
On the next Setup.exe page, select the check box for each Client Language Plugin to install or select the All Plugins check box to install all available plugins.

-
Review the message in the Installation Progress box. As the message indicates, Setup.exe applies the Client Language Plugins and other Client Plugin, as applicable.
-
Click Start. The IC User Applications (64-bit) install begins.

-
Click Next.
-
On the Custom Setup page, select the desired applications/features as necessary and then click Next.
Note:
Starting with CIC 2015 R3, Interaction Desktop replaces Interaction Client .NET Edition as the primary CIC client. Starting with CIC 2016 R1, Genesys removed Interaction Client .NET Edition.

The default applications/features are Interaction Desktop, Interaction Voicemail Player, and Interaction Fax. Note that Additional Features expands to display an optional CIC client feature. Select or clear applications/features as necessary.
For more information, see the PureConnect Installation and Configuration Guide at https://help.genesys.com/cic/mergedProjects/wh_tr/desktop/pdfs/Installation_Configuration_Guide.pdf.
-
If you selected SIP Soft Phone or Interaction Screen Recorder Capture Client on the Custom Setup page, the QoS Requirement page appears.
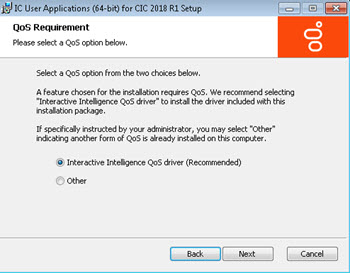
- Interactive Intelligence QoS driver: Default and recommended option. If selected, the install adds the "Interactive Intelligence" certificate to the Trusted Publishers list, and then installs the driver. In most cases, adding the certificate to the Trusted Publishers list keeps the Windows Security dialog box from displaying and asking the user to trust the certificate manually.
- Other: If selected, the PureConnect certificate is not added to the Trusted Publishers list and driver is not installed. We recommend that users do not select this option unless specified by the administrator. Selecting this option implies that another form of QoS is used at the site.
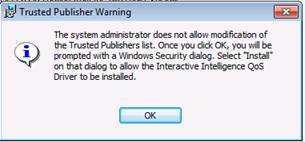
If the system administrator does not allow modification of the Trusted Publishers list, the Windows Security dialog box appears. The following message appears first, explaining what to do when the Windows Security dialog box appears.
For more information about the Interactive Intelligence QoS driver, see the KB article https://my.inin.com/Support/Pages/KB-Details.aspx?EntryID=Q131006915300479.
-
On the QoS Requirement page, select an option and then click Next.
-
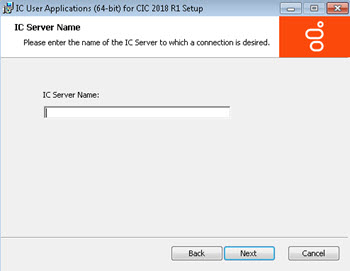
On the IC Server Name page, type the name of the host IC Server and then click Next. We recommend using a fully qualified domain name (FQDN), not a short name.
-
Click Install.

As the installation continues, a status bar indicates the progress.
-
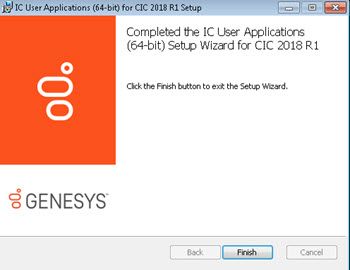
When the installation completes, click Finish.
-
The Setup.exe screen appears. Setup.exe proceeds to install the specified client language plugin.
-
When the installation completes, click Exit.
-
Do one of the following:
-
If Interactive Update Client is installed on the workstation, for example, you installed it as part of a new CIC 2015 R1 or later client workstation applications installation, the Interactive Update Client service checks for and applies any available updates, following the completion of the localized IC User Applications install.
-
If Interactive Update Client is not installed on the workstation, install it now by running Setup.exe in the IC_Update share on the IC Server. This step is necessary to ensure that Interactive Update can check for and apply localized IC User Applications updates in future releases.
In the first Setup.exe page, click the language in which you want the Interactive Update Client install to display and then click OK.
Unlike the other client workstation applications, all currently supported languages (English included) are available to select.
Note:
This page appears only in the initial run of Setup.exe in the IC_IUpdate share. The next time you run Setup.exe, the Interactive Update Client install appears in the language you selected the first time you ran Setup.exe.
-
-
When the installation completes, you can run the IC User Applications from shortcuts on the desktop or from Start->Programs->Genesys.