


- Contents
PureConnect Reporting Technical Reference
Step One: Interaction Designer - Set the Values of Custom Call Attributes
Creating and assigning values to custom columns is a way of storing information with a call as it moves through the system, while being processed by multiple handlers. Calls already have many attributes when they are created, including Call ID, Direction, and Type.
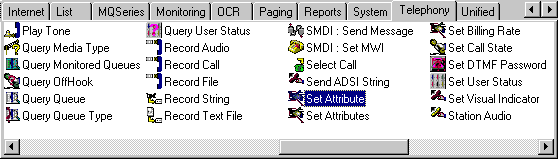
The tool we will use for creating and assigning call attributes is Set Attribute (a Telephony tool) shown in the following figure. Using Set Attribute, you can create a new call attribute and assign a value to that attribute. You will use a Set Attribute step for each attribute you want to assign. In this example we will use the Set Attribute tool in a monitor handler that starts when there is a new incoming call.
First, open the handler in Interaction Designer and double - click the Set Attribute tool.
When you double-click the Set Attribute tool, Interaction Designer
places the object for this tool in your handler.
Right-click the tool object, and select Properties. Enter the following information in the property page parameters:
-
Enter the Call Attribute Name in the Inputs properties page.
-
Enter the Call Attribute Value in the Inputs properties page.
-
Click OK to save your changes.
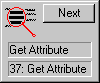
You have now created and assigned a new call attribute. Next, put the variable in scope for this new call attribute by using Get Attribute.