


- Contents
PureConnect Reporting Technical Reference
Using Crystal Reports
-
Open the template you want to modify in Crystal Reports. After the template opens, make sure you are connected to the desired table in the CIC database.
-
Save the template using a different file name. When modifying the report templates that ship with CIC, always save the customized template with a different name. This is to safeguard your changes from future upgrades to the existing templates. If you saved your changes in the shipping template, a future upgrade might overwrite your customizations.
-
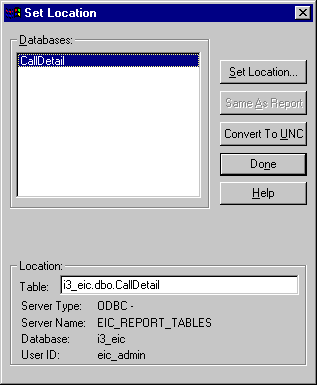
From the Crystal Reports Database menu, choose Set Location. The Set Location Dialog box appears, as shown in the following figure. This dialog shows which log this template retrieves information. For example, if you opened the USERDETAIL.RPT template, you would see that it requires the CallDetail_viw (Alias CallDetail) from i3_IC database.
-
If you need to specify the location of the table, click Set Location. The Choose SQL Table dialog box is displayed.
-
Specify the table your template requires, and click OK.
-
Verify that your template can view all the fields in the table. Since you are using a custom column in the table, make sure that this column is available in Crystal Reports. From the Database menu, choose Verify Database. Now you can add the field that contains the custom call attribute information.
-
From the Insert menu, choose Database Field. The Insert Fields dialog is displayed, as shown in the following figure. From this dialog box, you can insert the field, or create a formula that performs calculations on the data within the field. See the Crystal Reports documentation for more information on data manipulation.
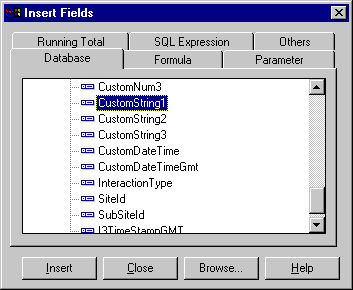
The Insert Fields dialog box displays the columns of your table.