


- Contents
Interaction Recorder Technical Reference
Interaction Recorder Configuration
Configure Interaction Recorder in Interaction Administrator in the Interaction Recorder Configuration dialog.
From the Interaction Administrator tree view, select the Interaction Recorder container, and in the right pane, double-click Configuration. The Interaction Recorder Configuration dialog is displayed.

The Interaction Recorder Configuration dialog includes pages for Recording
Processing, Email, Recording Generation, Key Generation, and Cloud Services
Configuration.
Recording Processing
Use this page to configure recording processing.

Compression Format
Select the compression format for recordings from the drop-down list. If you do not want recording compression, select μ-law (Mono), and your recordings will remain in uncompressed μ-law format.
The available compression formats are:
-
μ-law (Mono)
-
True Speech (Mono)
-
GSM 6.1 (Mono)
-
Opus (Mono)
-
Opus (Dual-channel)
Opus compression formats
When Opus Mono is configured, Interaction Recorder will request Telephony Services (TS) and the Media Servers generate a mono (1 channel) recording containing Opus audio data that will be wrapped in the SASF file container, similar to the other recording compression formats.
Dual-channel format will have separated 2-channels of audio data stored within the recording files, commonly referred to as stereo audio. When Opus Dual-channel is configured, Interaction Recorder will request Telephony Services (TS) and the Media Servers generate a dual-channel (stereo, 2-channel) recording with Opus audio data. The Opus audio data will be wrapped in the SASF file container, similar to the other recording compression formats.
When the Opus mono or Opus dual-channel compression formats are configured, if any pre-2017 R1 Media servers are also configured with the system, the recording compression format will be deprecated back to GSM 6.1, and errors will be logged stating that a non-supported Media server was found.
Opus recordings are not supported on Media servers before 2017 R1.
Important Note
Support for Opus recordings within Interaction Recorder and CIC requires
version 2017 R2 or later client and server-side components. Earlier versions
of the Interaction Recorder Remote Content Servers also do not support
Opus recordings and will result in errors when archiving or exporting
Opus recordings. Opus recordings can be generated within CIC and Interaction
Recorder starting with 2017 R1 or later Media Servers.
Database Processing
Use this utility to initiate the recovery of failed database transactions. Clicking the Recover Errors button makes Interaction Recorder process the PMQ error files. This function can be used when your database has been unavailable and you want to get the data that has been logged into the PMQ error files into the database.
Secure Recording Pause Duration (seconds)
Enter the number of seconds to pause the audio and screen recording when an agent presses the Secure Pause button on the queue toolbar in the CIC clients. The default setting is 20 seconds.
Use this page to configure the Reply To email address that Interaction
Recorder Server uses when sending a recording from an Interaction Recorder
Client.
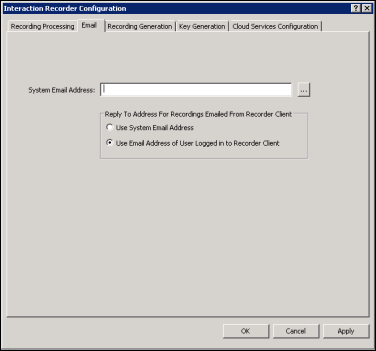
System Email Address
Enter the email address to be used as the Reply To (from) email address when a recording is emailed from Interaction Recorder Client.
-
Select Use System Email Address to use the email addressed specified in the System Email Address box.
-
Select Use Email Address of User logged on to Recorder Client to use the Recorder Client’s user’s email address.
Recording Generation
Use this page to configure Interaction Recorder’s recording generation options.
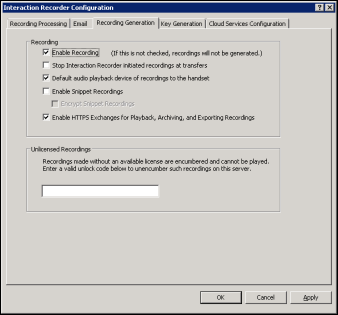
Recording box
Select the options in the Recording box to configure how Interaction Recorder server initiates recordings.
Enable Recording
Select the Enable Recording check box to record all interactions that qualify for recording based on Interaction Recorder Initiation Policies.
Note If this box is not selected, recordings will not be generated.
Stop Interaction Recorder initiated recordings at transfers
Select this check box to stop recording a call when it is transferred. If this box is selected, each transferred segment of a call will be its own recording and database entry.
If this box is clear (not selected), recording continues after the transfer. This applies only to calls that were defined to be recorded by the Initiation Policy. Also, if this box is not selected, it is not possible to play only a segment of the call or skip to a specific segment.
Default Audio playback device of recordings to the handset
Select this check box to set the handset as the default audio playback device for a recording. When listening to a recording, the audio playback device can be changed on the Audio menu in the Interaction Recorder Audio Playback window, in IC Business Manager.
Enable Snippet Recordings
Select this check box to allow Interaction Recorder Snippet Recordings
in Interaction Desktop and Interaction Connect.
To encrypt these recordings, select Encrypt Snippet Recordings.
Enable HTTPS Exchanges for Playback, Archiving, and Exporting Recordings
Select this check box to use HTTPs for: communication and traffic for
playback, archiving; and exporting of call, chat, email, and social media
recordings.
Note The S3 Bucket name cannot
contain periods as Amazon's SSL wildcard certificate only matches buckets
that do not contain periods.
Unlicensed Recordings box
Encumbered recordings cannot be played back. Recordings are encumbered if the user or station was not properly licensed for Interaction Recorder when the recording was made. When the Recording is Encumbered search attribute is used, Encumbered recordings are listed in the search results in the Interaction Recorder client search results view. The user or station that is not properly licensed is displayed in the Local Party Name column.
To unencumber a recording, first fix the licensing for the user or station that has encumbered recordings. Next, contact PureConnect Customer Care to get an unencumber key to unlock the encumbered recording that needs to be played back. Then in the Unlicensed Recordings field, enter a valid unlock code to unencumber the encumbered recordings on the server.
Key Generation
Use this page to generate a Master Key for Recording Encryption. A Master
Key securely protects Recording Keys (media keys), which are generated
every time a media file is recorded.
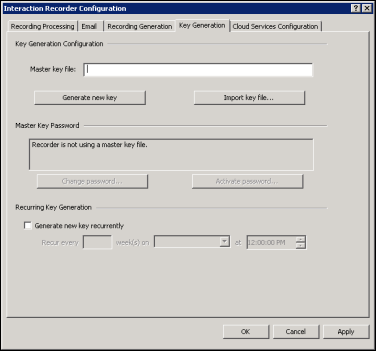
Key Generation Configuration box
The first step in generating a Master Key is to specify the location of the Master Key file. Master Keys are stored in the Master Key file and the Master Key file is encrypted using the Master Key Password.
Master Key File
In the Master Key File box, specify a location and file name for the Master Key File. When configuring this field, press F1 for specific Help on Key Generation configuration. For more information on recording encryption, see Appendix A: Recording Encryption.
Generate New Key
Click Generate New Key to manually generate a new Master Key. When you click OK or Apply for the first time, an initial Master Key is created and appended to the Master Key file. You can also use this button to manually create a new key and append it to the Master Key file. For additional information on administering the Master Key File, see Appendix A: Recording Encryption.
Import Key File
Click Import key file to import a key file and merge it with
the existing Master Key File. An Open dialog is displayed to specify the
location of the file to be imported. When the key file is successfully
imported, a confirmation message is displayed. If the key file import
fails, an error message is displayed. When the Master key file is password
protected, you will be prompted to enter the Master Key Password.
Import key file can be used to import a 3.0 Recorder key file to
2015 R1 and later. It can also be used to import a 2015 R1 or later key
file to a 2015 R1 or later server, to replace a bad key file. For example,
if a switchover pair did not share a key file location.
Master Key Password box
Use the Master Key Password box to password protect the Master Key File and securely encrypt master key data. To create, change, or deactivate a Master Key Password, the user must be assigned the Security Right Master Key Password Administrator.
Important Note
PureConnect Customer Care cannot recover encrypted recordings if a Master
Key Password is lost.
Change Password
Click Change password to create a new Master key password or to change the current password.
Deactivate/Activate Password
When you create a new Master key password or change the password, the password is Activated, and the Deactivate password button is displayed. To deactivate the password, click Deactive password. To activate the password, click Activate Password, and on the Activate Password dialog, type the password and click Activate.
Recurring Key Generation box
Use the Recurring Key Generation box to configure parameters to automatically generate a new Master Key on a recurring basis.
Generate New Key Recurrently
-
To automatically generate a new Master Key, select the Generate new key recurrently check box.
-
To schedule an automatic key generation: in the Recur every box, type the number for the weekly recurrence; in the drop down-list, select the day of the week to generate the key; and in the time field, select the time of day to run the key generation.
For more information on recording encryption and key generation, see Appendix A: Recording Encryption.
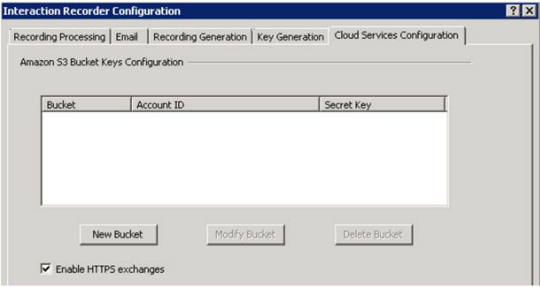
Use this page to configure Interaction Recorder’s Cloud Service options.
Using Amazon Simple Storage Service
To use the Amazon Simple Storage Service (Amazon S3) to store your recordings, you will need an Amazon Web Services (AWS) account. You will be downloading your AWS security access key to use when creating a New Bucket in Interaction Recorder’s Cloud Services Configuration. For information on Amazon Simple Storage Service, see Amazon Web Services at http://aws.amazon.com/s3
Here are the steps to create your AWS security access key.
-
Open an AWS account.
-
Under your AWS account, go to Security Credentials. Create your security access key, and download the key. The download is a .csv file that contains the AWSAccessKeyID (20 characters) and the AWSSecretKey (40 characters). Be sure to download this file as these are the keys you will be using to create a New Bucket in Interaction Recorder Configuration.
Next, create an AWS S3 bucket to store your recordings.
-
Go to the AWS Services tab and select S3.
-
Create an S3 Bucket.
-
If you choose, you can create a folder within the S3 bucket for recordings.
Now, using the AWS Policy Generator, grant permissions for the following AWS S3 Object Operations, from the Actions drop-down list.
-
GetObject
-
PutObject
-
DeleteObject
Amazon S3 Bucket Keys Configuration Box
To use Amazon S3 when creating storage and archive Retention Polices in Policy Editor, first configure your bucket keys in Interaction Recorder Configuration in Interaction Administrator.
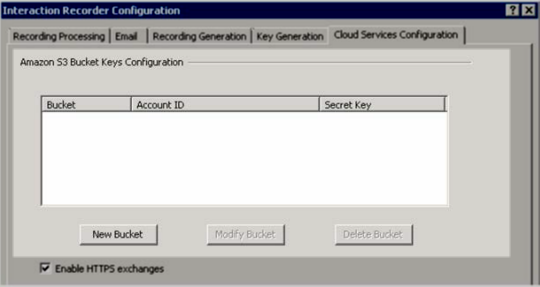
New Bucket
Follow these steps to configure a new bucket in Cloud Services Configuration.
-
Click New Bucket. The S3 Keys Editing dialog is displayed.
-
On the S3 Keys Editing dialog, type a Bucket name.
-
Type the Account ID and Secret Key from your AWS account downloaded key file. The Account ID is the AWSAccessKeyID, and the Secret Key is the AWSSecretKey.
-
Select the Region Endpoint.
-
Click Test to validate the proper access level for the specified account credentials.
Modify Bucket
To modify an existing bucket, select the bucket and click Modify Bucket. The S3 Keys Editing dialog is displayed. You can modify the Account ID and the Secret Key.
Delete Bucket
To delete an existing bucket, select the bucket and click Delete Bucket.
Note
You can also create a new bucket when creating a Retention Policy in Policy
Editor.
Enable HTTPS exchanges
All Amazon S3 communication uses HTTPS or HTTP protocol. Select the
Enable HTTPS exchanges check box for HTTPS protocol.
Note The S3 Bucket name cannot
contain periods as Amazon's SSL wildcard certificate only matches buckets
that do not contain periods.