


- Contents
Interaction Dialer Manager Help
Add a Schedule
The procedure explains how to define a weekly schedule and any exceptions that apply to that schedule.
-
In Interaction Administrator, expand the Advanced Interaction Dialer container. Then select the Schedules container.
-
Click Add to create a new schedule entry.
-
An entry titled New Item appears. Select the Details tab.
-
To define a Weekly schedule:
-
Expand the Weekly Schedule expander.
-
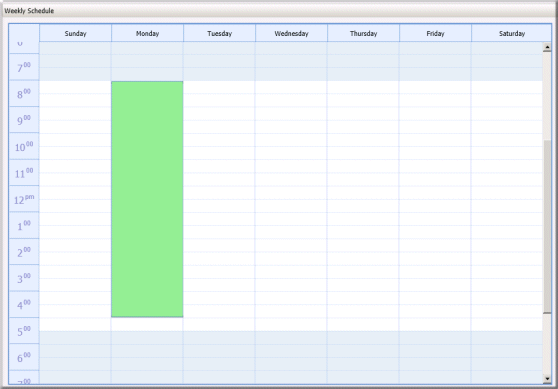
Move the cursor to the day of approximate week and time of day. Then click the left mouse button. A dialog appears to define a time slot.
-
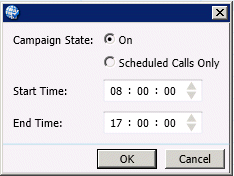
Select a Campaign State for this schedule to use. To place regular and scheduled calls, select On. To place only Scheduled Calls when this schedule is active, select Scheduled Calls Only.
-
Use the spin controls to change Start and End times as needed. Note that 24-notation is used. To stop dialing at 5 pm. For example, you would select 17:00 as the End Time.
-
Click OK. The new time slot appears as a green shaded region in the calendar.
-
Repeat steps 4b-4e to define additional time slots for other days of the week or times of day.
-
-
To define a One-Time Exception (such as a holiday when your business is closed):
-
Click the One-Time Exceptions tab.
-
Click Add. A new exception entry will appear.
-
For the entry, you must set campaign state, start date, end date, start time and end time. Campaign State can be On, Off, or Scheduled Calls Only. Most often, you will select Off to prevent dialing when a schedule exception is in effect.

-
Repeat steps 5b-5c to add additional exceptions, as needed.
-
-
Click Save to save the Schedule.