- Contents
Dialer Configuration
To configure dialer with Genesys Cloud
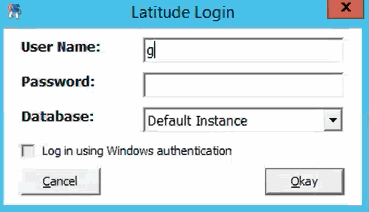
- Click Start > Dialer Configuration. The Latitude Login window appears.

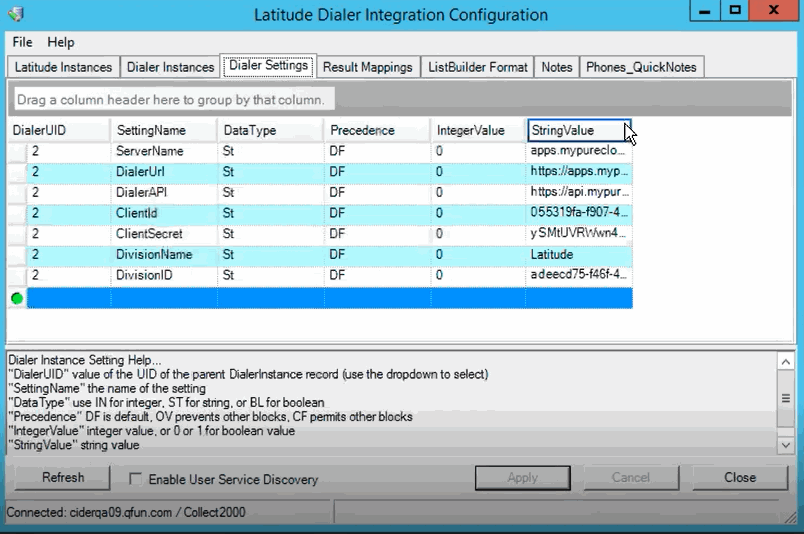
- Type your Latitude administrator credentials and click Okay. The Latitude Dialer Integration Configuration window appears.
Note: On successful setup you can find the Genesys Cloud instances under Dialer Instances tab.
- Click Dialer Settings tab.
Note: You need to enter all the Dialer Settings manually and the setting information will be provided by Genesys Cloud administrator.

-
Configure the Dialer Settings:
-
In the Dialer UID box, Select the value of the UID of the parent Dialer Instance record.
-
In the Setting Name box, type the name of the setting. The Setting Name column must consists of ServerName, DialerUrl, DialerAPI, ClientId, ClientSecret.
Notes:
-
To know more about ServerName, DialerUrl, and DialerAPI, see https://help.mypurecloud.com/faqs/how-do-i-select-my-region/
-
For the created OAuth ClientId, you must enable the Scopes. To know more about ClientId and ClientSecret, see https://help.mypurecloud.com/articles/create-an-oauth-client/
-
In the DateType box, type IN or ST or BL in the box. (For integer - IN, for string - ST, and for boolean - BL)
-
In the Precedence box, type DF or OV or CF in the box. (For default - DF, To prevent other blocks - OV, and to permit other blocks -CF)
-
In the IntegerValue box, type 0 or 1 for the boolean value.
-
In the StringValue box, type the string value provided by Genesys Cloud administartor.
-
Click Apply and then click Close.


