- Contents
Attach a Document to an Account
Use the Documentation panel to attach an electronic document to an account. The document can be any type, such as a Word document, Excel file, text file, or image. If the document is in paper format, see Scan a Document to an Account.
To attach a document to an account
-
With an account displayed in the Work Form, do one of the following:
-
Click the View Scanned Images or Documents icon.
-
From the Info menu, click Documentation.
-
At the top of the Panels section, click the name of the currently displayed panel (for example, Phones, Notes) and then click Documentation.
The Documentation panel appears.
-
Do one of the following:
-
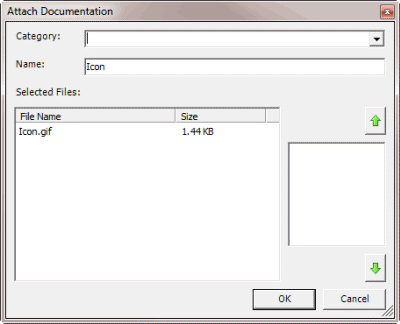
In the Documentation toolbar, click Attach. The Attach Documentation dialog box appears. Locate the file to attach, click it, and then click Open.
-
Drag and drop a file onto the Documentation panel.
Tip: You can select multiple files at once. To select multiple sequential files, hold down the Shift key and click the first and last file to attach. To select multiple non-sequential files, hold down the Ctrl key and click each file to attach.
The Attach Documentation dialog box appears.

Note: The file size indicates the storage space required for a document. Your organization is responsible for establishing attachment policies and allocating server space for attached files.
-
In the Category list box, click an existing category to associate to the document or leave it blank.
-
The document name defaults to the file name. To change the document name, in the Name box, type a new name.
-
If the file is an image file type (such as jpeg, gif, or tiff) and you want to view a thumbnail image of the file, click the file name. The image appears in the box.
-
Click OK.
-
If you added a category, a confirmation dialog box appears. Click Yes. The category isn't visible unless the View Attached Documents permission is set in the Policies Editor.
Related Topics
Document Category Codes


