- Contents
Latitude Console Help
Create a Pool Queue
Use the Create New Pool window to create a pool queue that assigned users can work.
To create a pool queue
-
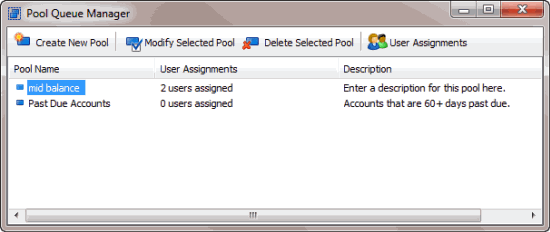
In the Main Menu window, from the Tools menu, click Pool Queue Manager. The Pool Queue Manager window appears.

-
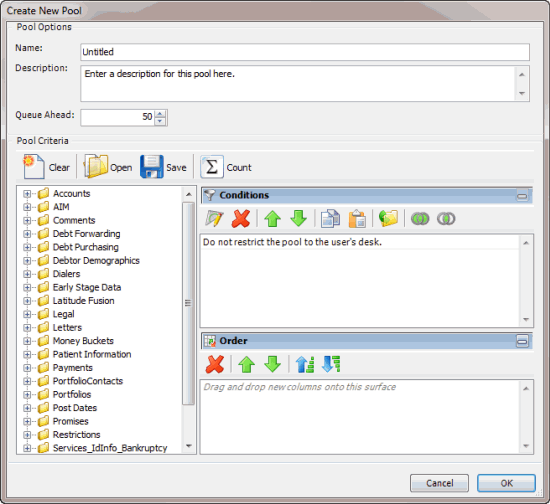
In the toolbar, click Create New Pool. The Create New Pool window appears.

-
In the Pool Options section, do the following:
-
In the Name box, type a name for the pool queue.
-
In the Description box, type a description for the pool queue.
-
In the Queue Ahead box, type or use the arrows to indicate the number of accounts to store in the pool queue. When the system reaches this number, the system retrieves the next batch of accounts from the server and places them in the pool queue. Retrieving accounts in batches optimizes system performance.
-
In the Conditions pane, a condition is included by default to indicate to the system not to restrict the pool queue to the users' desk. If you only want collectors to work accounts that meet the specified criteria and for their current desk, right-click the condition and then click Delete. In the confirmation dialog box, click Yes.
-
Do the following as necessary:
-
In the Order pane, do the steps to Specify the Sort Order for Query Results.
-
To count the number of records that match the selection criteria, in the toolbar, click Count. The results appear in the Query Designer dialog box. Click OK.
-
To save the query, do the following:
-
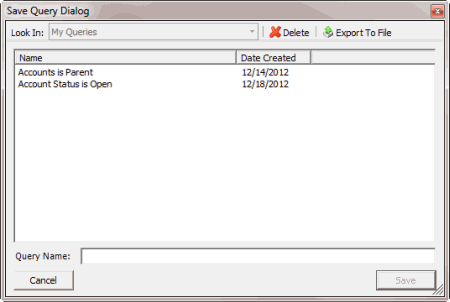
In the toolbar, click Save. The Save Query Dialog box appears.

-
In the Query Name box, type a name for the query and then click Save.
Tip: To overwrite an existing query, in the Name column, click the query to overwrite and then click Save.
-
Click OK.
-
To assign users to the pool queue, do the steps to Assign Users to a Pool Queue.
Related Topics


