- Contents
Credit Bureau Reporting Wizard Help
Create a Credit Bureau Reporting File
Use the Credit Bureau Reporting Wizard to create a text file containing account information to send to a credit bureau. You can automate the creation of the Credit Bureau Reporting (CBR) file and schedule it to run during off-peak hours.
To create a credit bureau reporting file
-
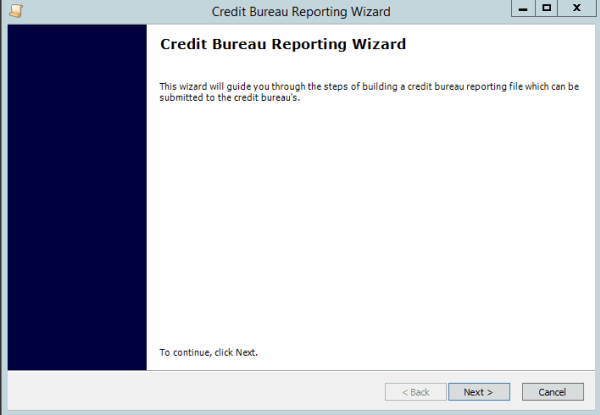
In the Main Menu window, from the Tools menu, click Credit Reporting Wizard. The Credit Bureau Reporting Wizard page appears.

-
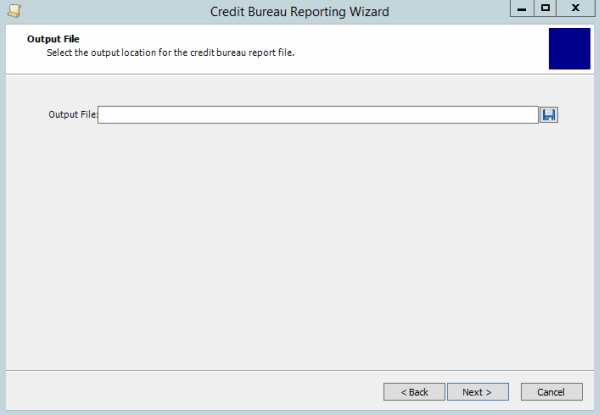
Click Next. The Output File page appears.

-
Do the following:
-
Click the Disk icon. The Select Output File dialog box appears.
-
In the File Name box, change the name of the output file or keep the default name, and then click Save. The system populates the Output File box in the Output File dialog box with the file name.
-
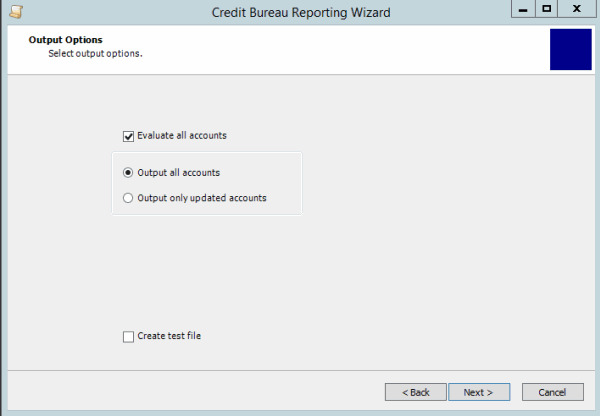
In the Output File page, click Next. The Output Options page appears.

Evaluate all accounts: If selected, a stored procedure runs to reevaluate all accounts in the system to determine whether to report them.
Note: The evaluation could take a while, depending on the number of accounts in your system. Typically, evaluation occurs during end-of-day (Custodian) processing and the system doesn't necessarily require it immediately before file creation.
Output all accounts: If selected, the file includes all accounts valid for credit reporting.
Output only updated accounts: If selected, the file only includes accounts not previously included, with a CBR change pending, or a balance change.
Create test file: If selected, the system sends the output to a test file for your review. The system does not record the results or the history in the database. The test file includes "--TEST--" in the first column of each record to indicate that the file is for testing purposes only. DO NOT submit the file to credit bureaus.
-
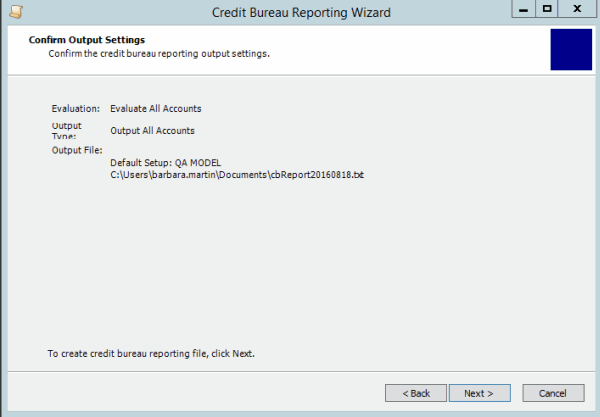
Complete the information and then click Next. The Confirm Output Settings page appears.

-
Verify the information. To change the information, click Back; otherwise, click Next. The system displays the Building Credit Bureau Reporting File page while creating the file. After creating the file, the Credit Bureau Reporting File Completed page appears.
-
Click Finish. You can distribute the file to credit bureaus using any method available to your agency (for example, email or FTP).
Note: If you chose to create a test file, DO NOT submit the file to credit bureaus.


