- Contents
Add a User
Use the User dialog box to add a user. You cannot set a user's password through the add feature. To set the user's password, add the user and then use the edit feature.
To add a user
-
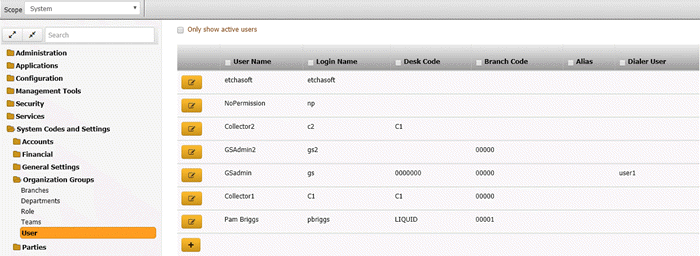
In the Navigation pane, click System Codes and Settings > Organization Groups > User.

Tip: To display active users only in the data grid, click Only show active users.
-
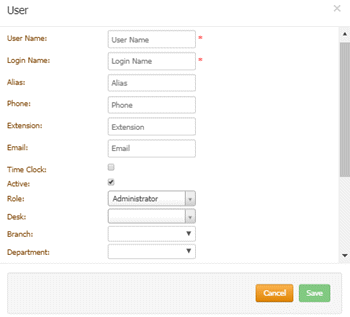
Click the plus sign (+). The User dialog box appears.

User Name: User's first and last name.
Login Name: User's logon name.
Alias: User's alias name such as a shortened version of the first name or a nickname.
Phone: User's telephone number
Extension: User's telephone extension number.
Email: User's email address (for example, jdoe@mycompany.com).
Time Clock: If selected, the system includes the user's logon and logoff times on the User Logon report.
Active: If selected, the user can log on to the system. If cleared, the user cannot log on to the system.
Role: User's role.
Desk: User's desk.
Branch: User's branch.
Department: User's department.
Dialer Login Credentials: Latitude uses these credentials to log on the user to a dialer automatically.
User Name: User's dialer logon name for a PureConnect or Genesys Cloud integration.
Password: User's dialer password for a PureConnect integration. Leave this box blank for a Genesys Cloud integration.
Third Party Credentials: Latitude uses these credentials to log on the user to a third-party system automatically.
User Name: User's logon name for the third-party system.
Password: User's password for the third-party system.
-
Complete the information and then click Save.


