- Contents
Interaction Connect Help
Custom Themes and Forms
You can customize the appearance of any type of Genesys Widget. If needed, you can also change the layout, content, and other features of the Chat Registration form.
Themes
Use a custom theme to change the appearance of Genesys Widgets. Use CSS properties to control non-structural properties such as color and font-family. For information about creating and registering a custom theme, see Styling the Widgets.
You then include this name of your theme in the Custom JSON field on the Widget General Configuration page.
Example 1:
{"main":{"theme":"mytheme","themes":{"mytheme":"cx-theme-mytheme"}}}
Example 2:
In this example, we are modifying the Chat registration form to change the Subject from a textbox to a dropdown with options.
  {
    "webchat": {
      "form": {
        "wrapper": "<table></table>",
        "inputs": [
          {
            "id": "cx_webchat_form_firstname",
            "name": "firstname",
            "maxlength": "100",
            "placeholder": "@i18n:webchat.ChatFormPlaceholderFirstName",
            "label": "@i18n:webchat.ChatFormFirstName"
          },
          {
            "id": "cx_webchat_form_lastname",
            "name": "lastname",
            "maxlength": "100",
            "placeholder": "@i18n:webchat.ChatFormPlaceholderLastName",
            "label": "@i18n:webchat.ChatFormLastName"
          },
          {
            "id": "cx_webchat_form_email",
            "name": "email",
            "maxlength": "100",
            "placeholder": "@i18n:webchat.ChatFormPlaceholderEmail",
            "label": "@i18n:webchat.ChatFormEmail"
          },
          {
            "id": "cx_webchat_form_subject",
            "name": "subject",
            "maxlength": "100",
            "placeholder": "Select an option",
            "label": "@i18n:webchat.ChatFormSubject",
            "type": "select",
            "options": [
              {
                "text": "Request a Qoute",
                "value": "Qoute_Request"
              },
              {
                "text": "Make a Payment",
                "value": "Payment"
              }
            ]
          }
        ]
      }
    }
  }
Forms
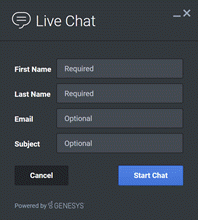
Genesys provides a default Web Chat registration form. This form is shown to website visitors requesting a live chat with one of your agents.

You can change the layout, input type, label, and attributes for each input in this Chat Registration form. For more information, see https://docs.genesys.com/Documentation/GWC/Current/WidgetsAPI/CustCRF.
You then copy and paste the JSON for the custom form into the Custom JSON field on the Widget General Configuration page.
Note: While you can add extra form fields with custom JSON, you need an extension to pass values from the form through to the interaction that gets created. For more information, see Widgets Extensions Configuration.


