- Contents
Interaction Data Extractor Help
Extraction Job Wizard
The Extraction Job Wizard guides you through the process of creating a new data extraction job. You can cancel a job creation, before submitting, by clicking the X in the navigation bar.

Defining a new job
-
On the Definition page, select a dataset from which you want to extract data. Datasets are tables or views in the CIC database.
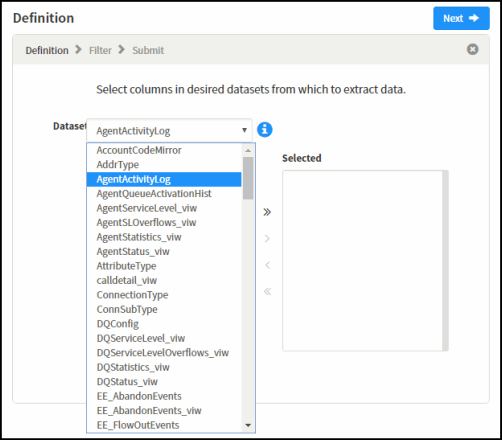
-
For details about the selected dataset, click the View Dataset Description information icon.
![]()
-
For details on a dataset column, select the column. A description of the column is displayed.
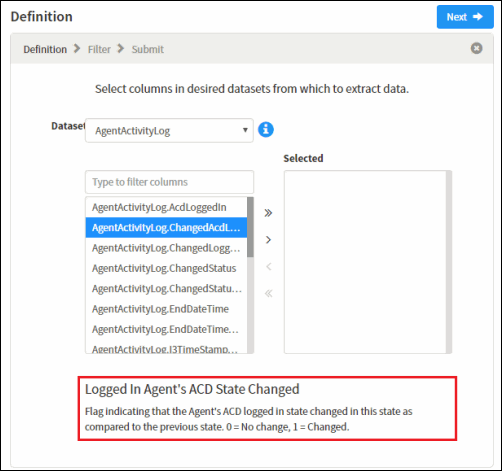
-
From a dataset, select the columns to be extracted. You can select multiple columns using Ctrl+Click or Shift+Click.
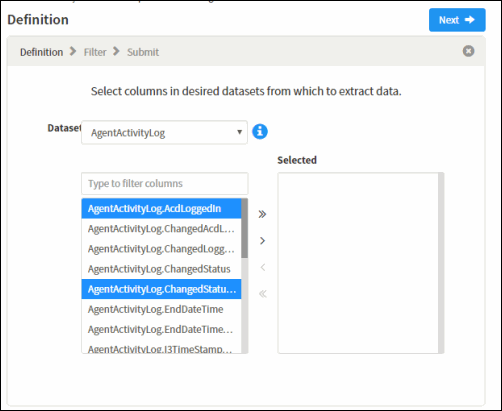
-
Next, move the selected columns to the Selected pane. To move selected columns:
-
Click > to move the selected columns to the Selected pane.
-
Click >> to move All columns, for the selected dataset, to the Selected pane.
-
To remove a selected column from the Selected pane, click < for selected, or << for all.
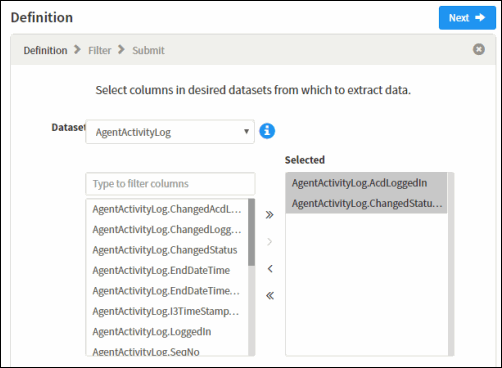
-
If you want to extract additional columns from another dataset, select a dataset from the Dataset picker, and repeat the column selection process.
-
To continue, click Next.
-
On the Filter page, define the interval DateTime for the data you are extracting, if applicable.
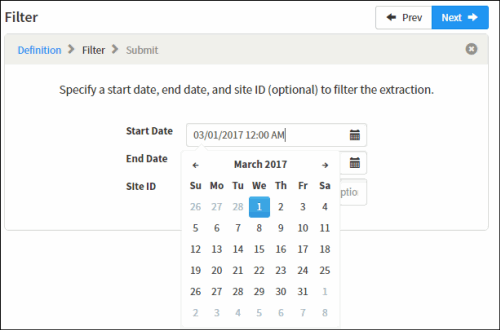
Filter DateTimes are lower bounds inclusive and upper bounds exclusive. For example, with a Start Date of "3/01/2017 12:00AM" and an End Date of "04/01/2017 12:00 AM," the resulting query will be filtered by "dateColumn >= '2017-03-01 00:00' AND dateColumn < '2017-04-01 00:00.'" -
Type the Site ID for the sites to extract data from, if applicable.
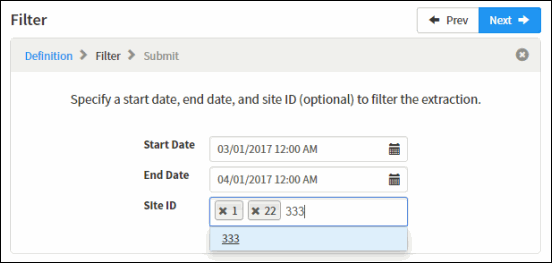
Note Site IDs are optional. If the field is empty, data for all sites is extracted.
- To continue, click Next.
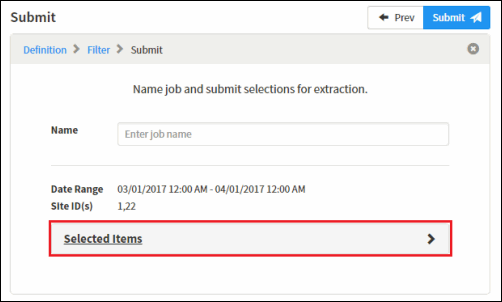
- On the Submit
page, review your job configuration. You can click on Selected Items to review selected
datasets and columns.
- Type a relevant name to identify the extraction job. Extraction
job names are limited to 100 characters
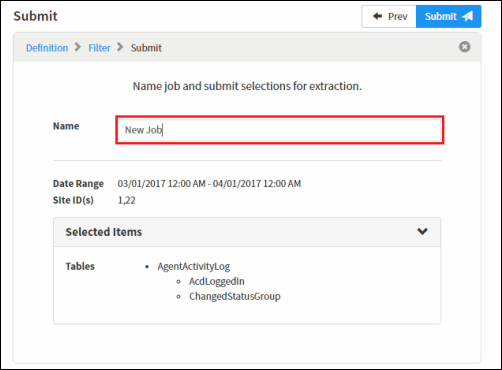
Note Job names do not need to be unique. A unique job ID is assigned when when the extraction job is created. This job ID can be obtained by viewing details for the job from the jobs dashboard. Extracted data will written to a folder named similar to the job ID. The folder is located in the output location configured by your administrator.
- To continue, click Submit.
Click Submit
again on the Submit Job
confirmation dialog to send the job to the server and queue it for
extraction.

Note The data extractor subsystem creates a child process that connects to the database server and executes the extraction query. The child process runs at below normal priority. If the server is busy or under heavy load, the extraction process might delay in starting or take longer than expected.
For information about receiving an email on job status, see Email Notifications.


