


- Contents
Interaction Attendant Help
Email - Build Reply
The Build Reply form allows the user to configure specific attributes of a message that will be sent in response to the inbound Email. Additionally, the user can select the processing that will occur after the reply has been built.
-
Send the reply and then stop processing (strictly an auto-response)
-
Send the reply and continue processing (for things like "We got your message and we will respond soon...")
Email nodes are processed in top-to-bottom order under a schedule.
Node Characteristics frame
Options in this frame name the node, and establish whether or not it is active, logged, or tracked for reporting purposes.
Name field
The label you enter here becomes the name of the node in the tree structure.
Active check box
By default, forms are "on", or "active", which means that Interaction Attendant will process them. If you uncheck a form's Active check box, the name of the node turns gray in the tree to indicate that the form is inactive. Interaction Attendant and its handlers will thereafter ignore the form and its children. Use this feature to save a configuration that you are testing. Inactive forms are invisible to callers. When a node is inactive, it appears grayed out in the tree view.
Enable IVR Reporting
This option determines whether or not reporting data will be collected when control passes through this node. Several IVR Reports summarize this information. IVR Reporting is disabled by default. Enable it to capture the date, time and duration of time that the call remained in the node and its children. This option is hidden when Attendant is connected to a server that does not have reporting installed. For more information about this feature, see IVR Reporting Option.
Add entry to the Interaction log
When this option is enabled, information about this node is appended to the call's Interaction Log when the call enters this node. This helps track the path that a call took through Attendant. The Interaction Log is maintained for reporting purposes. See View the Interaction Log for details.
Reply to Sender frame
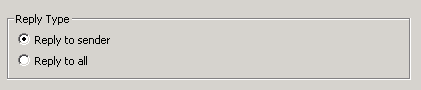
Reply to sender
Sends the reply using the address of the person who sent the Email.
Reply to all
Sends the reply to all persons who originally received the Email.
Reply Process frame
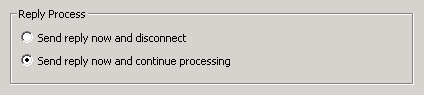
Send reply now and disconnect
Sends reply and terminates the interaction. No other nodes will process this Email.
Send reply now and continue processing
Sends the Email but does not terminate the interaction. Control is passed to the next node below the current one.
Routing and Message Body Options
You can manually type an Email address in any of the address fields in the form username@somedomain.com. However, no address validation occurs unless you use the Email Address Selection dialog to select an address.
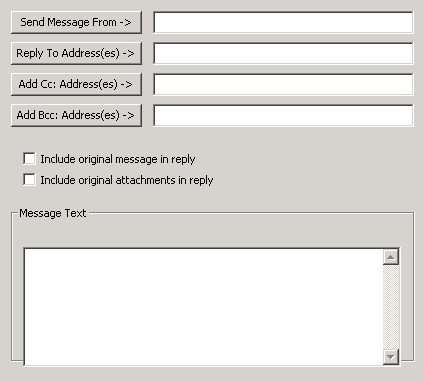
Send Message From
Click the Send Message From button to open the Email Address Selection dialog and search for and select Email addresses. The resulting text string specifies the address that will be used as the From address.
In the Send Message From field, you can enter a string of the email address or a string of the display name with the email address.
Examples:
bojo@xyz.com
Boris Johnson|bojo@xyz.com
Reply To Address(es)
Click the Reply To Address(es) button to open the Email Address Selection dialog and search for and select addresses. The resulting text string specifies the addresses that should be used as the Reply To address.
In the Reply to Address(es) field, you can enter a string of the email address or a string of the display name with the email address.
Examples:
bojo@xyz.com
bojo@xyz.com;tsmith@abc.com
Boris Johnson|bojo@xyz.com
Boris Johnson|bojo@xyz.com;tsmith@abc.com
margin-left: .25in; margin-right: 0in;
Important: "Reply to Address(es)" specifies the person that the message is sent to by Attendant, not the original sender. When a user opens the message in a client application, and chooses to reply, the Reply To address (specified in the Build Reply node) is not used. The message is sent to the sender of the original Email, or to all persons who received the original Email, based on whether "Reply to Sender" or "Reply to all" was selected in the Build Reply node.
Add Cc: Address(es)
Click the Add Cc: Address(es) button to open the Email Address Selection dialog and search for and select addresses. The resulting text string specifies address(es) that will be appended to the end of the current list of carbon copy (Cc) addresses for the reply.
In the Add Cc: Address(es) field, you can enter a string of the email address or a string of the display name with the email address.
Examples:
bojo@xyz.com
bojo@xyz.com;tsmith@abc.com
Boris Johnson|bojo@xyz.com
Boris Johnson|bojo@xyz.com;tsmith@abc.com
Add Bcc: Address(es)
Click the Add Bcc: Address(es) button to open the Email Address Selection dialog and search for and select addresses. The resulting text string specifies address(es) that will be appended to the end of the current list of blind carbon copy (Bcc) addresses for the reply.
In the Add Bcc: Address(es) field, you can enter a string of the email address or a string of the display name with the email address.
Examples:
bojo@xyz.com
bojo@xyz.com;tsmith@abc.com
Boris Johnson|bojo@xyz.com
Boris Johnson|bojo@xyz.com;tsmith@abc.com
Include original message in reply
Use this option to include the text of the original message in the response message. If you select this checkbox,
Include original attachments in reply
Use this option to include the original message file attachments with the response message.
Message Text field
The text you enter in this field becomes the body text of the reply that is being built, replacing the original body text of the message. The text will appear in plain text format. HTML tags are not supported and although they may work as desired, the tags will appear in the plain text body of the message.
If you choose to include the original text in the message body by selecting the Include original message in reply check box, the text you enter into the Message Text field will be added to the body of the message.
Related Topics