- Contents
Exchange Manager Help
Map Source Fields to Destination Fields
Use the Mapping tab to map data in the import file to the Latitude database. Before mapping the fields, define the source file layout. If you are using an Excel file, open an import file (see Viewing Source Information).
Note: Examples in this topic are based on the New Business import type.
To map source fields to destination fields
-
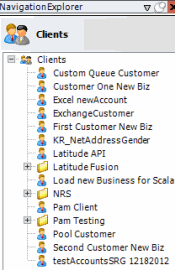
In the Navigation pane, click Clients.
-
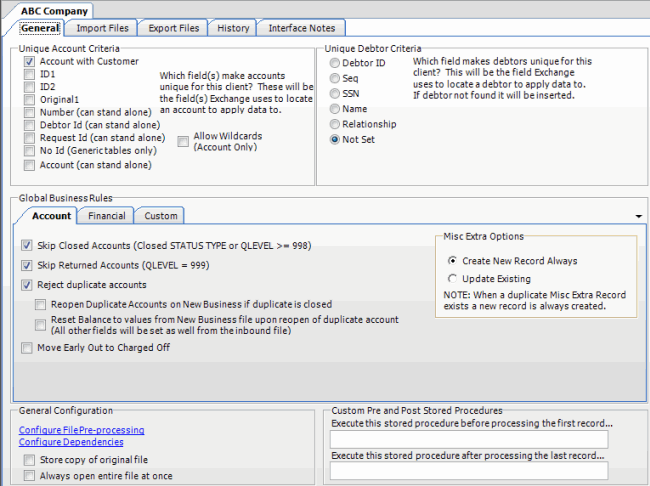
In the Clients pane, expand the appropriate folder and then double-click the client. The tab for the specified client appears in the Information pane.
-
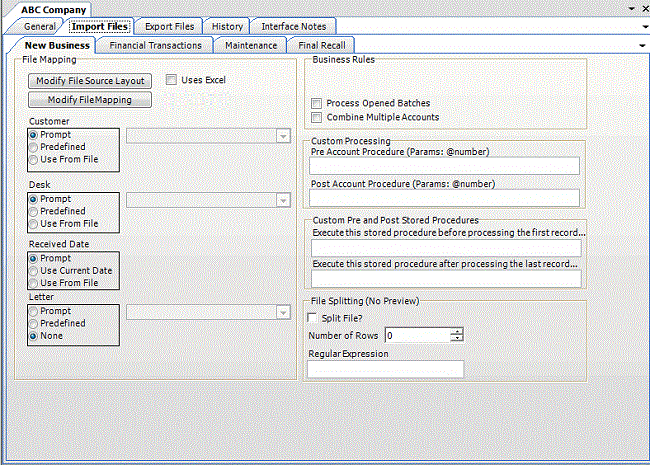
Click the Import Files tab and then click the New Business, Financial Transactions, Maintenance, or Final Recall tab, depending on the import file type.
-
Click Modify File Mapping. The Data Translator window appears.

-
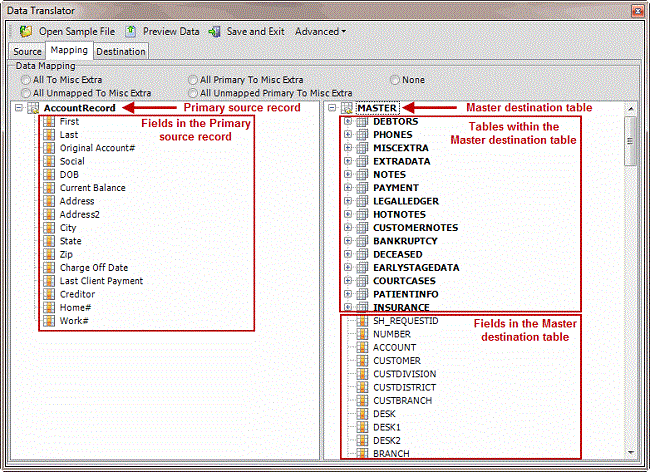
Click the Mapping tab.
-
In the Data Mapping section, select one of the following:
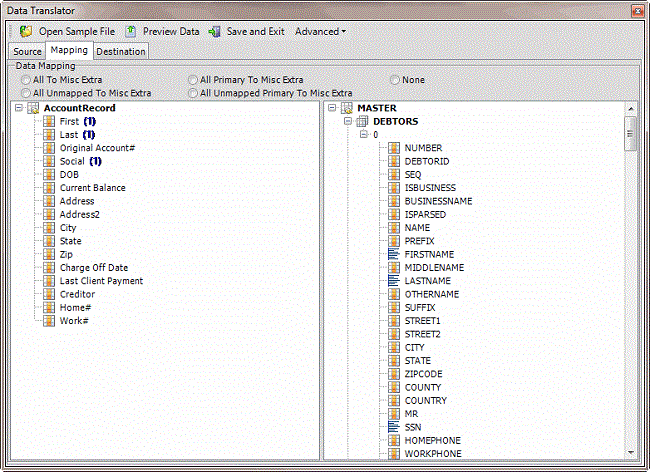
All to Misc Extra: If selected, Exchange Manager adds all fields in the source file to the Misc Extra table, regardless of whether you mapped them.
All Unmapped to Misc Extra: If selected, Exchange Manager only adds unmapped fields in the source file to the Misc Extra table.
All Primary to Misc Extra: If selected, Exchange Manager adds all fields in the source file that are in the parent table (whether mapped or not) to the Misc Extra table, and excludes the fields in child tables. Don't select this option for Excel imports.
All Unmapped Primary to Misc Extra: If selected, Exchange Manager only adds unmapped fields in the source file that are in the parent table to the Misc Extra table, and excludes the fields in child tables. Don't select this option for Excel imports.
None: If selected, Exchange Manager only includes data that you mapped to Latitude tables and ignores all other data.
-
To map a field, click a field in the Source pane and drop it onto the destination field in the Destination pane. Continue mapping fields as necessary.
Notes:
-
You can map multiple source fields to a single destination field. For example, you can map the First and Last source fields to the Name destination field.
-
Exchange Manager maps some fields twice in the Latitude destination tables. For example, if you map the source Name field to the destination NAME field in the Master table, Exchange Manager maps the Debtor0 destination record also.
-
If you are reporting to the credit bureaus, ensure that the delinquency date is valid and is at least 31 days before the date received into Latitude. Map the date to the delinquency date field.
The following example shows three fields in the source file mapped to their corresponding fields in the destination file. The First field maps to the FIRSTNAME field, the Last field maps to the LASTNAME field, and the Social field maps to the SSN field. The blue icons indicate mapped fields. The yellow icons indicate unmapped fields. For more information about the icons, see Mapped Field Icons.
-
Do the following as necessary:
-
To show the current mapping, right-click the source field and then click Show Current Usage.
-
To map a file to the Misc Extra table, right-click the source field and then click Map to MiscExtra.
-
To map a field to the Notes table, right-click the source field and then click Map to Notes.
-
To add a row to a table for mapping, right-click the destination table name and then click Add New Row. Exchange Manager assigns the next sequential number to the new row.
Note: Destination tables in the Master table contain one row (indicated by a 0) by default. You can add information from a source file to multiple rows in a table by adding more rows and then mapping the data to each subsequent row. For example, only one debtor record (row) is available initially in the destination file (debtor 0, or primary debtor). If co-debtor information is available in the source file, add another row to the Debtors table to accommodate the additional debtor record.
-
To view data dictionary information, right-click the destination field and then click View Data Dictionary Information.
-
To remove a field mapping, right-click the mapped destination field and then click Delete Sources.
-
To remove information from a field in the Misc Extra or Notes table, right-click the destination field and then click Delete Info.
-
To define the mapping for a destination field, see the following:
-
In the toolbar, click Save and Exit.
Related Topics
Define a Destination Field Value Using Hardcoded Text
Define a Destination Field Value Using C# Script
Define a Destination Field Value Using a Switch
Define a Destination Field Value Using the Name Parser


