- Contents
Exchange Manager Help
Specify Unique Account Criteria
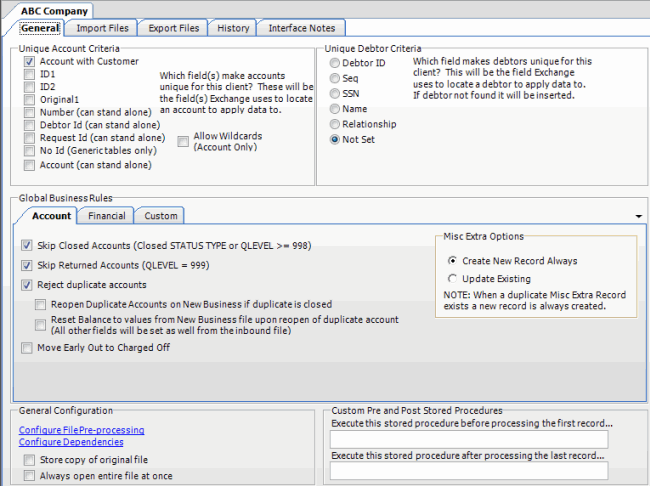
Use the Unique Account Criteria section of the General tab to specify the criteria to use to locate the accounts to update in Latitude.
To specify unique account criteria
-
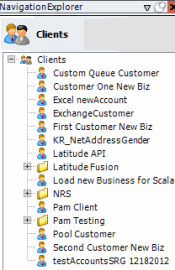
In the Navigation pane, click Clients.

-
In the Clients pane, expand the appropriate folder and then double-click the client. The tab for the specified client appears in the Information pane.

Account with customer: If selected, Exchange Manager uses the client's account number and the client specified during import to locate an account.
ID 1: If selected, Exchange Manager uses ID1 to locate an account.
ID 2: If selected, Exchange Manager uses ID2 to locate an account.
Original1: If selected, Exchange Manager uses the amount in the Principal money bucket to locate an account.
Number (can stand alone): If selected, Exchange Manager uses Latitude's unique account number to locate an account.
Debtor ID (can stand alone): If selected, Exchange Manager uses Latitude's unique debtor identification number to locate an account.
Request ID (can stand alone): If selected, Exchange Manager uses Latitude's Service Request ID to locate an account. Exchange uses this ID when matching records returned from a vendor to the Service History table.
No ID (generic tables only): If selected, Exchange Manager writes the information to a generic table. Advanced users only.
Account (can stand alone): If selected, Exchanges Manager uses the client's account number to locate an account.
Allow Wildcards (account only): If selected, you can use a partial account number for matching. For example, your client can provide you with a 16-character account number, and send maintenance information using only the first 10 characters.
Note: Ensure that you map the unique account criteria from your source file to a destination field. For more information, see Map Source Fields to Destination Fields.
-
Select one or more criteria that renders accounts as unique for the specified client and then, in the toolbar, click Save. The Update Comment dialog box appears.
-
In the Update Comment box, type a comment regarding your changes and then click OK.


