- Contents
Statistics Console Help
Generate a Batch Report for a Customer
Use the Batch Reports tab to configure and generate a batch report for a customer.
To generate a batch report for a customer
-
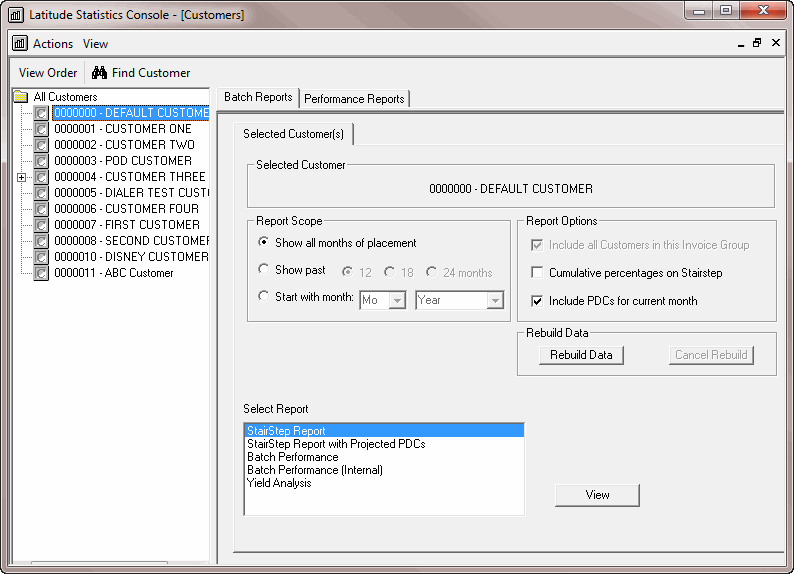
In the Latitude Statistics Console window, from the View menu, click Customers. The customer report options appear.

-
To change the order of the customers in the Selection pane, do one of the following:
-
To sort the customer list by customer code, click View Order and then click Order by Customer Code.
-
To sort the customer list by customer name, click View Order and then click Order by Customer Name.
-
To include inactive customers in the list, click View Order and then click View Inactive Customers.
-
To select a customer, do one of the following:
-
In the Selection pane, click a customer.
-
Do the steps to Search for a Customer.
-
On the Batch Reports tab, specify the report parameters.
Report Scope section
Show all months of placement: The report includes all business ever received into Latitude.
Show past: The report only incudes business received during the specified number of past months.
Start with month: The report only includes business received from the specified date forward.
Report Options section
Include all Customers in this Invoice Group: If selected, the report includes all customers in the invoice group. This option is available for parent customers only.
Cumulative percentages on Stairstep: If selected, collection percentages increase cumulatively, meaning the last month of collection shows the total collection percent. If cleared, collection percentages are for the month indicated only.
Include PDCs for current month: If selected, the report includes post-dated checks for the current month.
-
In the Rebuild Data section, click Rebuild Data. Statistics Console applies the report parameters.
-
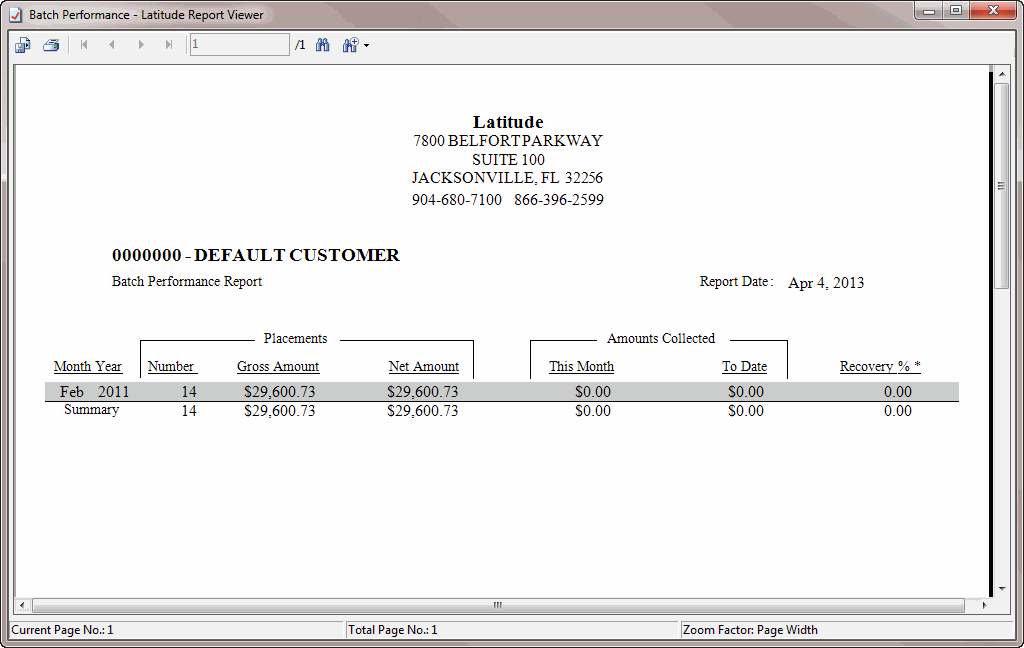
In the Select Report section, click a report and then click View. The Latitude Report Viewer window appears.
Note: If you chose to include all customers in the invoice group, the Stairstep Title dialog box appears. Type a title for the report and then click OK.

-
To print the report, in the toolbar, click the Print icon. The Print dialog box appears.
-
Modify the settings as necessary and then click Print.
Note: For more information about using the Latitude Report Viewer window, see Latitude Report Viewer.


