


- Contents
Director Installation and Configuration Guide
Install Secondary Director Server in a Switchover Pair
Use the Interaction Director Server Setup wizard to install Director server as the secondary (backup) server in a switchover pair. Before installing the secondary Director server, complete the steps to Install Primary Director Server in a Switchover Pair. If you don't require switchover, see Install Director Server Without Switchover.
To install a secondary Director server in a switchover pair
-
Copy "ServerGroupCertificate.cer" and "ServerGroupPrivateKey.bin" from the "\i3\Director\Certificates\ServerGroup" directory to a USB drive, CD, or other media that this computer can access. Do not copy files to a network path as it can cause issues when importing files.
-
On the secondary Director server in the switchover pair, run Director.msi. The Welcome page of the Interaction Director Server Setup wizard appears.
-
Click Next. The Custom Setup page appears.
-
Click Next. The Select License File page appears. It displays the ID of the Director server.
-
Click Browse. The Open dialog box appears.
-
Click the Director license file and then click Open.
-
Verify that the correct license file appears and then click Next. The Domain User Validation page appears.
-
Do the following:
-
In the User box, type the ID of the Director administrator.
-
In the Password box, type the numeric password for the Director administrator. If you are in a secure location where no unauthorized people can see your screen, select the Display Password in Clear Text check box so that you can see what you're typing.
-
In the Domain box, type the name of the domain for Director to work in.
-
Click Next. The CIC Site Name page appears.
-
Do the following:
-
In the Site Name box, type a name for your Director server. This name is whatever you choose.
-
In the Site ID box, type a unique number (between 0 and 999) not assigned to any other Director or CIC server in your organization.
Note:
Assign a unique Site ID to the Director server and ensure that every CIC server in the environment has a unique Site ID.
-
Click Next. The Switchover Information page appears.
-
Do the following:
-
Select This server is part of a Switchover Pair.
-
Click Backup Switchover Server.
-
In the Enter the hostname of the other Director Server in the pair box, type the host name (Windows machine name) of the primary server.
Note:
Before completing the next step, ensure that you copied the ServerGroupCertificate.cer and ServerGroupPrivateKey.bin files from the \i3\Director\Certificates\ServerGroup directory to a USB drive, CD, or other media that this computer can access.
-
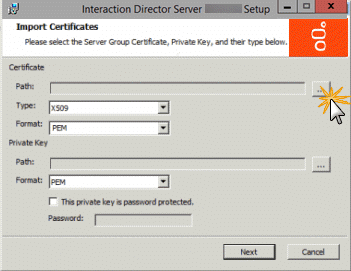
Click Import Certificates. The Import Certificates page appears.
-
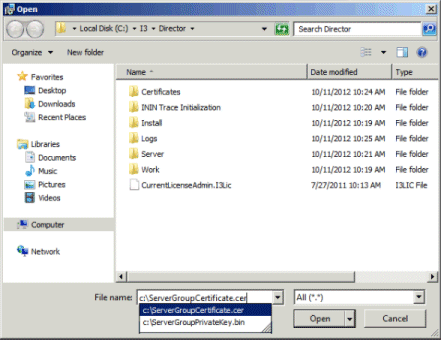
In the Certificate section, click the ellipsis (…) next to the Path box. The Open dialog box appears.
-
Click the ServerGroupCertificate.cer file and then click Open. The Import Certificates page appears. Don't change the values in the Type and Format list boxes.
-
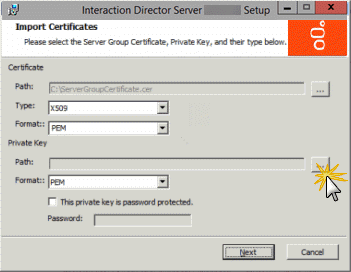
In the Private Key section, click the ellipsis (…) next to the Path box. The Open dialog box appears.
-
Click the ServerGroupPrivateKey.bin file and then click Open.
-
To establish a password for the private key, select This private key is password protected and in the Password box, type a numeric password.
Note:
Verify that the paths to the .cer and .bin files are not network paths. If network paths display, copy the files to a local folder and reselect the paths.
-
Click Next. The Director User Account Creation page appears.
-
Do the following to establish a user ID and password for accessing the Director server later when using Interaction Designer or Interaction Administrator:
-
In the Account Name box, type the user ID for administrative applications (such as Interaction Designer and Interaction Administrator) to use on the Director server. The commonly used name is IDIR, but you can use any name that you want.
-
In the Password box, type the password for administrative applications to use. If you are in a secure location, select the Display Password in Clear Text check box so that you can see what you are typing.
-
In the Confirm Password box, retype the password.
-
Click Next. The Ready to Install Interaction Director Server page appears.
-
Click Install. The wizard displays a progress bar as it installs Director.
-
When installation completes, click Finish. The Interaction Director Server Setup dialog box appears.
-
Click Yes. The Director server is not ready for use until after it restarts.
-
After the server restarts, log on using the same domain credentials. Interaction Director server is ready for use.
Installation does not add icons to the desktop, but the following shortcuts appear under Start > All Programs > Interactive Intelligence.
-
Interaction Administrator
-
Interaction Designer
-
Trace Configuration Utility
-
Switchover Control Panel
-
Log Viewer
-
Online Documentation
|
|
|
Note:
When Interaction Administrator runs against a Director server, it displays Interaction Director containers only, and not the full set of containers for configuring CIC. For more information about Director containers in Interaction Administrator, see Interaction Director Containers.
-
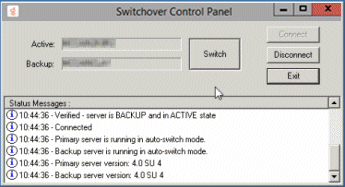
Click Start > All Programs > Interactive Intelligence > Switchover Control Panel.
-
The Switchover Control Panel appears. If the names of the primary (active) and secondary (backup) Director servers appear, the Switchover Server implemented correctly.
-
Click Exit.
-
Complete the steps to Install Secondary Director Server in a Switchover Pair.