


- Contents
Scheduled Reports User's Guide
Save the report to a file
To save the report as a file for future reference:
-
In the Report Destination dialog box, select the File check box. The fields in the File area are now enabled.
-
Click the File Location drop-down list, choose a file path, and then click the add arrow to add the file paths to the list box on the right. The system saves the report in the file path locations in the list box on the right.
Note:Your administrator configures file location paths. The report path cannot contain spaces.
-
Repeat step two to add additional file paths to the list.
-
To delete a path from the list box, select it and click the remove arrow.
-
In the File Format drop-down list, select the file format for the saved report file.
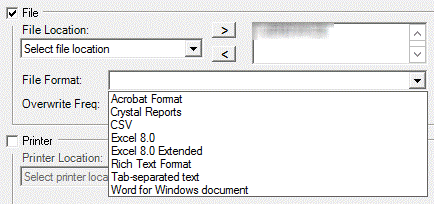
Note:The available formats are Acrobat Format, Crystal Reports, CSV, Excel 8.0, Excel 8.0 Extended, Rich Text format, Tab-separated text, and Word for Windows document.
-
To determine when to overwrite report files, use the Overwrite Freq drop-down list. The default values are Daily, Weekly, Monthly, Yearly, or Never.
Note:Setting the frequency to overwrite an existing file assists you in keeping the directory from becoming too large. Your administrator configures these values, and default values vary.
-
To set up the frequency of the report, go to Schedule the time and frequency of the report generation.
Or to set up an additional distribution method, go to Distribute the report through e-mail or Send the report to a printer.