


- Contents
Interaction Attendant Help
Email - Disconnect
The email disconnect node stops processing an email message. Messages can optionally be stored in a folder.
Node Characteristics frames
Options in this frame name the node, and establish whether or not it is active, logged, or tracked for reporting purposes.
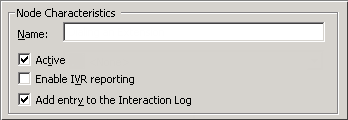
Name field
The label you enter here becomes the name of the node in the tree structure.
Active check box
By default, forms are "on", or "active", which means that Interaction Attendant will process them. If you uncheck a form's Active check box, the name of the node turns gray in the tree to indicate that the form is inactive. Interaction Attendant and its handlers will thereafter ignore the form and its children. Use this feature to save a configuration that you are testing. Inactive forms are invisible to callers. When a node is inactive, it appears grayed out in the tree view.
Enable IVR Reporting
This option determines whether or not reporting data will be collected when control passes through this node. Several IVR Reports summarize this information. IVR Reporting is disabled by default. Enable it to capture the date, time and duration of time that the call remained in the node and its children. This option is hidden when Attendant is connected to a server that does not have reporting installed. For more information about this feature, see IVR Reporting Option.
Add entry to the Interaction log
When this option is enabled, information about this node is appended to the call's Interaction Log when the call enters this node. This helps track the path that a call took through Attendant. The Interaction Log is maintained for reporting purposes. See View the Interaction Log for details.
Action on Disconnect frame
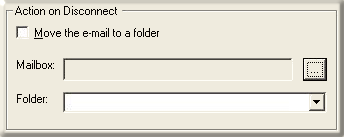
Move the e-mail to a folder
You can optionally move an email to a folder, rather than discard it. This option stores the message until it can be manually processed, and allows Attendant to be configured as a lightweight "spam filter". The logic for determining what is spam must be user-configured by creating additional Email Profiles or by using Email Transfer nodes.
Mailbox
Select a destination mailbox by pressing the browse (…) button. The Mailbox Selection dialog will appear. Select a mailbox, and then press OK to dismiss the dialog.
Note: If you use Microsoft Exchange Web Services, select a folder in the same mailbox from which the email was queued.
Folder
When the drop list is enabled, you can select from a list of destination folders in the selected mailbox. The message will be transferred to the selected folder and processing of the interaction will be halted.
Related Topics