- Contents
Add Debtor Account Dates
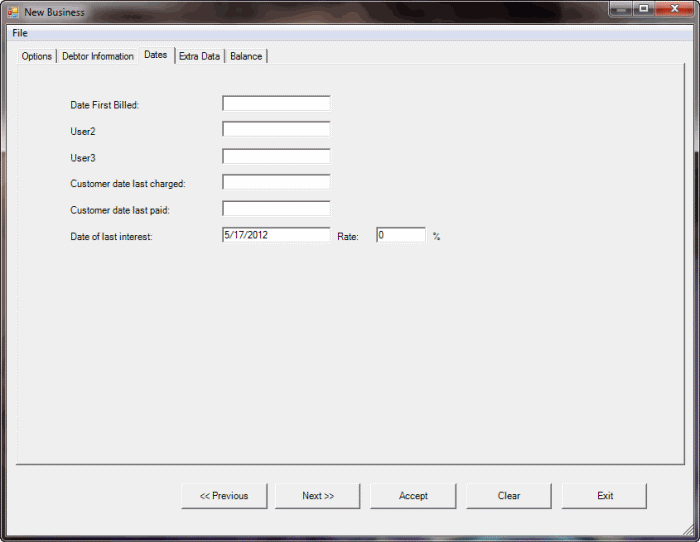
Use the Dates tab to specify debtor account date information.
To add debtor account dates
-
In the Main Menu window, from the Data Entry menu, click New Business. The New Business window appears.
-
Click the Dates tab.

First three boxes: The labels for these boxes are based on settings on the Account Titles tab of the Latitude - Control File Properties dialog box. If you set a value on the Account Titles tab, that value displays as a label on this tab. If you didn't set a value on the Account Titles tab, the label appears as either "User1," "User2," or "User3."
For example, "Date First Billed" displays instead of "User1" if the User Date Title 1 box on the Account Titles tab of the Latitude - Control File Properties dialog box and has a value of "Date First Billed." In this example, specify the date you first billed the account in the Date First Billed box.
Customer date last changed: Last date the customer charged the debtor account.
Customer date last paid: Last date the customer indicated receipt of a payment on the debtor account.
Date of last interest: Date to begin calculating simple interest. Latitude Custodian uses this date to calculate initial simple interest to add to the account.
Rate: Rate used to calculate simple interest for the account. The system adds accumulated interest to the Interest bucket each time the End of Day program runs. The format is 00.00 (for example, type 15.5 in the box to indicate a 15.5% interest rate).
Note: You can view or modify the interest rate for the account by selecting Info – Debtor Misc Info in the Work Form.
-
Complete the information and then do one of the following:
-
To save the information and display the next tab, click Next>>.
-
To save the information and close the New Business window, click Accept.
Related Topics
Balance


